Harnessing the power of Acquia CLI to accelerate Drupal development on Acquia Cloud Platform
- 8 minute read
-
Acquia CLI is a free and open source Command-Line Interface for macOS, Linux, and Windows that makes it easy for developers to access and manage Acquia Products and Services without leaving the terminal.
With Acquia CLI, you can run Drush commands remotely, tail logs from your Acquia-hosted applications, create and manage teams and applications on the Acquia Cloud Platform, and much more. Every single Acquia Cloud API and Acquia Cloud Site Factory API endpoint has a corresponding Acquia CLI command. You can run it interactively from a local or Cloud IDE terminal or integrate it into your continuous integration workflow using its parameterized input and JSON output.
The 2.0 version of Acquia CLI introduces Acquia Cloud Site Factory commands and full support for PHP 8.1. Download and install Acquia CLI version 2.0 now. If you’re already using version 1, just run acli update.
In this post, we will walk through a few examples of how to use the power of Acquia CLI to accelerate the development and maintenance of your Drupal application.
Getting started with Acquia CLI
To get started with Acquia CLI follow the simple installation instructions. Then make sure to link your application to the Acquia Cloud Platform via the Cloud Platform API and SSH.
Finally, run acli list to see everything it can do.
Acquia CLI accelerates Drupal development and debugging
Imagine that you’re troubleshooting a problem with your Drupal application; let’s see how Acquia CLI can help.
Calling the Acquia Cloud Platform API and getting help
As a seasoned developer, you know that a cache clear can fix just about anything, so let’s start by clearing Varnish. Run acli api:list to get a list of available API commands and you’ll see the one we want: api:environments:domain-clear-caches.
Let’s see how to run it by using the help command: acli help api:environments:domain-clear-caches
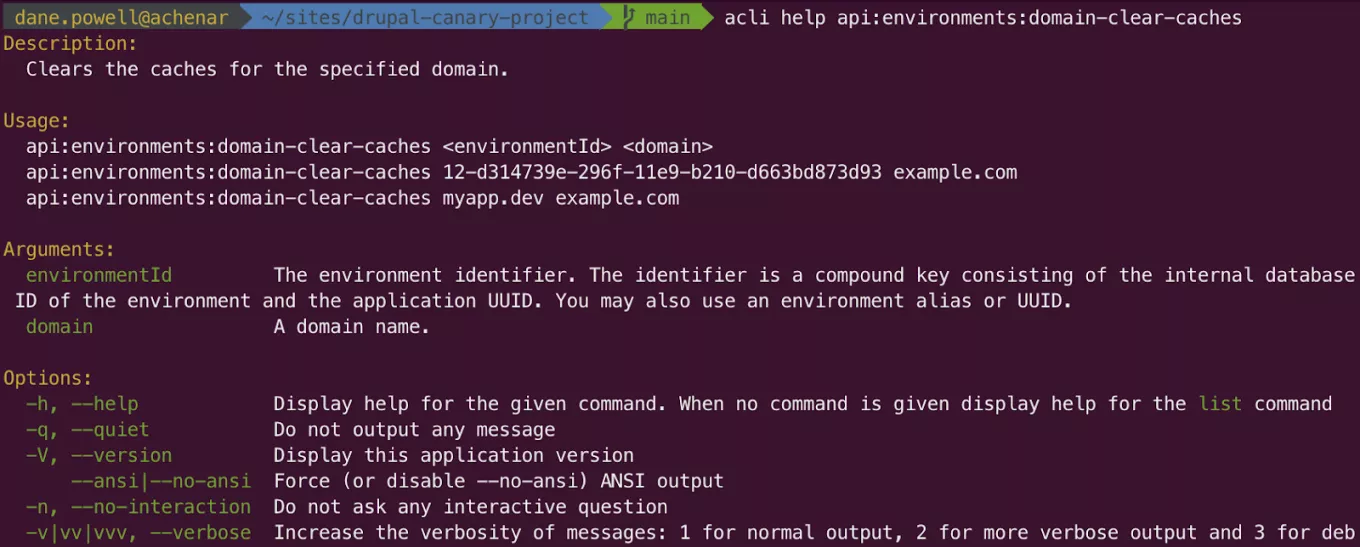
To clear caches, we see that we need to provide an environmentId and domain to clear. Acquia CLI supports an environmentId in the form of a UUID, as used by Cloud API, or a more user-friendly environment alias in the form of a site name and environment, which will be very familiar to Drush users. Use acli sa to view available aliases for an application.

In this example, either of the following commands would have the same effect of clearing Varnish caches:
acli api:environments:domain-clear-caches 12-d314739e-296f-11e9-b210-d663bd873d93 example.comacli api:environments:domain-clear-caches myapp.dev example.com
Running Drush and SSH commands
Let’s imagine that clearing Varnish caches didn’t help, so we’ll next try clearing Drupal application caches. Ordinarily this would require setting up Drush aliases for each site ahead of time, but Acquia CLI can run Drush commands on the remote environment for you without any aliases. You don’t even need to download or install Drush. Simply use the environment alias as before: acli remote:drush myapp.dev -- cr

If you prefer, you could accomplish the same thing using a variety of other Acquia CLI commands:
- Open a shell on your application using SSH:
acli remote:ssh myapp.devand then rundrush @myapp.dev cr - Run a command against your application using SSH:
acli remote:ssh myapp.dev – drush @myapp.dev cr - Download Drush aliases for your application and then run Drush locally:
acli remote:aliases:downloadand then rundrush @myapp.dev cr
Tailing logs
Let’s imagine clearing Drupal caches didn’t work either–it’s time to do a bit of debugging. Let’s see what’s going on by tailing logs with {{acli log:tail}}. Once you’ve selected the application, environment, and logs to tail, Acquia CLI will continuously stream the output of those log files as the servers receive new requests.
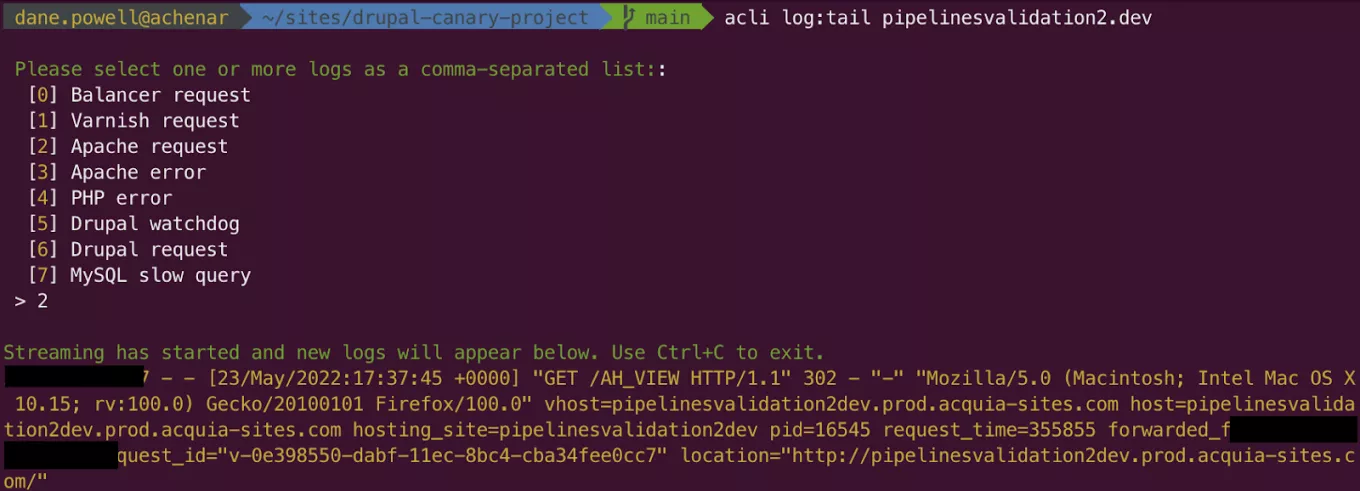
You can now interact with your application and watch the messages stream in to diagnose the issue.
Developing with a Cloud IDE
Now that Acquia CLI has helped us to identify the bug, we’re going to use an Acquia Cloud IDE to develop the fix. You can quickly create a new IDE (if you don’t already have one) by running acli ide:create and giving the new IDE a name. Within a few seconds, the new IDE will be provisioned and you can open the provided link in your browser.
Pushing and pulling code and files
The Acquia Cloud IDE comes initialized with an empty project workspace, but it’s very simple to pull in the code, files, and database from an Acquia Cloud Platform environment using Acquia CLI. Run acli pull to copy everything, or acli pull:code, acli pull:database, or acli pull:files for more granular control.
Note that the acli pull command is currently only available in Acquia Cloud IDE and Lando environments.
Now you have an exact copy of the Acquia Cloud Platform environment inside of your IDE, allowing you to replicate the user experience, develop features, and squash bugs. Acquia Cloud IDE even has out-of-the-box code scanning (provided by Intelephense) that can help you identify problems and develop better code.
Once you’ve made the fix and you’re ready to deploy a change back to an Acquia Cloud Platform environment, you you have a few options:
If you are using Code Studio, just git push to Code Studio and let it handle testing, staging, and artifact creation for you.
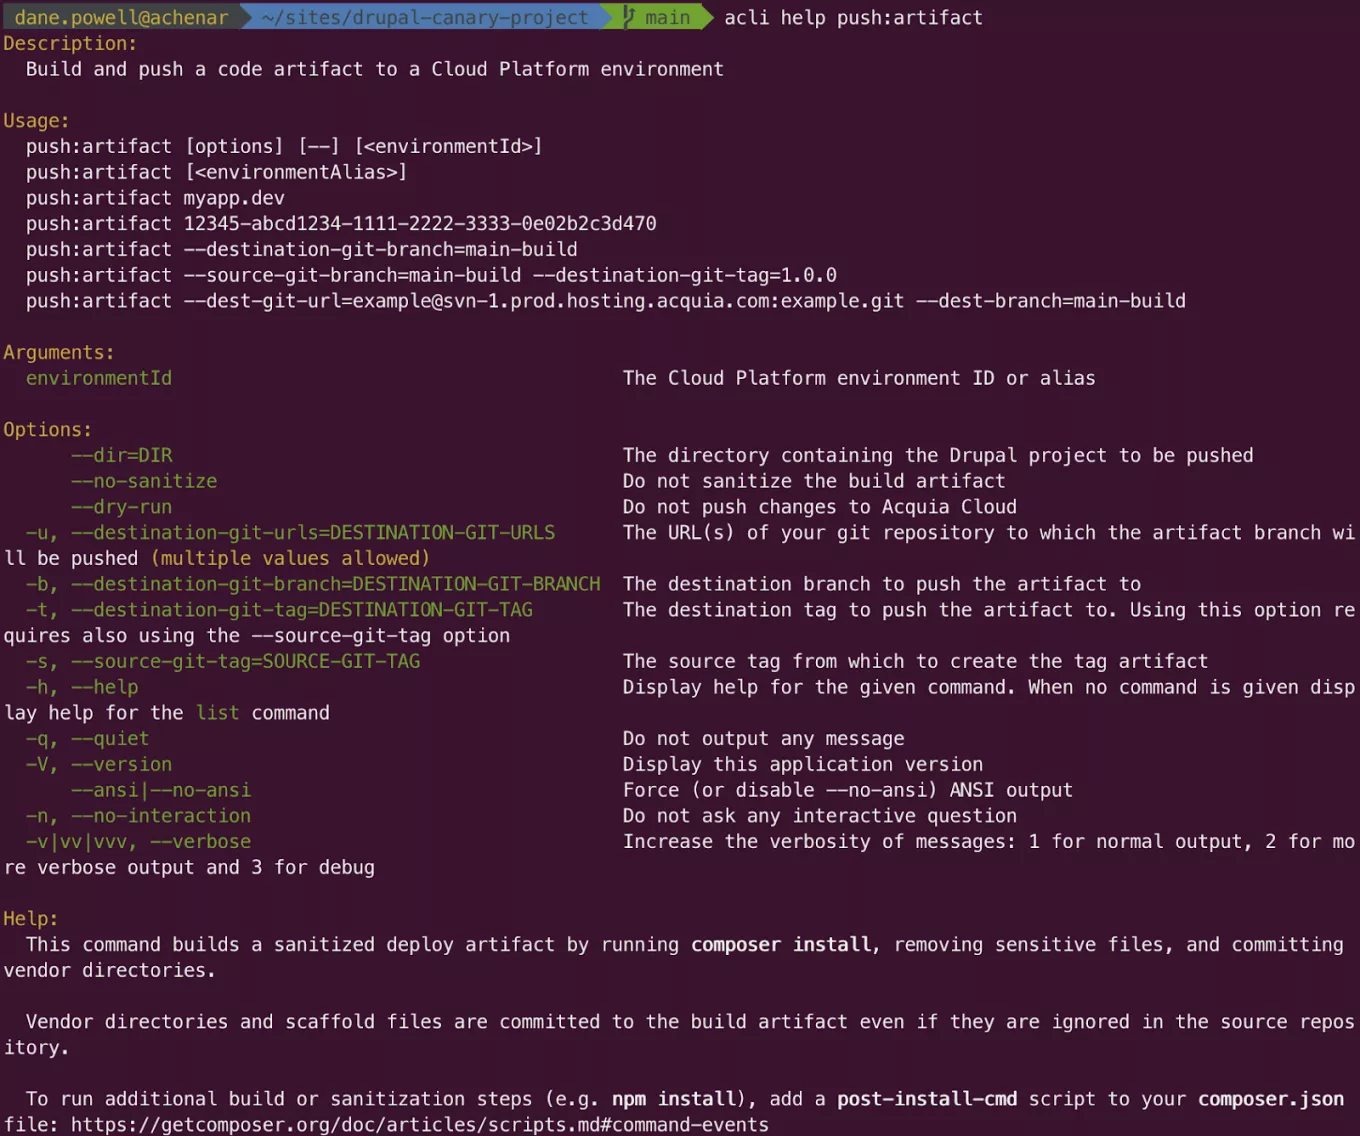
If you’re following Acquia’s best practices of not committing third-party dependencies (such as the vendor directory) to your source Git repository, you can run the acli push:artifact command. It will build a deployment artifact (including vendor directories) and push it to a particular environment.
If you are committing everything to Git Acquia CLI can still help deploy code. First commit your changes, then use the Acquia Cloud Platform API to deploy the new Git commit to an Acquia Cloud Platform environment.
git checkout -b my-feature-branch && git add -A && git commit -m “Fixed bug” && git push
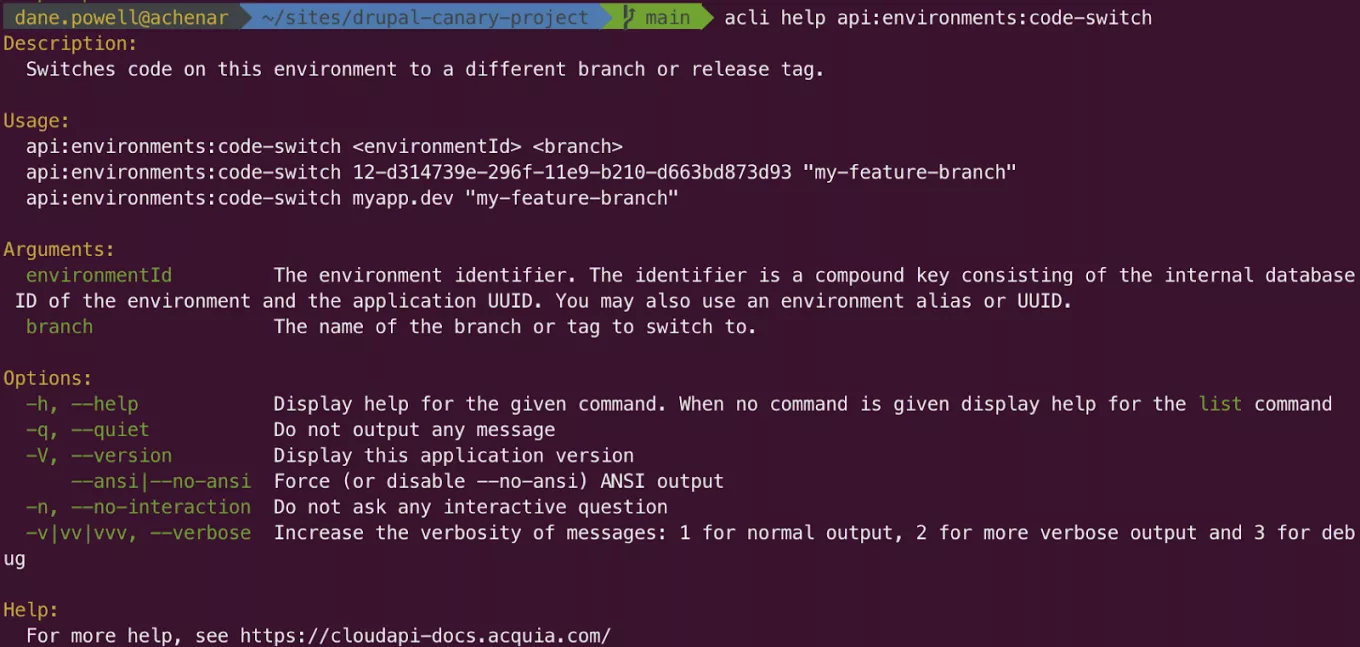
acli api:environments:code-switch myapp.dev "my-feature-branch"
Next steps
You’ve seen how Acquia CLI helps with day-to-day development and debugging via its human-readable interfaces, but it also has a number of commands, input parameters, and output options that make it useful for automation and scripting, such as in Continuous Integration (CI) and Continuous Delivery (CD) workflows.
For instance, it’s often useful in CI environments to force scripts to run non-interactively, get verbose output or suppress output entirely, or suppress ANSI color codes; this can be achieved using the --quiet, --no-ansi, --no-interaction, and --verbose flags, which are available for every command.
Many commands support even more parameters; use the --help flag with any command to discover these.
Additionally, API commands return JSON output that can be piped to tools like jq to extract individual fields. If you have jq installed, try running acli api:accounts:find | jq ‘.company’ to retrieve the company associated with your Acquia Cloud Platform account.

Complex queries and filters can also be used with jq. For instance, you can run acli api:distributions:list | jq .[0] to retrieve the first available Drupal Cloud distribution.
Find more examples of JSON integrations at https://docs.acquia.com/acquia-cli/examples/