ABM Personalization with Acquia Personalization and 6Sense
- Last updated
- 1 minute read
Goal
The goal of this tutorial is to bring 6Sense ABM data into Acquia Personalization and use that to create personalized experiences based on a visitors 6Sense profile data.
Prerequisites
-
Acquia Personalization, 6Sense, Google Tag Manager
Overview
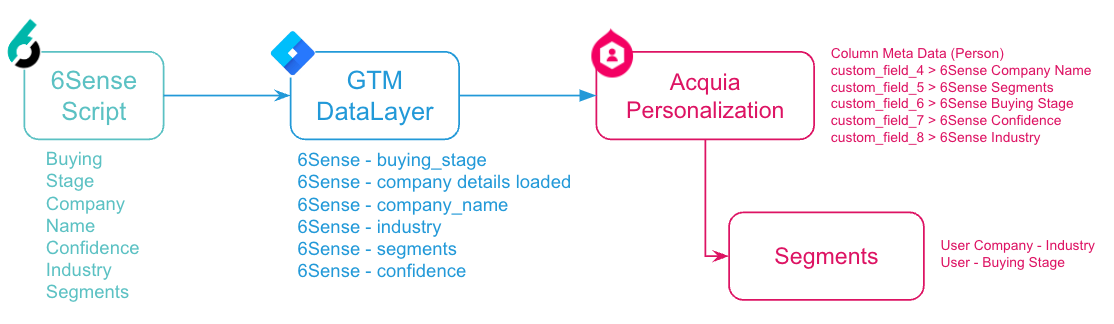
6Sense is an ABM data company that allows you to create paid and email campaigns that are directly sent to know accounts. When you purchase 6Sense you install a tracking script on your site that stores information about that visitor and then it is combined with known information about that visitor, like their company, their buying stage, their city, their state...etc
-
Configure Google Tag Manager to Store 6Sense Data
Setup variables in Google Tag Manager (GTM) to store 6Sense Data
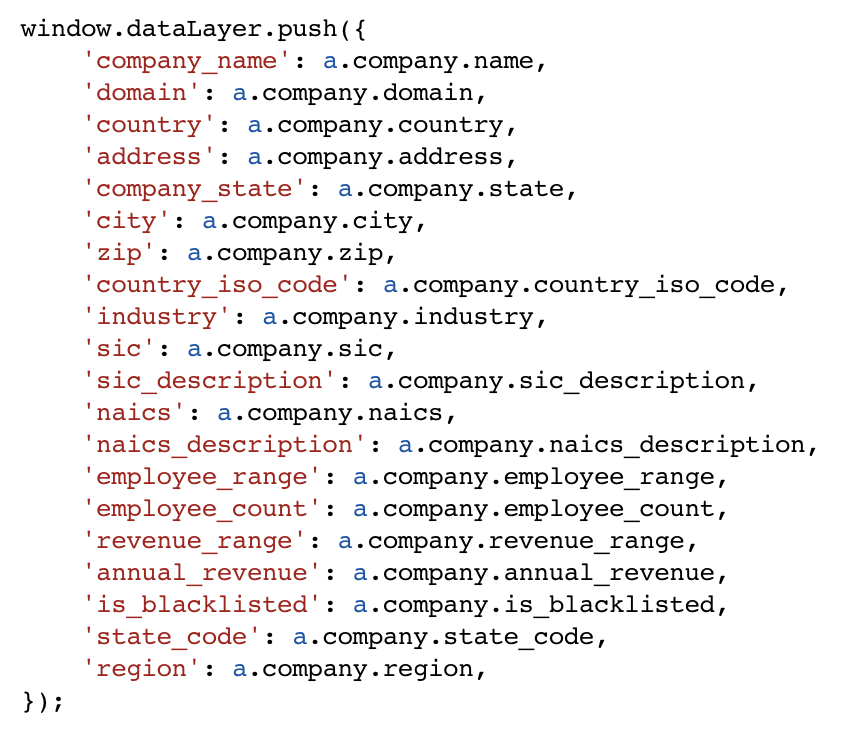
1. 6Sense makes data available to the Google Tag Manager (GTM) dataLayer and that information can be passed to variables you define in GTM. The 6Sense tag is configured by default to send visitor information into the dataLayer. Here is an example snippet that stores that data in the dataLayer, make note of the attribute names as they will be used when defining the GTM variables.
2. Go to Variables > New (User-Defined Variable)
Image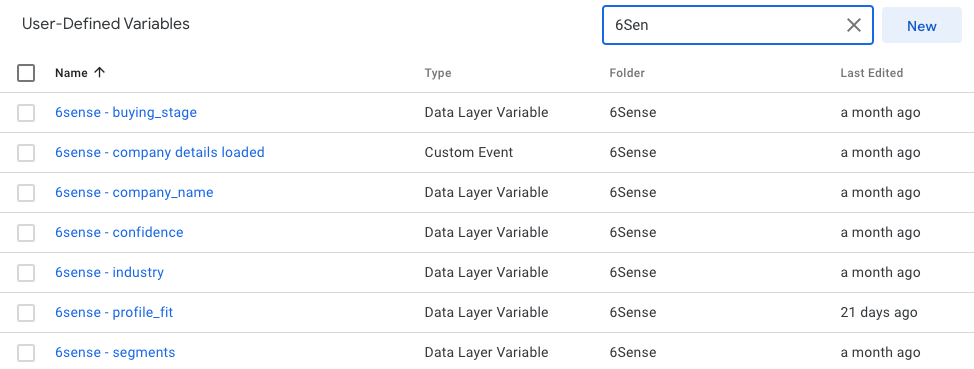
3. Enter the Details for your User-Defined VariableUsing the example dataLayer.push example above, we are adding a Variable for Company Name.
Set the name for the Variable, set the Variable Name, using our example this is company_name.
You can leave the remaining settings alone and accept the defaults.
Image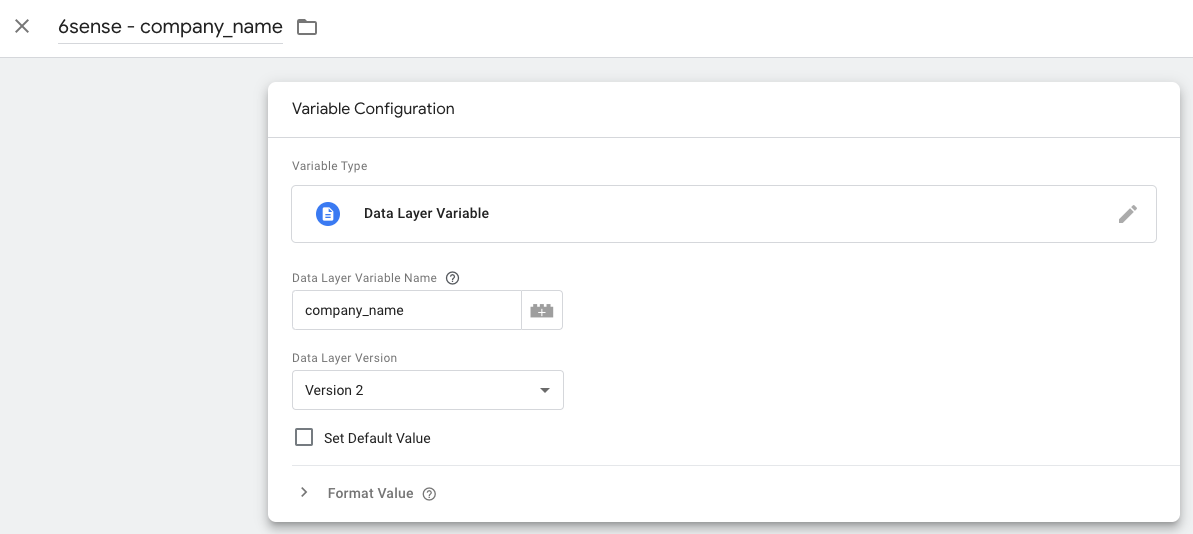
4. Continue adding DataLayer Variables for all the 6Sense Data you want to track. -
Configure Acquia Personalization to Store 6Sense Data
Before you can send you 6Sense data to Acquia Personalization you need to setup some additional Meta Data fields to store this data. Acquia Personalization stores information about a visitor in a profile, within this profile you can store person information, events the visitor performs and touches that occur within a 30 minute period.
Image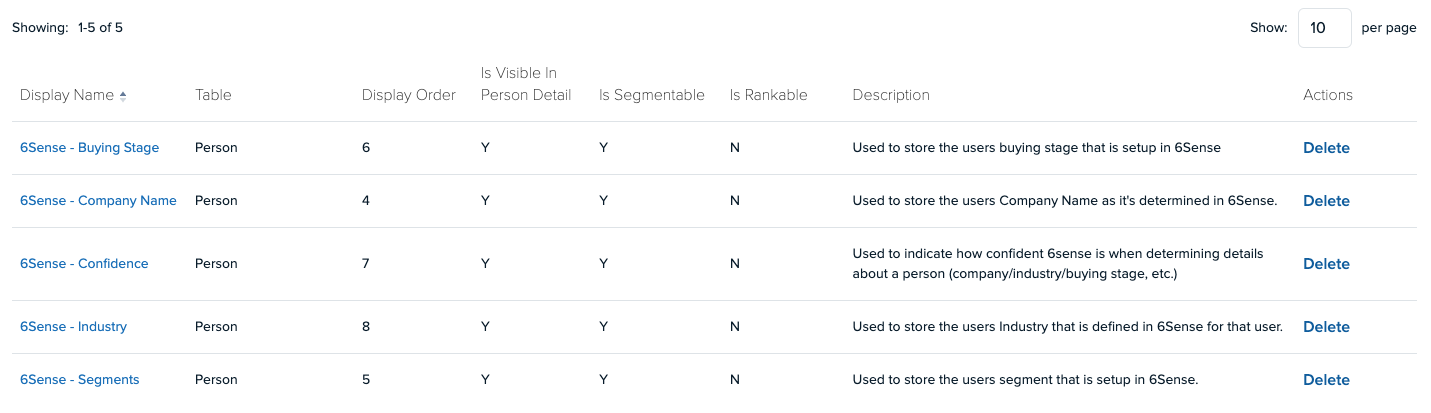
Within Acquia Personalization you can add additional columns for each of the fields that you want to store, in the example above we've added columns for the data we are receiving from 6Sense.
Image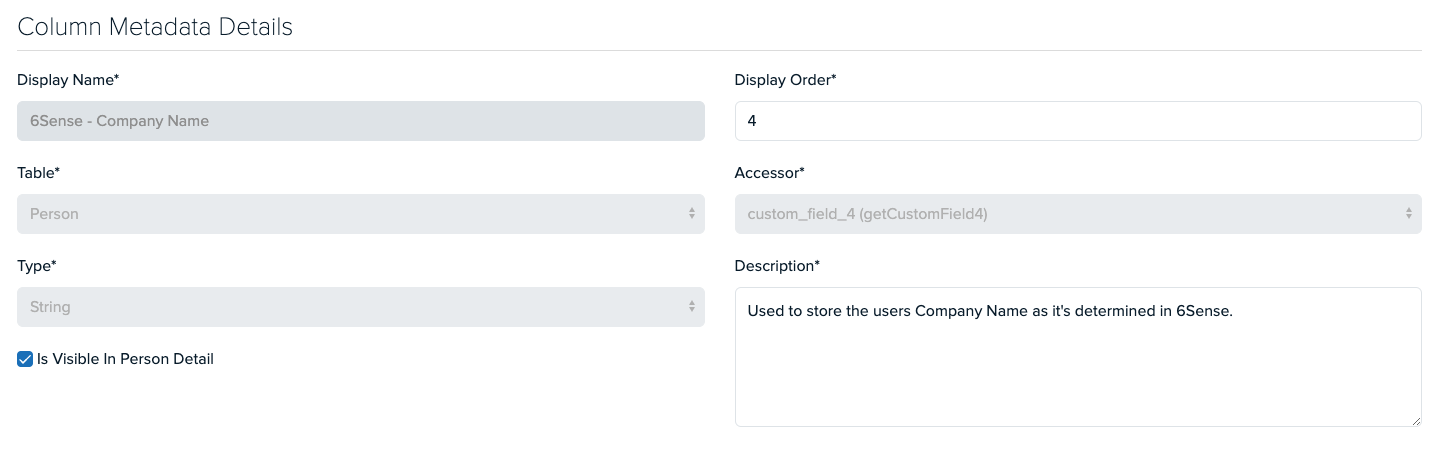
There are a few fields that you need to make note of to continue this tutorial:
- Accessor - This is the numbered column definition which will be needed when sending the data to Acquia Personalization
- Is visible in Person Detail - If you want to see the information when viewing the persons detail in Acquia Personalization
- Segmentable - If you want to be able to segment data by this field, you should check this.
- Category - It could be helpful to find all of these later, so you can add a custom category.
-
Send 6Sense data to Acquia Personalization
By leveraging Google Tag Manager you are able to take advantage of the pre-built custom tag that simplifies sending event data to Acquia Personalization. This can be found by going to the Community Template Gallery in GTM and searching for Acquia Personalization.
Image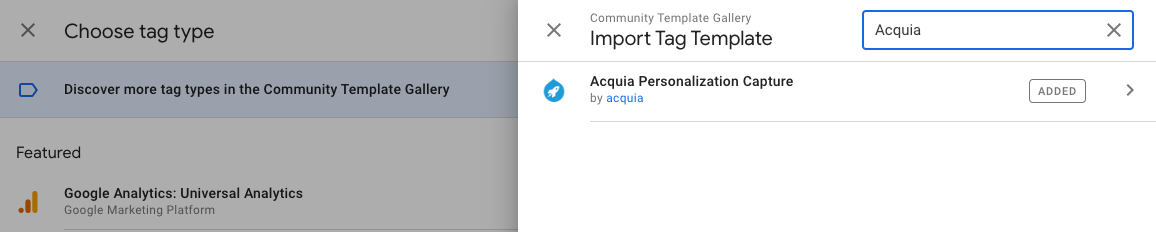
To send data to Acquia Personalization you need to create a new Tag, for example "Acquia Personalizaiton - Data Push"
You should find and select the "Acquia Personalization Capture" tag:
Image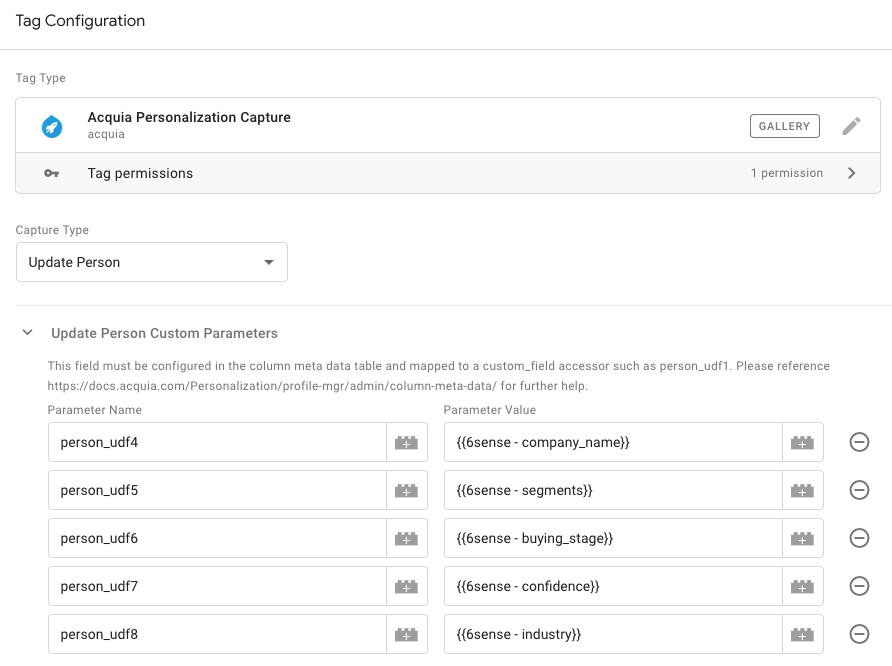
Some important items to make note of here:
- Capture Type - This should be set to what you are updating, in our example we are updating the Person details.
- Parameter Name - This maps to the column that you setup in the earlier steps. In this example person_udf4 is the company name column in Acquia Personalization, we are then mapping the 6sense - company_name variable to that field.
- This Tag should fire on every page view.
- This Tag should also be set to fire after your 6Sense Tag fires on your site.
Reminder - Preview your container to make sure your tags are firing and be sure to publish your container!
Now that your Tag Manager is setup to send 6Sense data to Acquia Personalization, you should be able to see the additional fields and data within the Person profile within Acquia Personalization, for example:
Image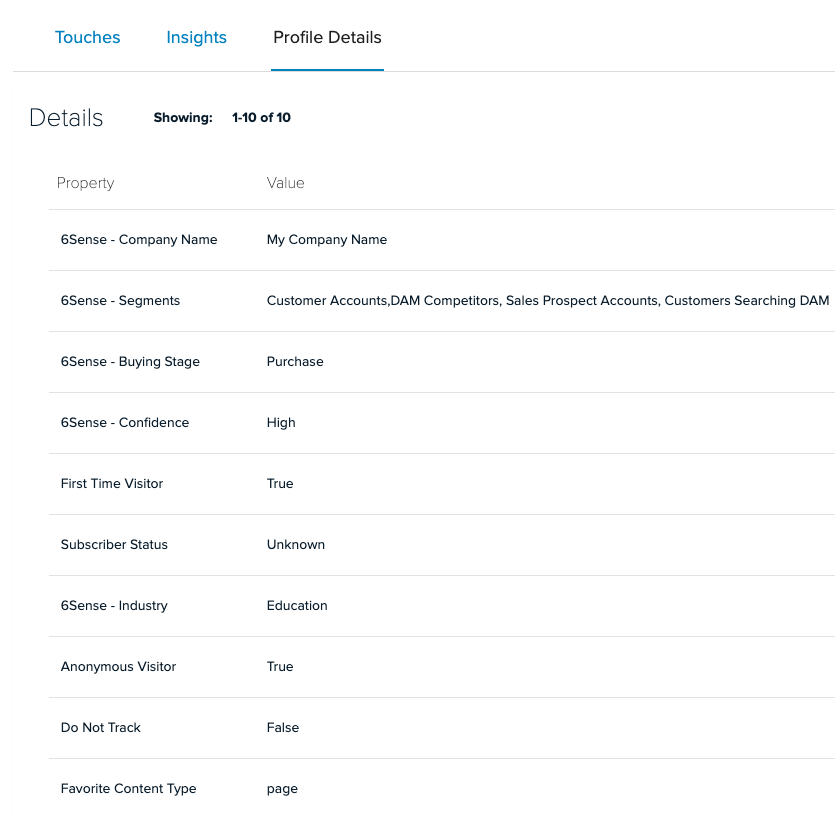
-
Create Segments in Acquia Personalization
Now that you have verified that information is flowing from 6Sense to Acquia Personalization, you can use this information to establish Segments for visitors based on this information.
Image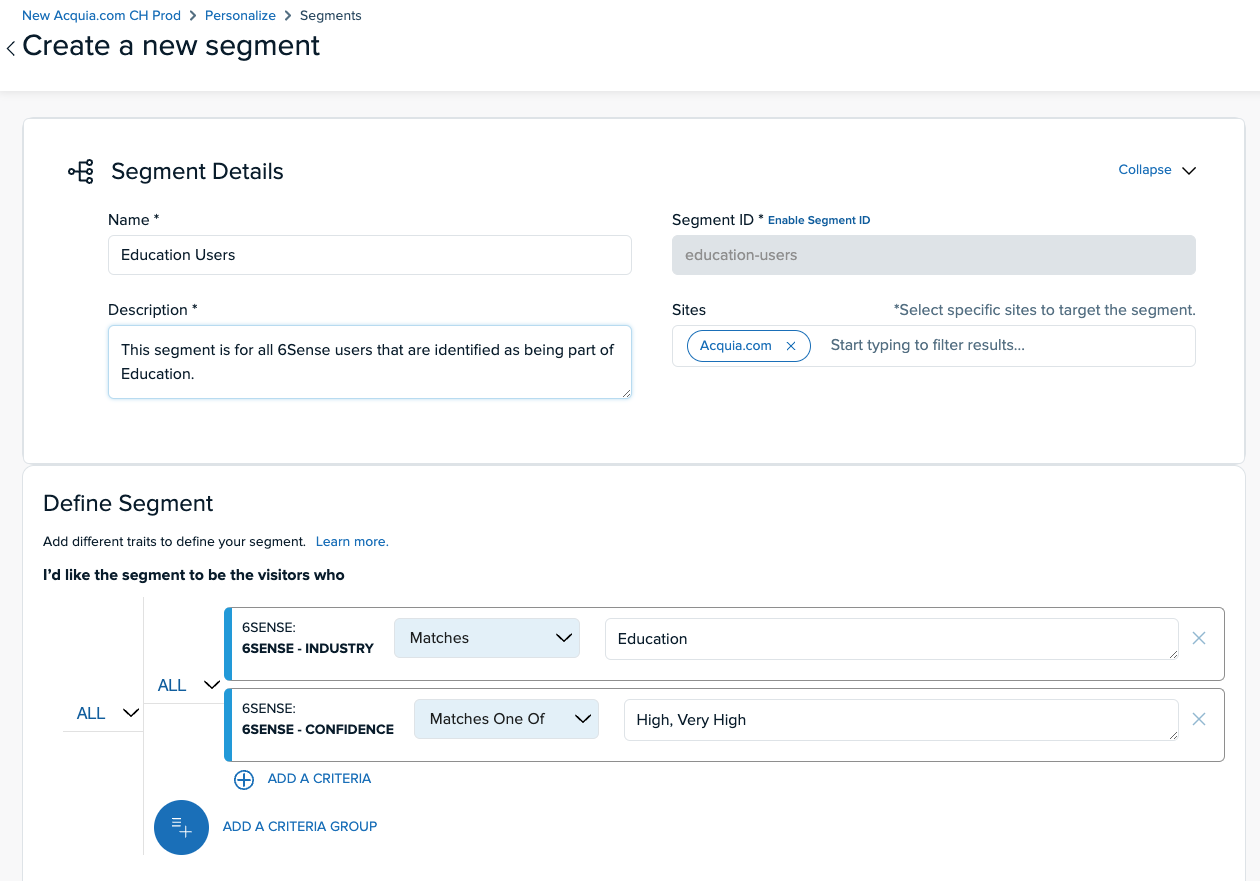
Some potential segments you might be able to create:
- Segment users based upon their Industry, for example, you could personalize the site based upon users that are in Education.
- Company, you could get very direct and segment users in a specific company.
- Segment within 6Sense, if you already have users grouped into specific campaigns in 6Sense you can carry those into Acquia Personalization
- Buying Stage, you can target specific content based upon where the user is in their Buying Stage.
A Quick Word About Confidence Levels
6Sense does the best it can to match a visitor to their known profile in 6Sense, sometimes it has accurate information on the user, sometimes it doesn't. One of the pieces of information that you can pass from 6Sense to Acquia Personalization in Confidence Level. Confidence Level's can be Low, Moderate, High, Very High. When creating your segments it's a good idea to make the confidence of High / Very High a criteria so you can be sure you are targeting the right person. -
Finishing Up
This tutorial showed you just one way in which to augment Person profiles in Acquia Personalization but this can be applied to other platforms and other systems to really get the most out of Acquia Personalization.
For more information on Acquia Personalization, be sure to read our documentation and be sure to try Acquia Personalization