
Configure a Drupal 10 codebase with Drupal CMS and Site Studio for Site Factory: Part 4
- Last updated
- 2 minute read
Goal
Demonstrate a regular Site Factory Deployment workflow with Site Studio in mind.
Overview
This is Part 4 of a five-part comprehensive tutorial covering the set up of a new Drupal 10 codebase with Acquia CMS and Site Studio for Acquia Cloud Site Factory (ACSF). In the previous section you learned how to create a new ACSF codebase with a custom profile that you will use to create new Acquia CMS sites and automatically import all the existing Drupal and Site Studio configuration. In this section I will demonstrate a regular ACSF deployment workflow with Site Studio in mind by adding some minor changes to the existing codebase and pushing the new changes across your ACSF sites.
This guide has been divided into five parts:
- Set up Cloud IDE, Install Drupal 10, and Prepare your Codebase for Site Factory
- Acquia CMS and Site Studio installation and configuration for Site Factory
- Create a Custom Profile and test New Site Creation with Site Factory
- ACSF Deployment Workflow with Site Studio
- Optional: Configure multiple Site Studio sync directories
I will now guide you through a standard Site Factory deployment workflow with Site Studio. This will involve making minor modifications to the existing codebase and pushing the updates to your ACSF sites.
-
Making changes to your Codebase: Config Ignore configuration
In order to have configuration differences between your ACSF sites, you will need to list inside the Config Ignore module the configuration entities that you wish to be different between your sites.
For example, If you want to have different site names and different webforms between your Site factory sites, you should add the following configurations entities to your Config Ignore module:
- system.site:name (Will ignore the name of the system site settings, but will not ignore other system.site configuration.)
- webform.webform.* (will ignore all configuration entities that starts with webform.webform)
In your Cloud IDE site, go to the Config Ignore admin page ( /admin/config/development/configuration/ignore) and add the following:
system.site:name
webform.webform.*
Image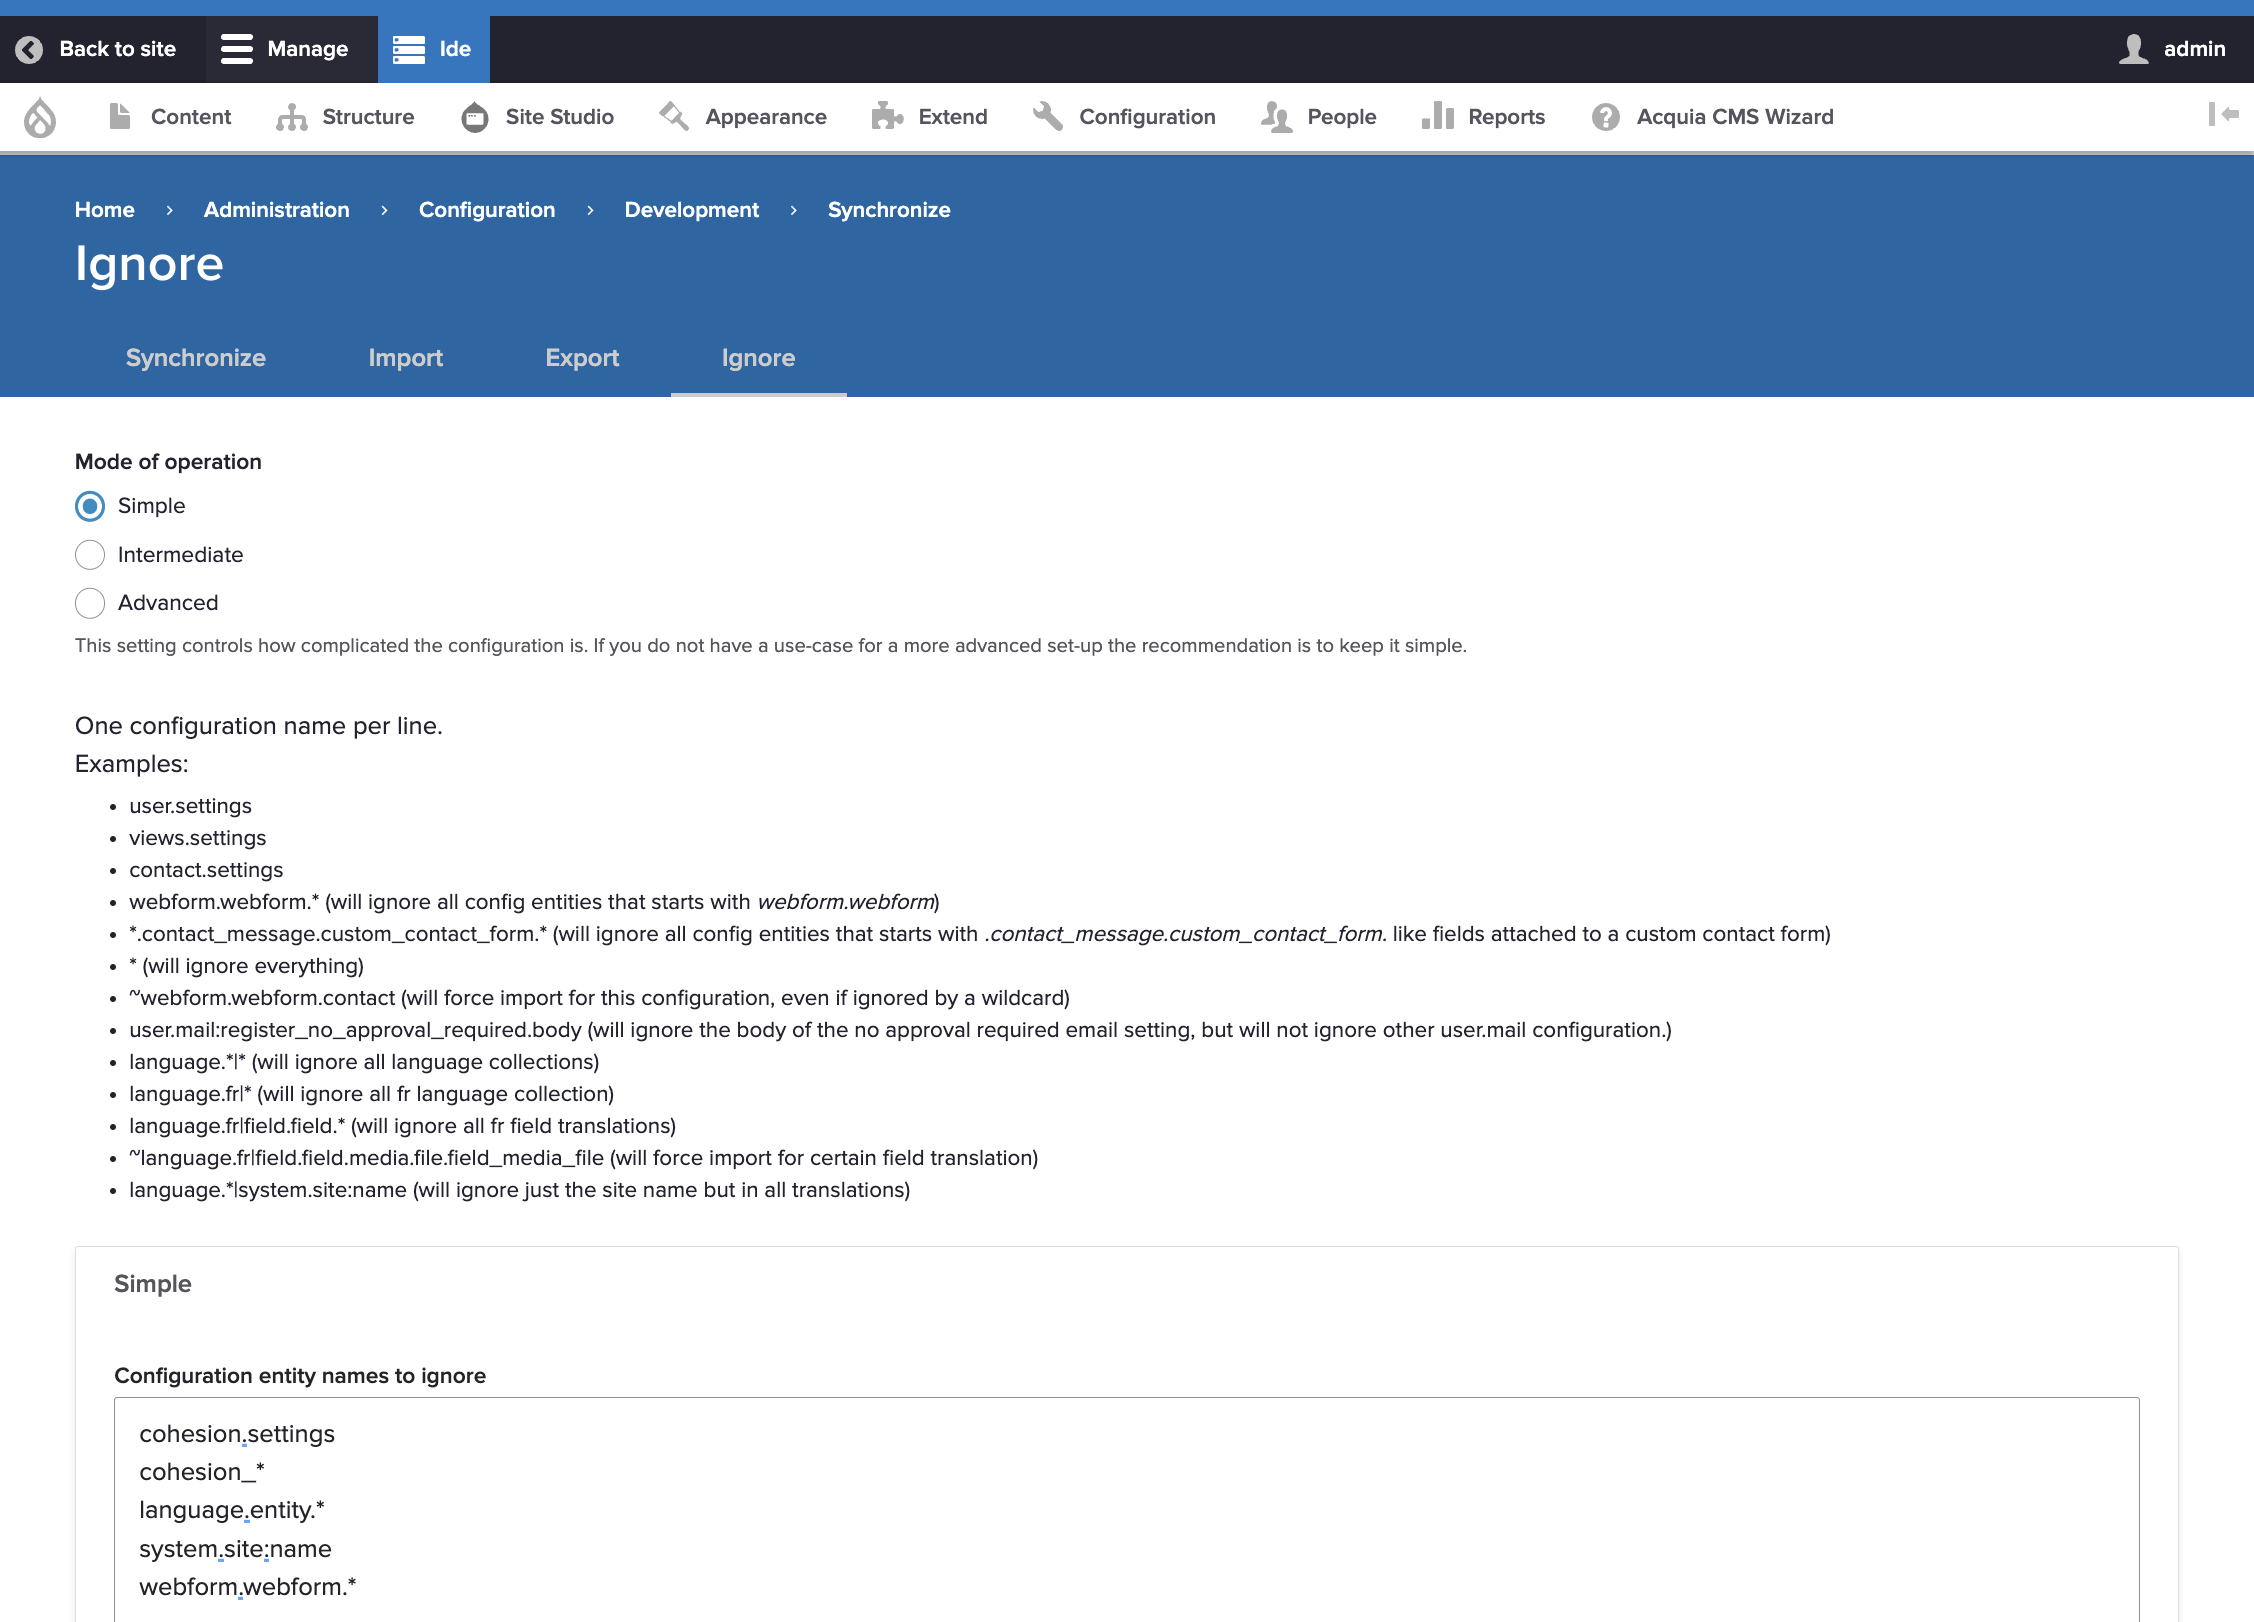
Save your changes.
An alternative method that enables adjustments to be made to your Site Factory site settings, without impacting the site's configuration, is through the utilization of the Site Settings and Labels module:
Site Settings and Labels
https://www.drupal.org/project/site_settingsExport the configuration changes
After you make changes to your codebase, it’s a good idea to check for Database updates:
Signorelli IDE:~/project (main) $ drush updb
[success] No pending updates.
Export the new Drupal configuration:
drush cexSignorelli IDE:~/project (main) $ drush cex [notice] Differences of the active config to the export directory: +------------+------------------------+-----------+ | Collection | Config | Operation | +------------+------------------------+-----------+ | | config_ignore.settings | Update | +------------+------------------------+-----------+ The .yml files in your export directory (/home/ide/project/config/default) will be deleted and replaced with the active config. (yes/no) [yes]: > yes [success] Configuration successfully exported to /home/ide/project/config/default.Export the Site Studio configuration:
drush sitestudio:package:exportFiles in your export directory (../config/site_studio_sync/) will be deleted and replaced with the package config and files. (yes/no) [yes]: > yes ➜ ➜ Exported 264 config and 38 non-config files. ➜ /home/ide/project/config/defaultDeploy your codebase changes to ACSF
First, you need to push your new codebase changes to your repository:
git add -A
git commit -m "BLT-002: Config Ignore minimal configuration."
git push
Deploy your codebase to ACSF:
blt artifact:deployI named this new deployed code: 1.0.1-tamacsf
Signorelli IDE:~/project (main) $ blt artifact:deploy
Would you like to create a tag? (y/n) y
Enter a valid commit message [BLT-003: Config Ignore minimal configuration.]
Enter the tag name for the deployment artifact, e.g., 1.0.0-build 1.0.1-tamacsf
Go to the ACSF Console UI of one of your lower environments, for this tutorial, I’m using the test environment.
Navigate to Administration -> Update code:
Image
In the Site Update page, use the dropdown to select your new codebase (1.0.1-tamacsf):
Image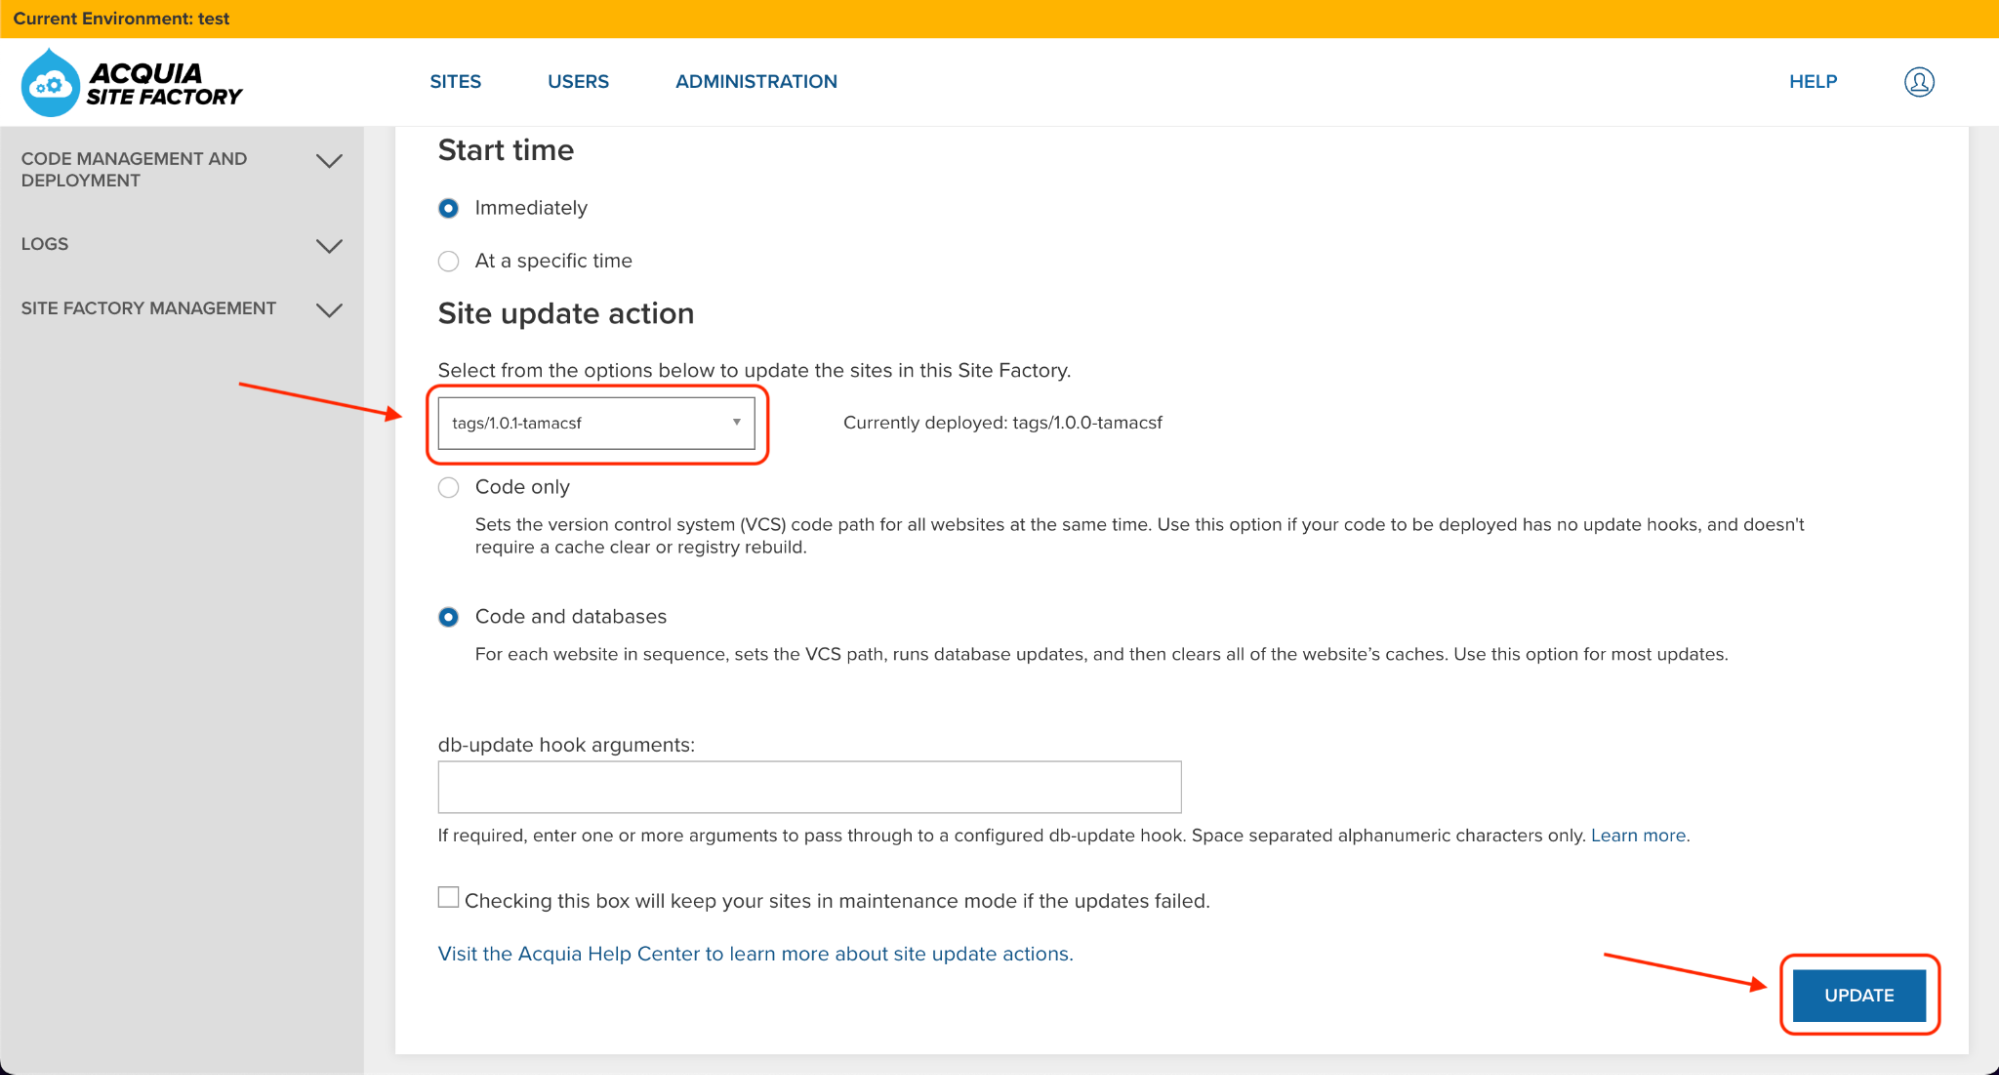
Click the Update button and wait until the update process finishes:
Image
Check for configuration differences: Create your second ACSF site
It’s recommended that you always create a new site to test that your codebase is working fine and that it doesn’t create configuration differences.
Create a new ACSF site using your new codebase. Go to Sites and select your group:
Image
Click the “Create a new Site” button.
Provide a name to your new site (Example: site2), and click the “Create Site” button:
Image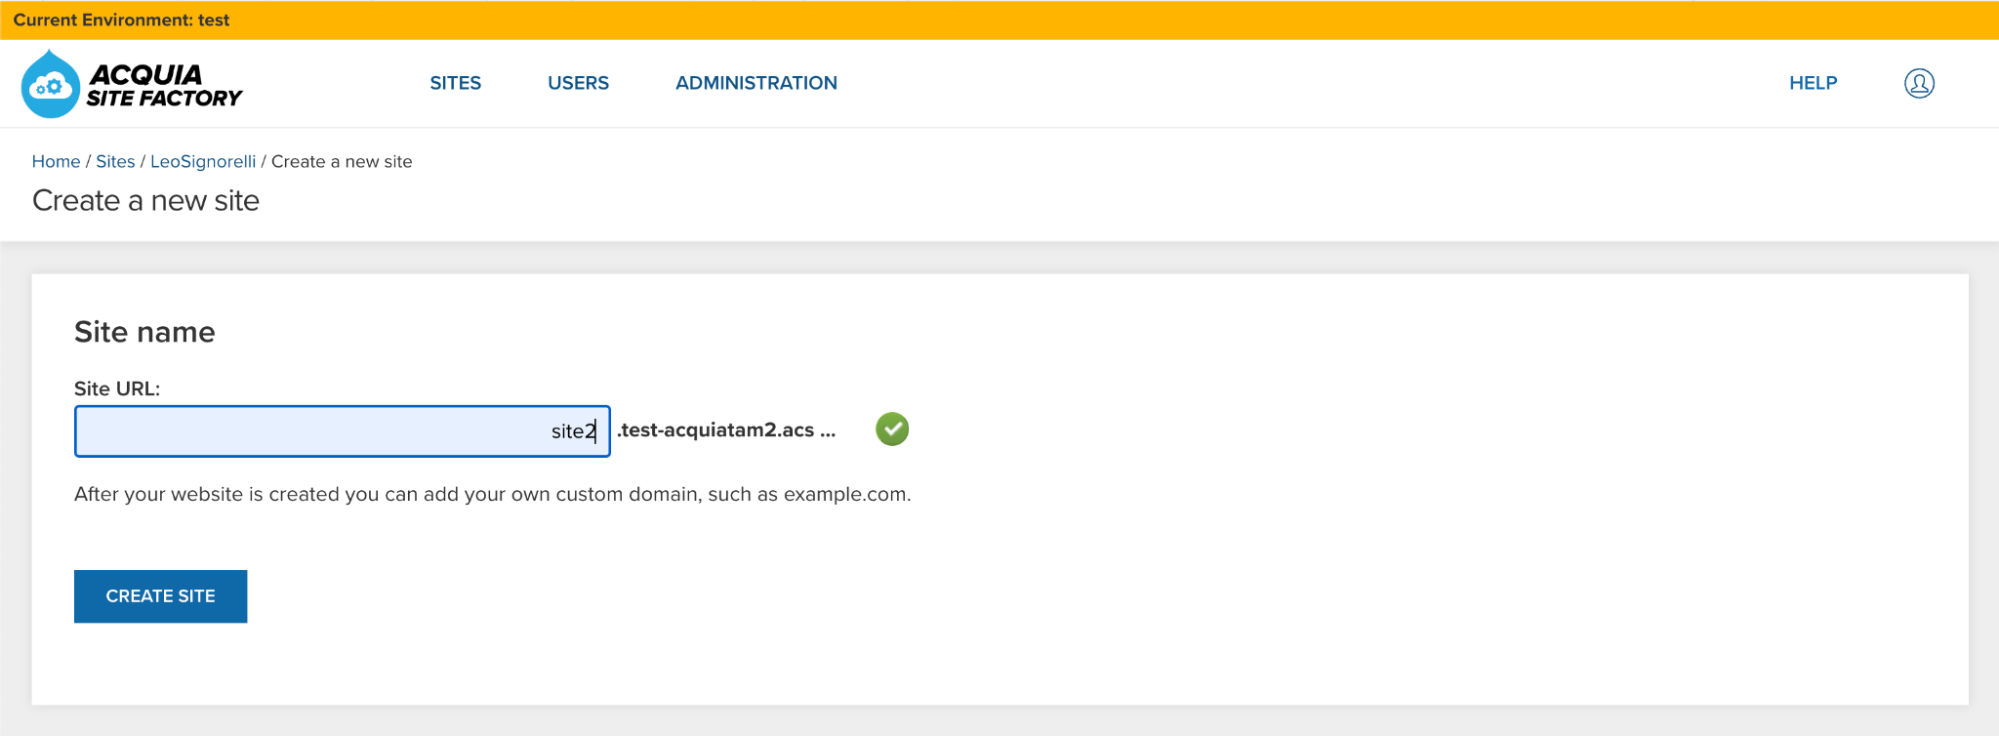 Image
Image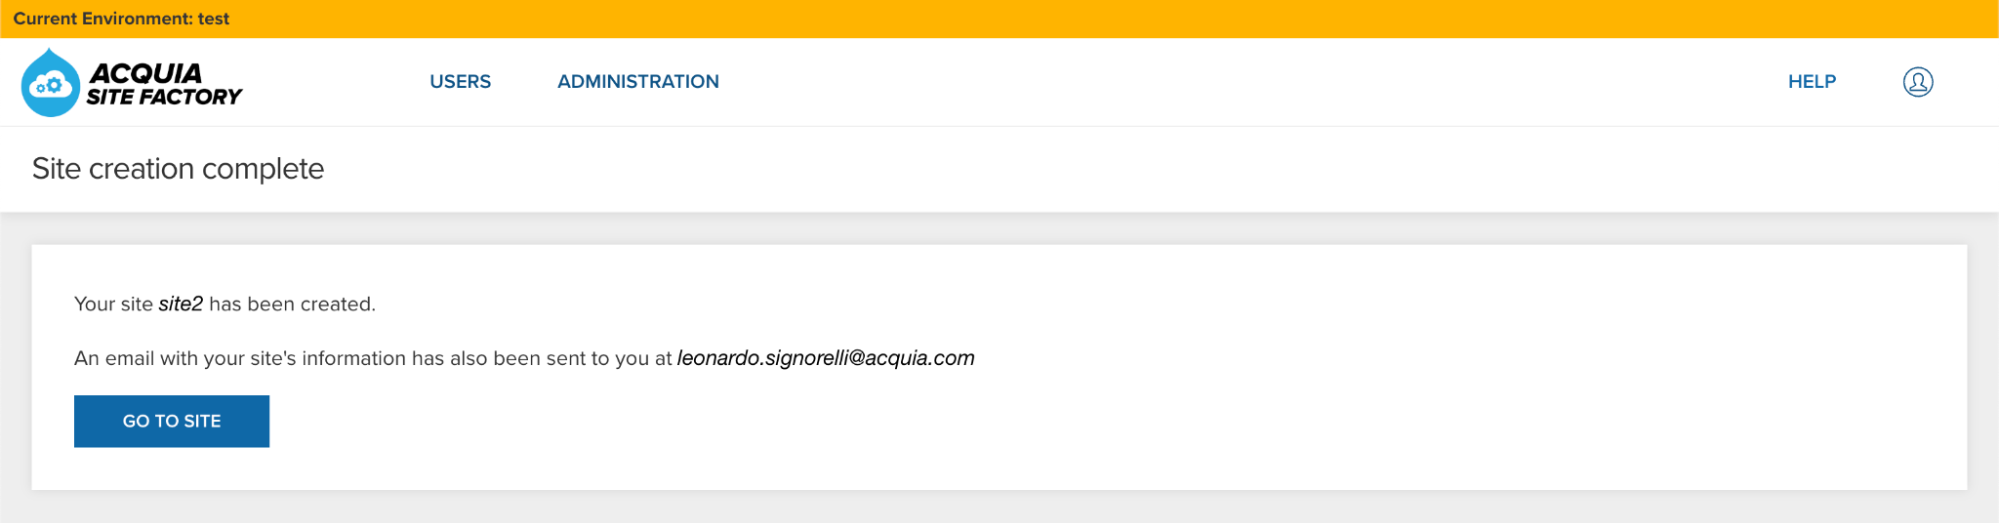
Create a new Drush alias for your new ACSF site
Go back to your Cloud IDE and create a new Drush alias for your new ACSF site using the aliasgenerator.sh bash script.
Execute the aliases.sh bash script and follow the instructions:
./aliasgenerator.shSignorelli IDE:~/project (main) $ ./aliases.sh <-------> <---------------> <---------------------------------> | Create Drush Aliases | <---------------------------------> <---------------> <-------> |--------------------| | Main Menu | |--------------------| | 1 - New site Alias | | 2 - Exit | |--------------------| Select a number from the Main Menu: 1 Selected: New site Alias ------------------------ Make sure to enter the name of the site you created in ACSF. Example: If the ACSF URL assigned to your new site is site1.acquiatam2.acsitefactory.com Enter site1 Provide the name of the site you want to create a Drush alias: site1 Is this site name correct?: "site2" (Yes/No/Cancel = y/n/c) y Generating the drush alias for this new site.. Ready! Going back to the Main Menu... |--------------------| | Main Menu | |--------------------| | 1 - New site Alias | | 2 - Exit | |--------------------| Select a number from the Main Menu: 2 Selected: Exit -------------- Exiting this script… Signorelli IDE:~/project (main) $Check that your new site doesn’t have configuration differences:
drush @site2.01test cexSignorelli IDE:~/project (main) $ drush @site2.01test cex [notice] The active configuration is identical to the configuration in the export directory (../config/default). ../config/default Connection to acquiatam201test.ssh.enterprise-g1.acquia-sites.com closed. Signorelli IDE:~/project (main) $Testing your new codebase: Change the site name of your second site
Login to your new ACSF site using drush uli:
drush @site2.01test uliNavigate to the “Basic site settings” admin page (/admin/config/system/site-information) and change the name of your new site:
Image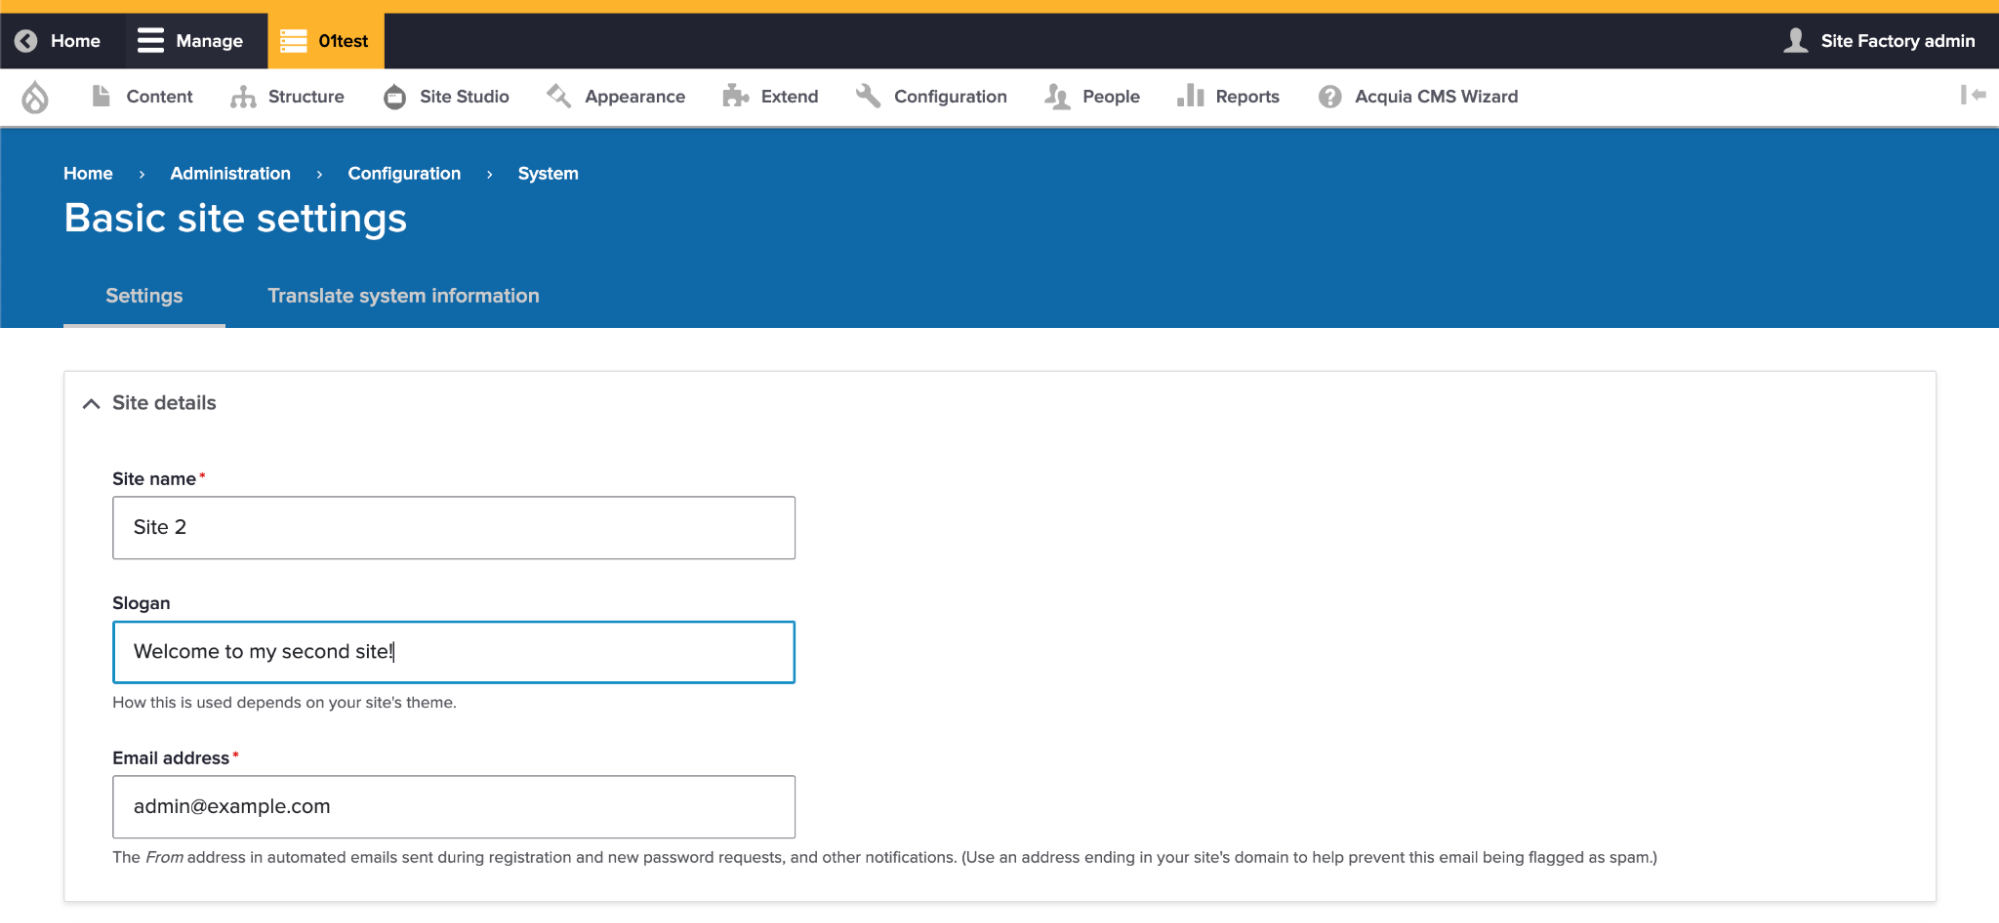
Save your changes.
Check that this new change in your second site didn’t create a configuration difference:
drush @site2.01test cexSignorelli IDE:~/project (main) $ drush @site2.01test cex [notice] The active configuration is identical to the configuration in the export directory (../config/default). ../config/default Connection to acquiatam201test.ssh.enterprise-g1.acquia-sites.com closed. Signorelli IDE:~/project (main) $ -
Making changes to your Codebase: Install a new module and make changes to Site Studio
I will install the Shield module to demonstrate the process of adding a new module to your codebase.
Install the new module with Composer
Go to your Cloud IDE instance and execute the following composer command to install the Shield module:
composer require 'drupal/shield:^1.7'Enable the Shield module:
drush en shieldAfter installing a new module, it’s alway recommended to see if there are pending database changes:
drush updbSignorelli IDE:~/project (main) $ drush updb [success] No pending updates. Signorelli IDE:~/project (main) $Go to the Shield module configuration page to make sure the module was installed and enabled successfully (/admin/config/system/shield):
Image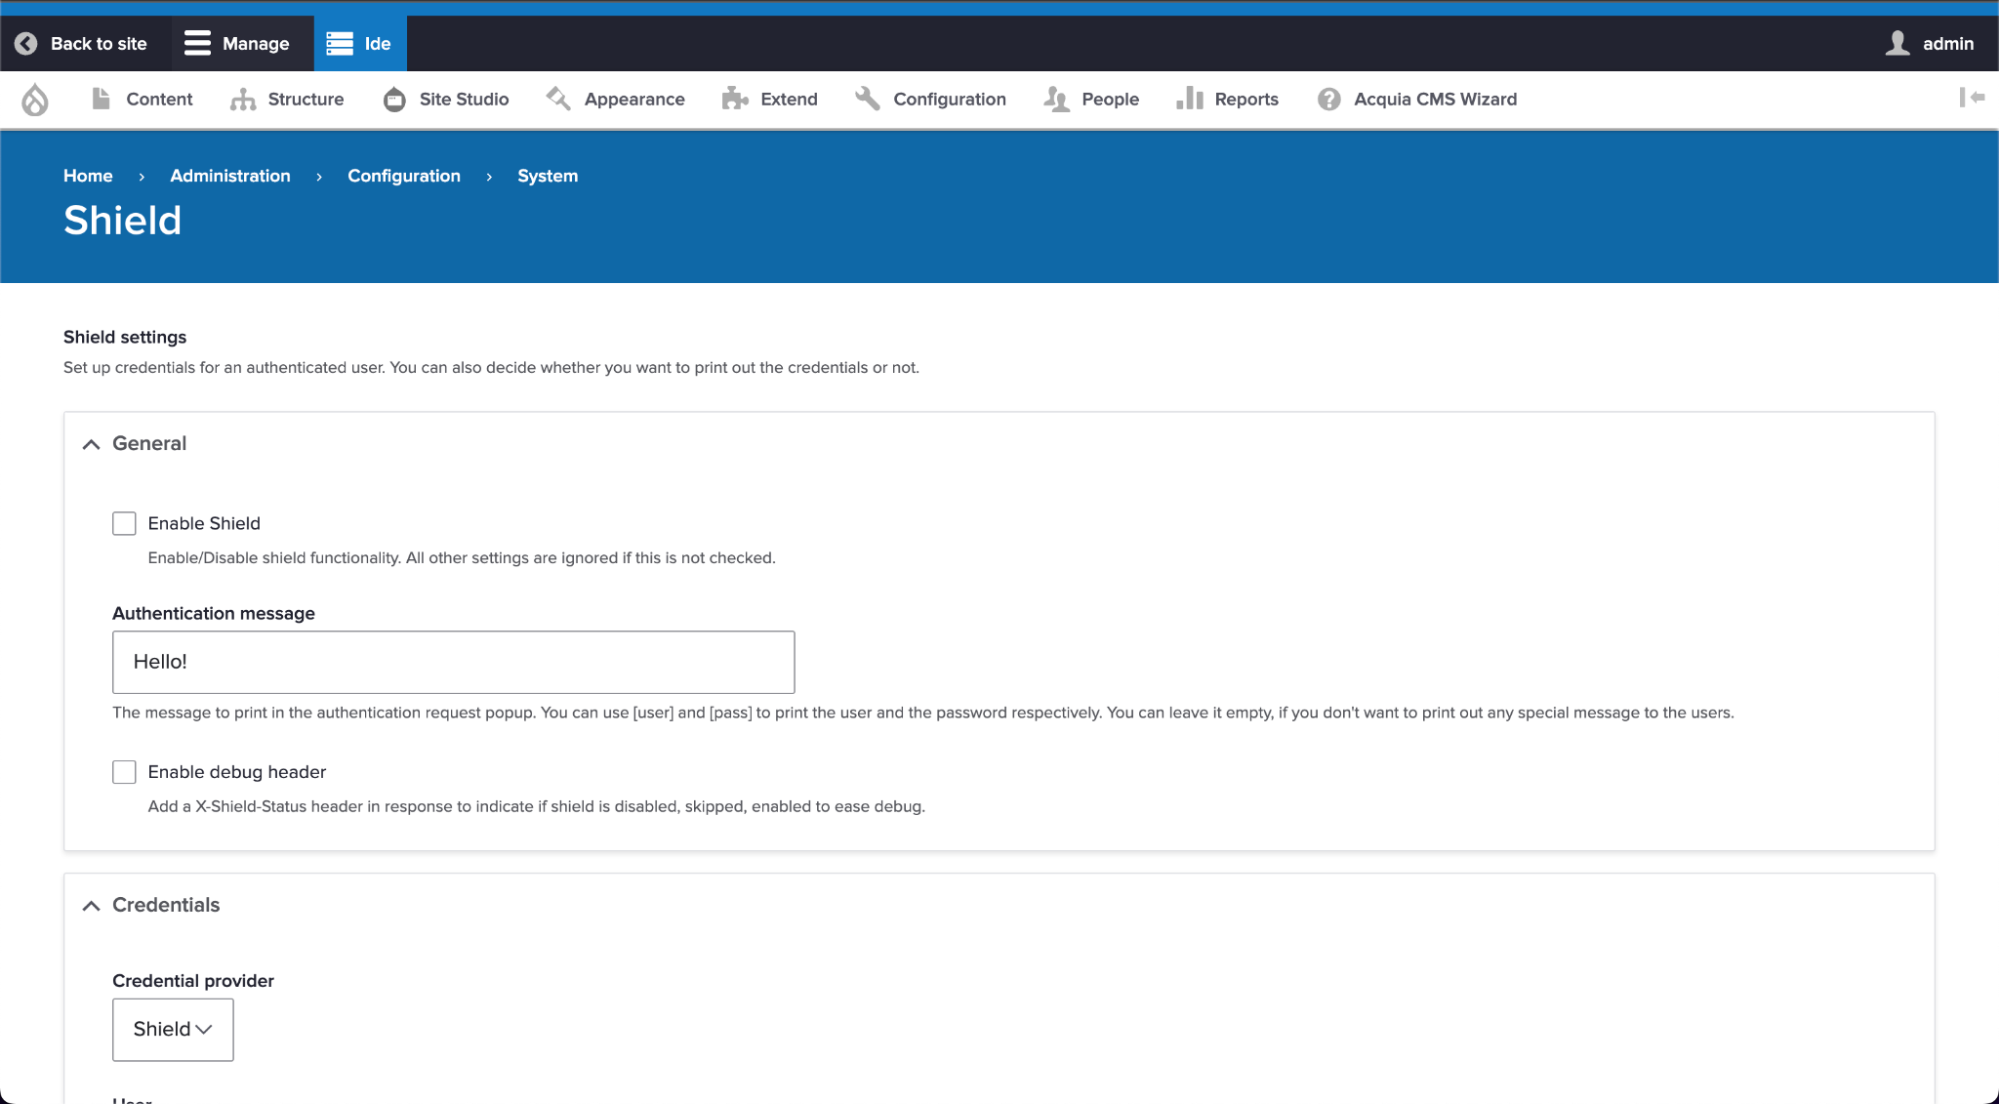
Add the Shield module to the Config Ignore module
If you wish to have the ability to use different Shield credentials per site, you will need to add the Shield configuration entity to the Config Ignore module.
Open a new Terminal window in your Cloud IDE instance and execute “drush cex” to find out the filename of the Shield configuration file. Respond NO to the prompt as we don’t want to export the configuration changes at this moment:
drush cexSignorelli IDE:~/project (main) $ drush cex [notice] Differences of the active config to the export directory: +------------+-----------------+-----------+ | Collection | Config | Operation | +------------+-----------------+-----------+ | | shield.settings | Create | | | core.extension | Update | +------------+-----------------+-----------+ The .yml files in your export directory (/home/ide/project/config/default) will be deleted and replaced with the active config. (yes/no) [yes]: > no In ConfigExportCommands.php line 155: Cancelled. Signorelli IDE:~/project (main) $Go to the Config Ignore admin page of your Cloud IDE site and add “shield.settings” to the end of the list (/admin/config/development/configuration/ignore):
Image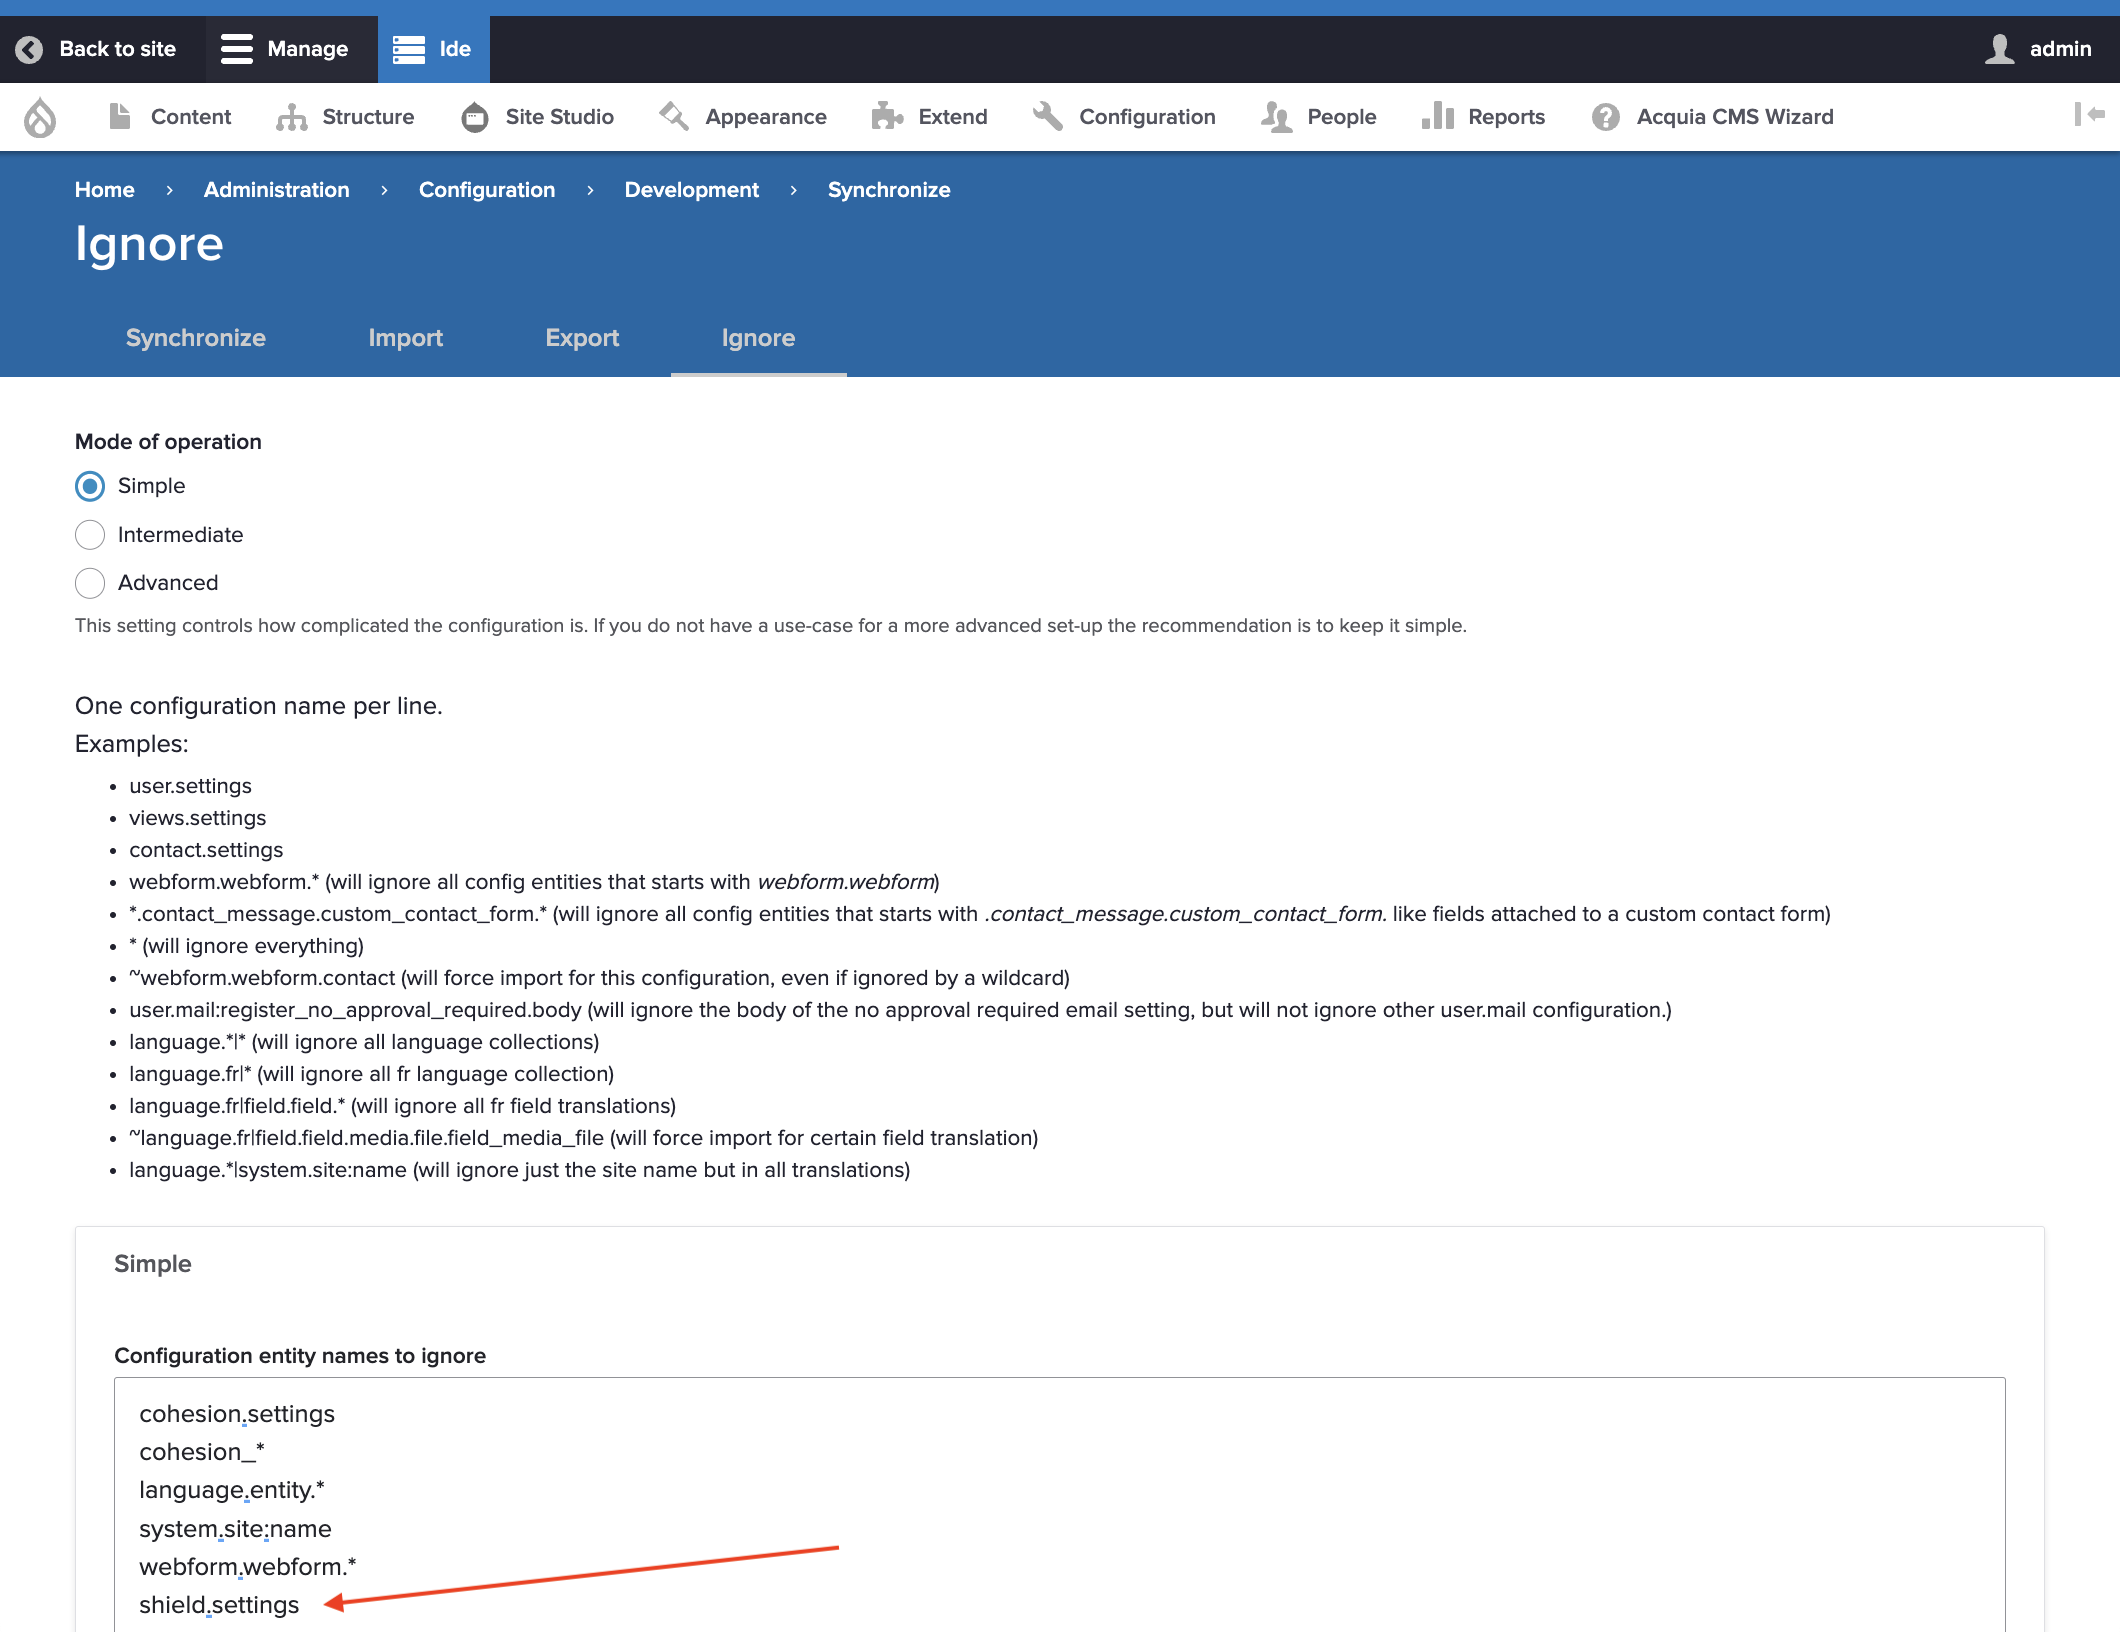
Click the “Save configuration” button to save the changes.
Make changes to Site Studio
In order to demonstrate how to deploy Site Studio changes to ACSF and your ACSF sites, I will change the logo icon of the Site Studio’s Master template.
Navigate to /admin/cohesion/templates/master_templates/master_template/edit and double click the “Site Header” component:
Image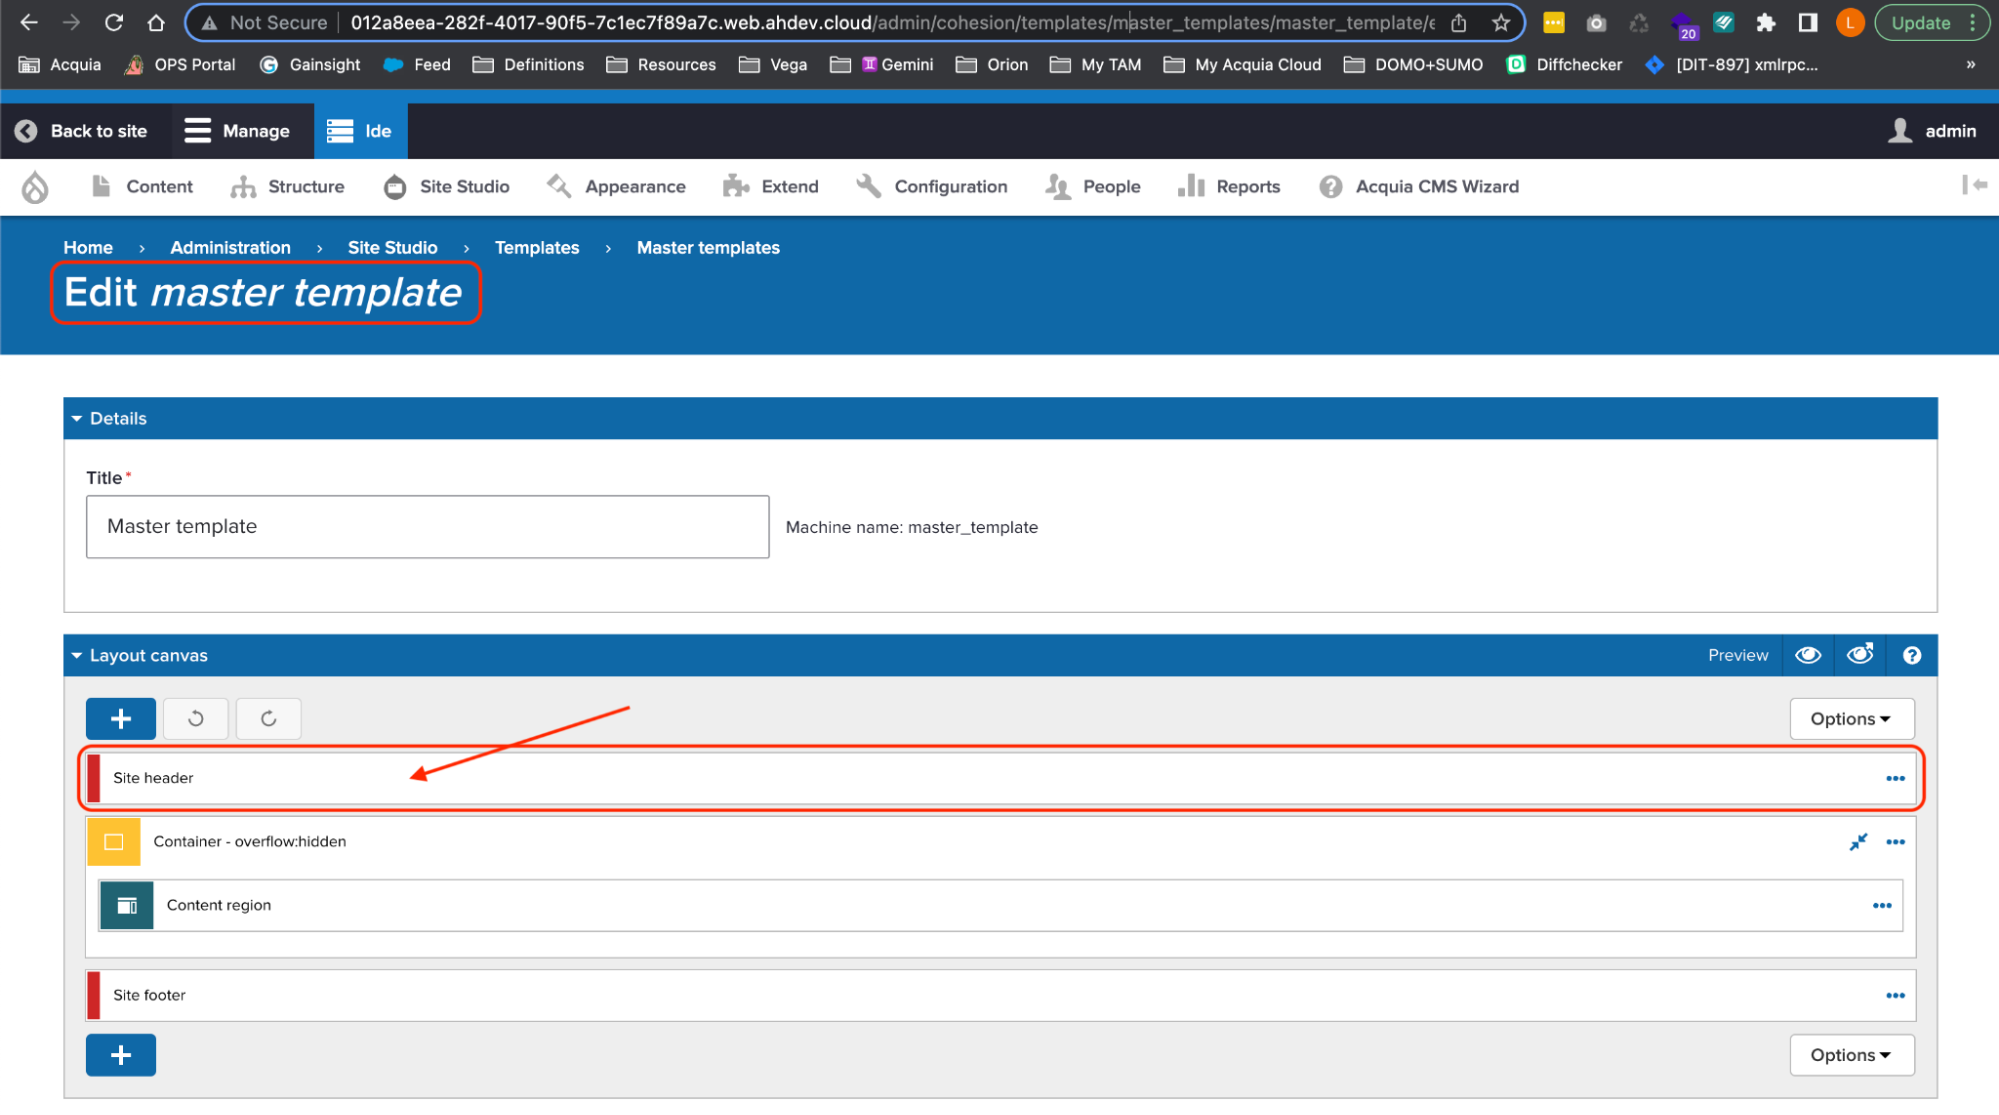
Remove the existing Acquia CMS logo image and click the “Select image” button:
Image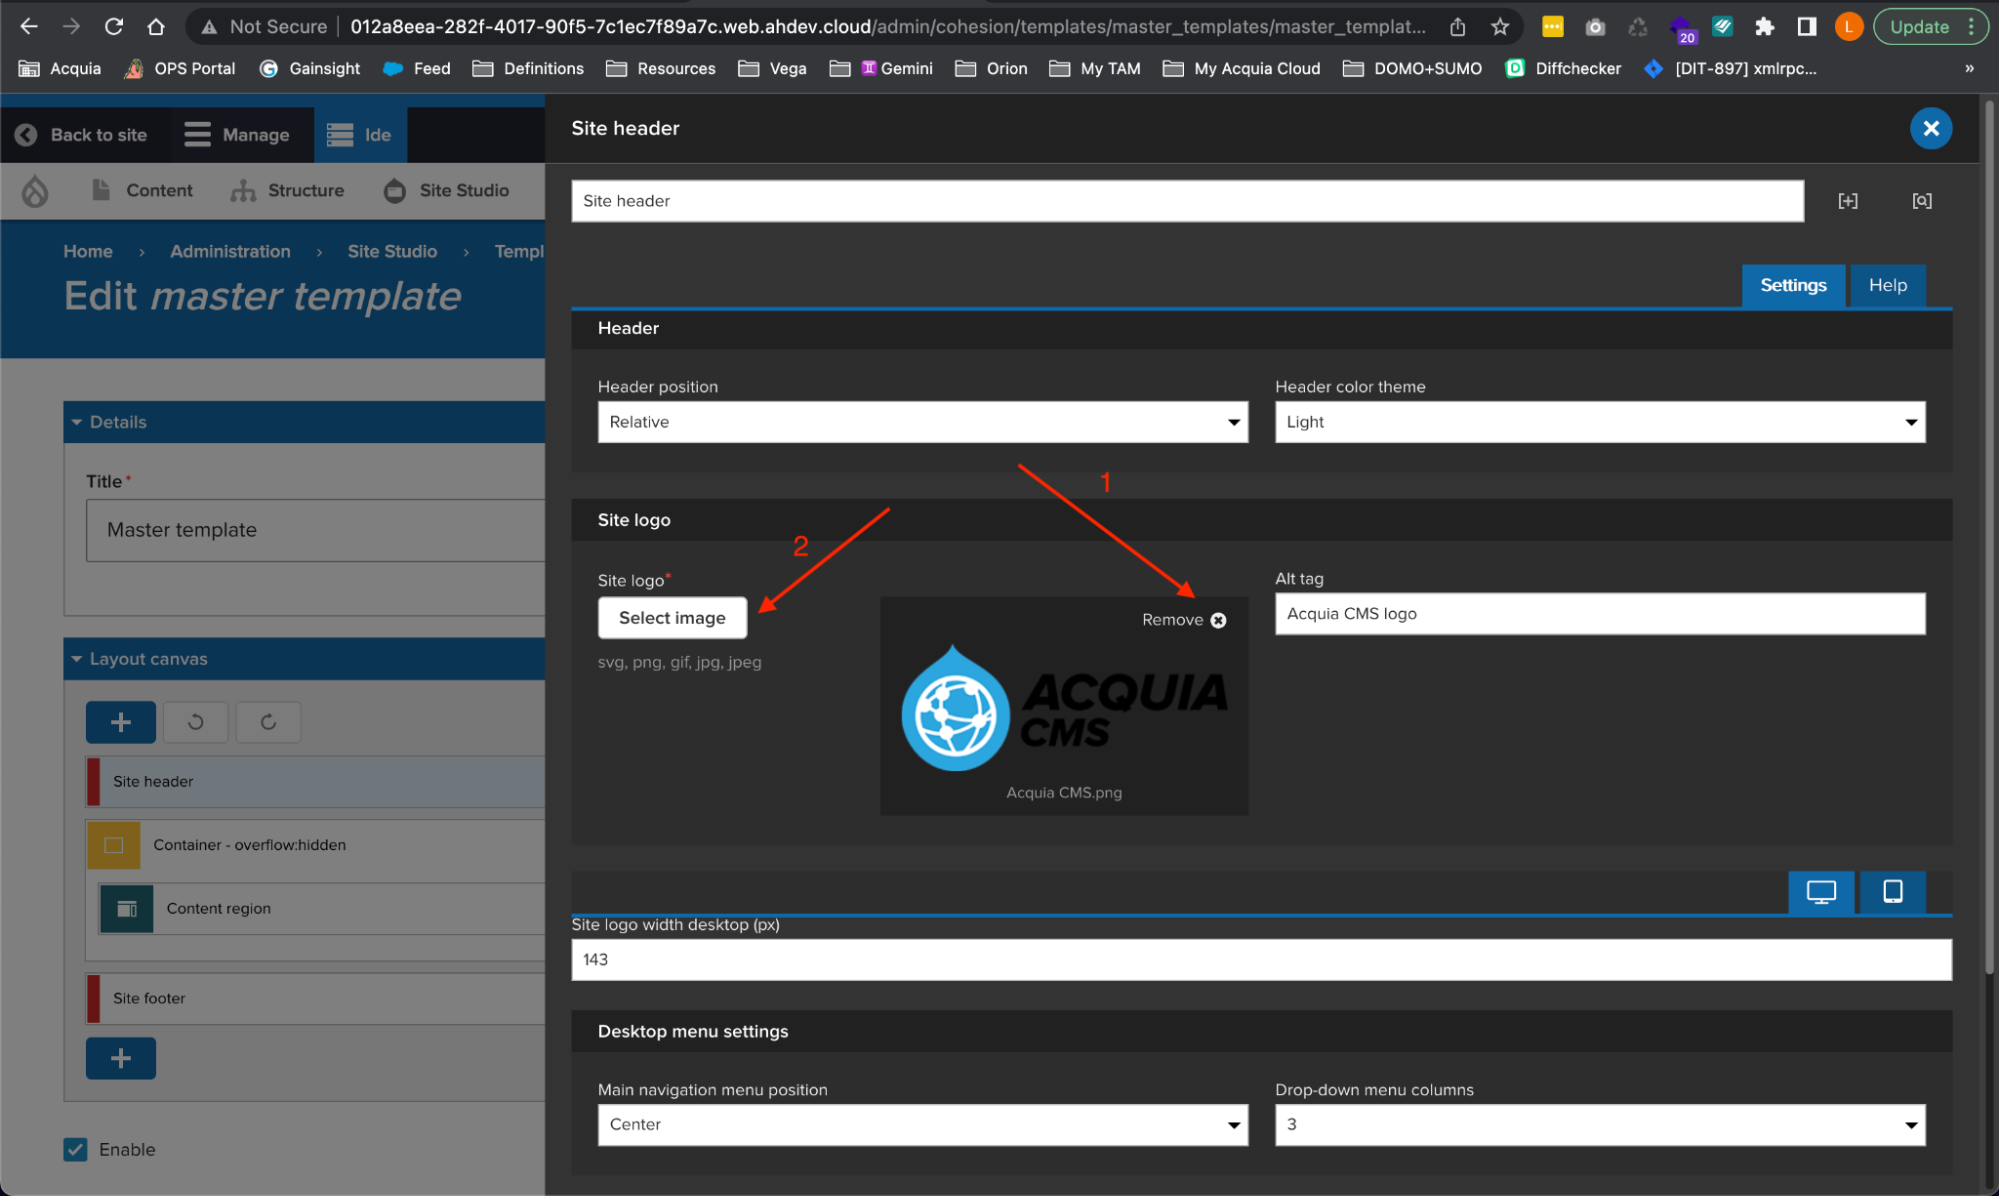
- On the Imce File Manager window, click the “Upload” button to upload a new image from your computer.
- After the file is uploaded, make sure it’s selected.
- Click the “Select” button.
Image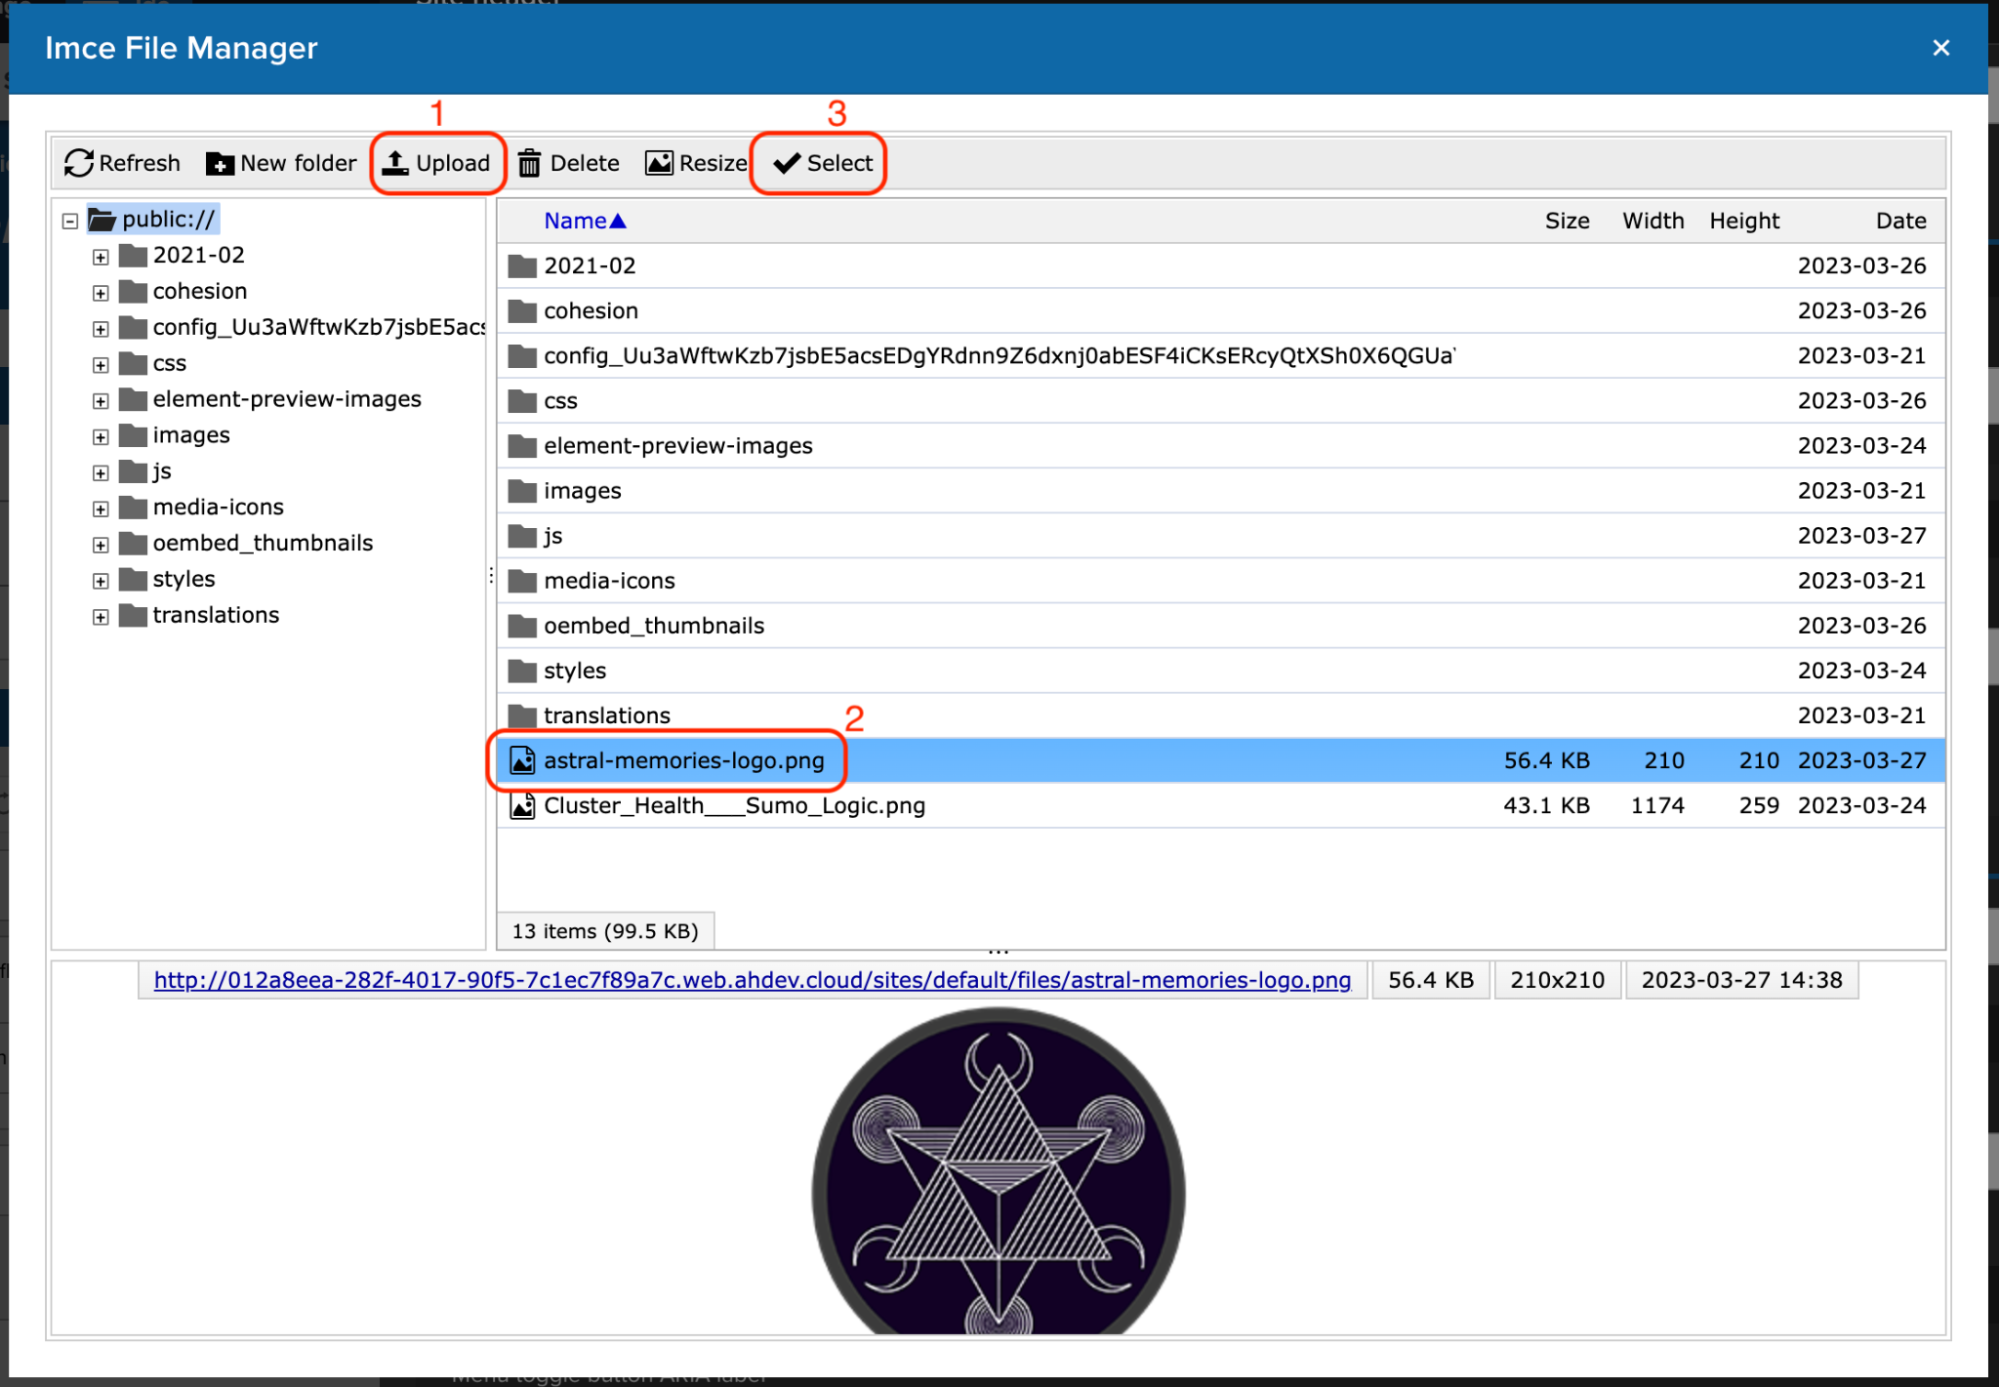
Click the “Apply” button to save the changes to the “Site Header” component:
Image
Click the “Save and continue” button to save the changes to the Master Template:
Image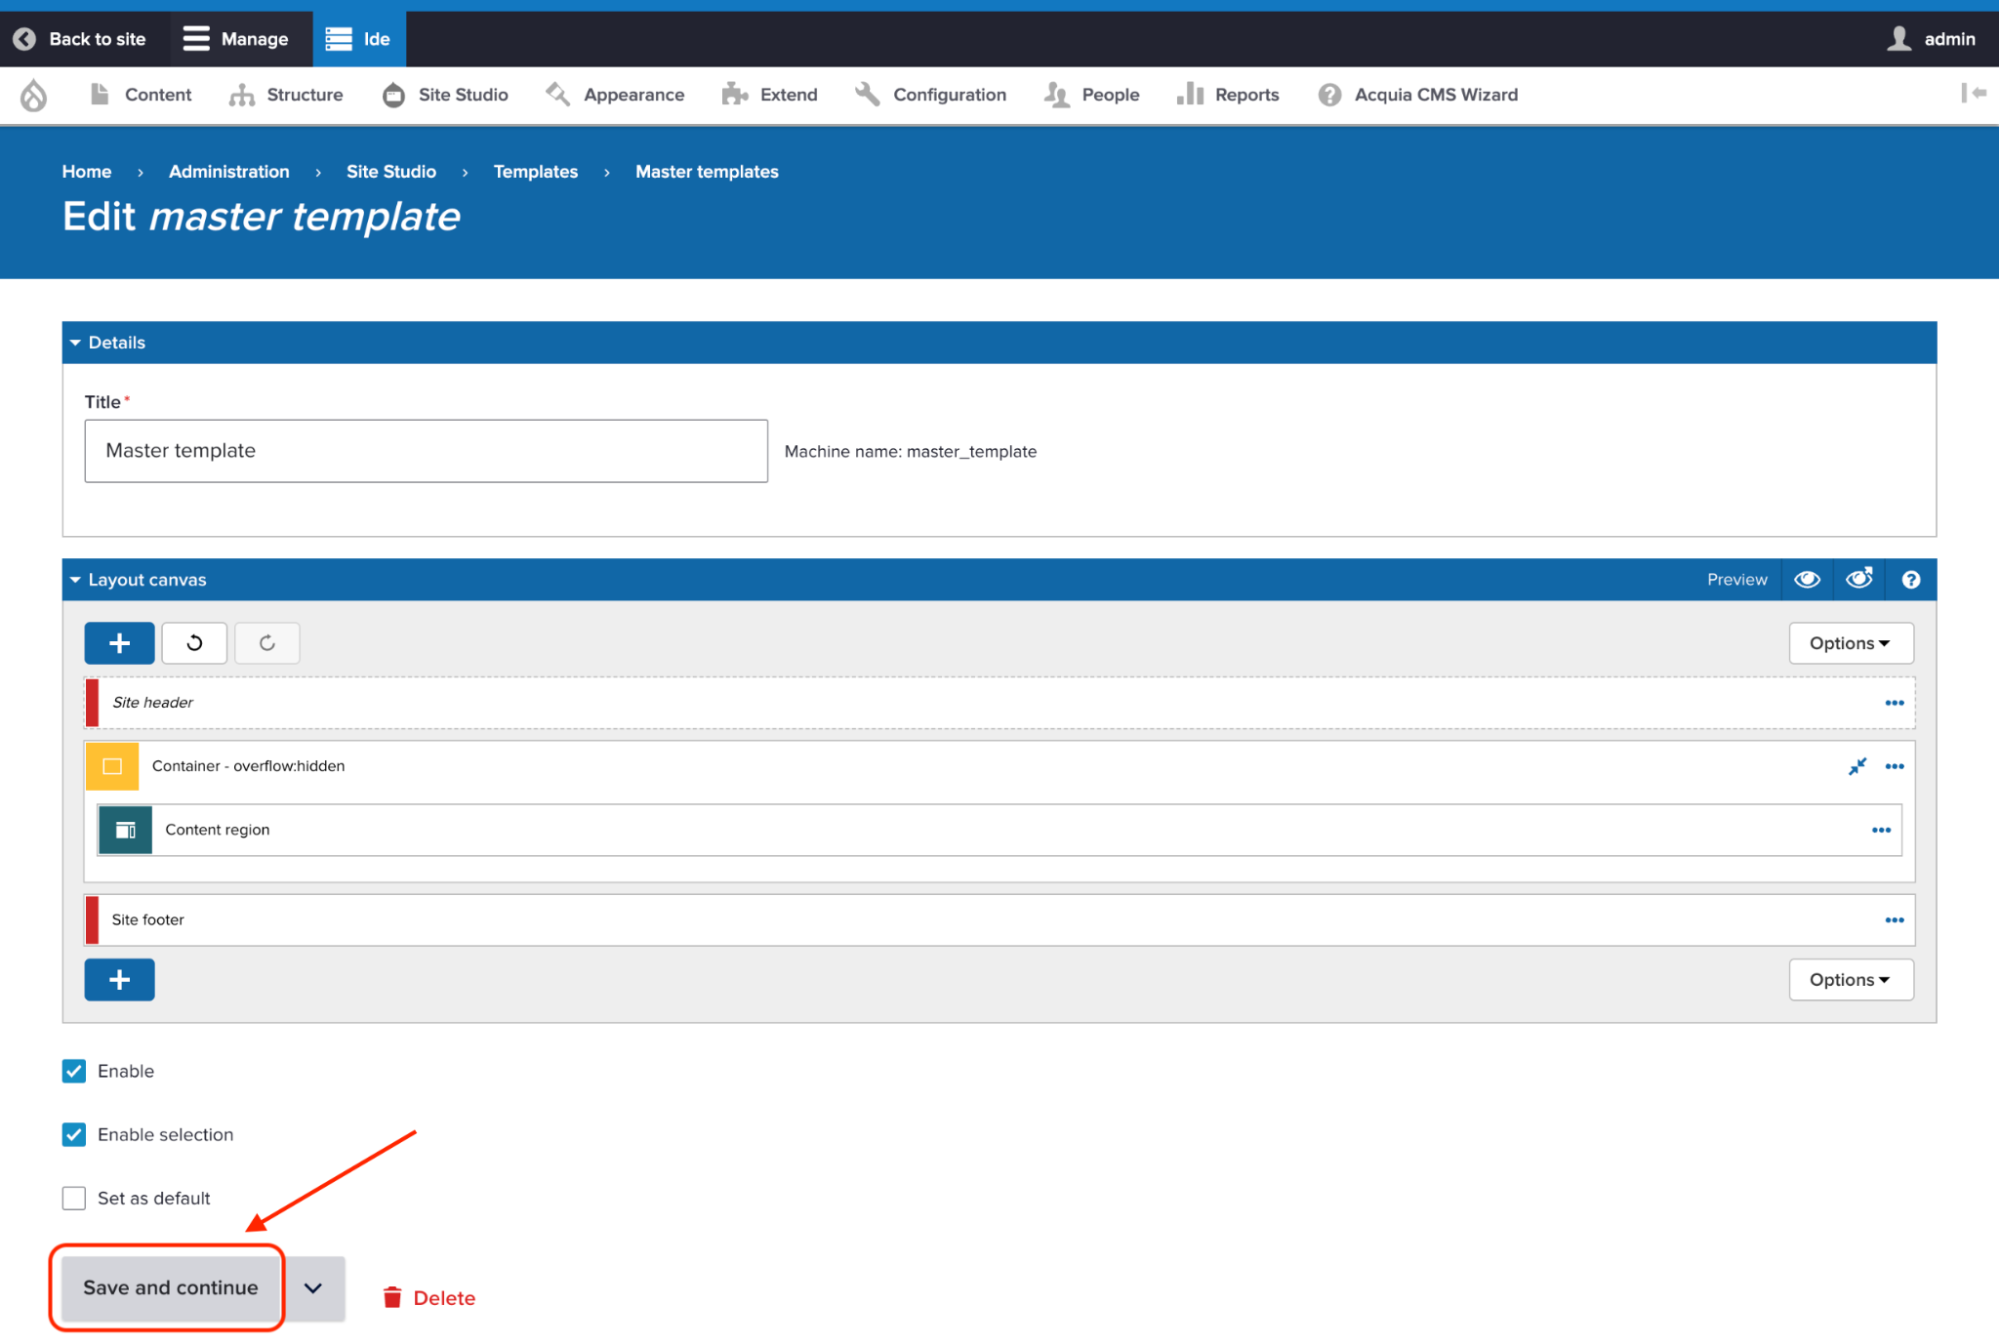
Follow the same steps above to change the Logo Icon of the “Master Template - Boxed” Site Studio template:
Image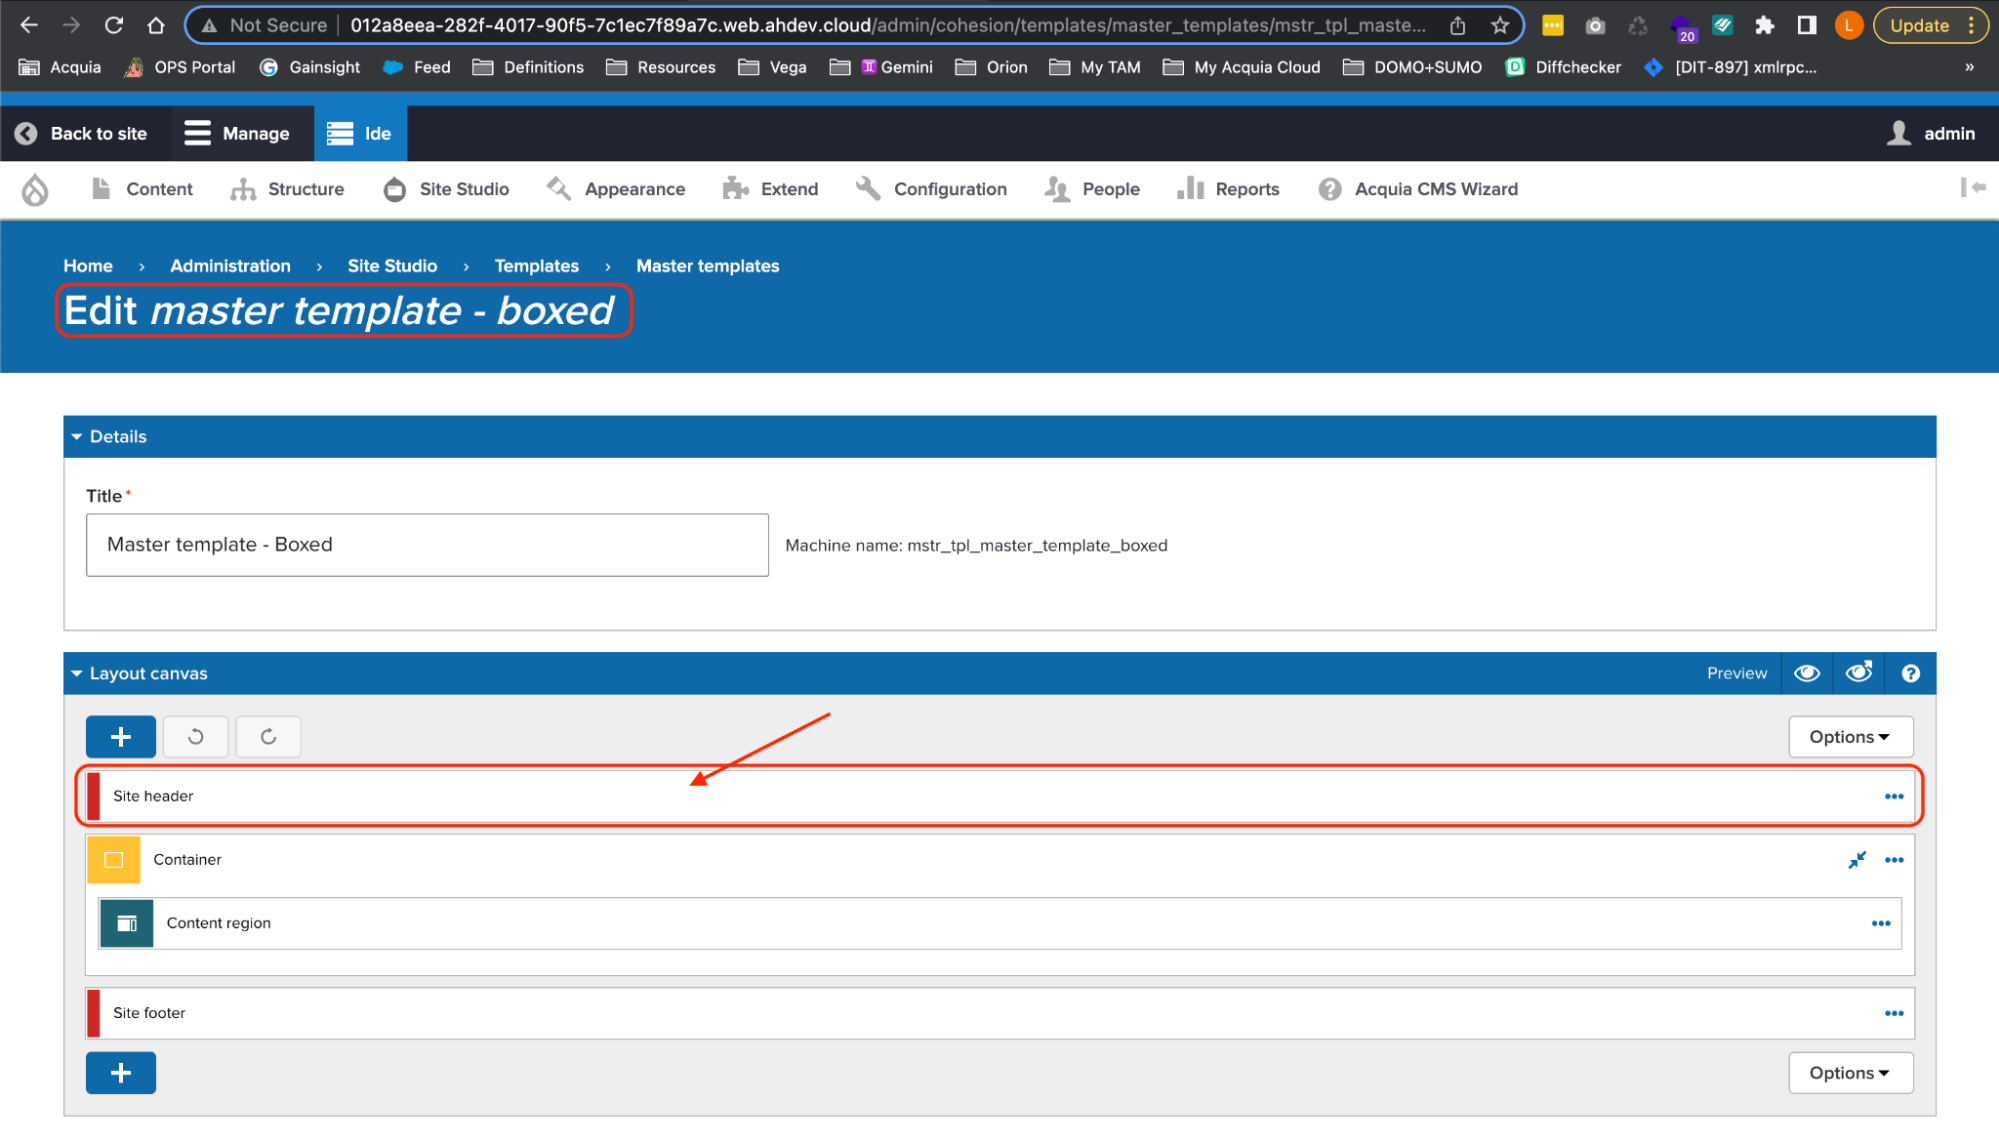
Go back to the Cloud IDE terminal and clear the Drupal cache:
drush crNow, if you visit your Cloud IDE site, you should see the new Logo Icon:
Image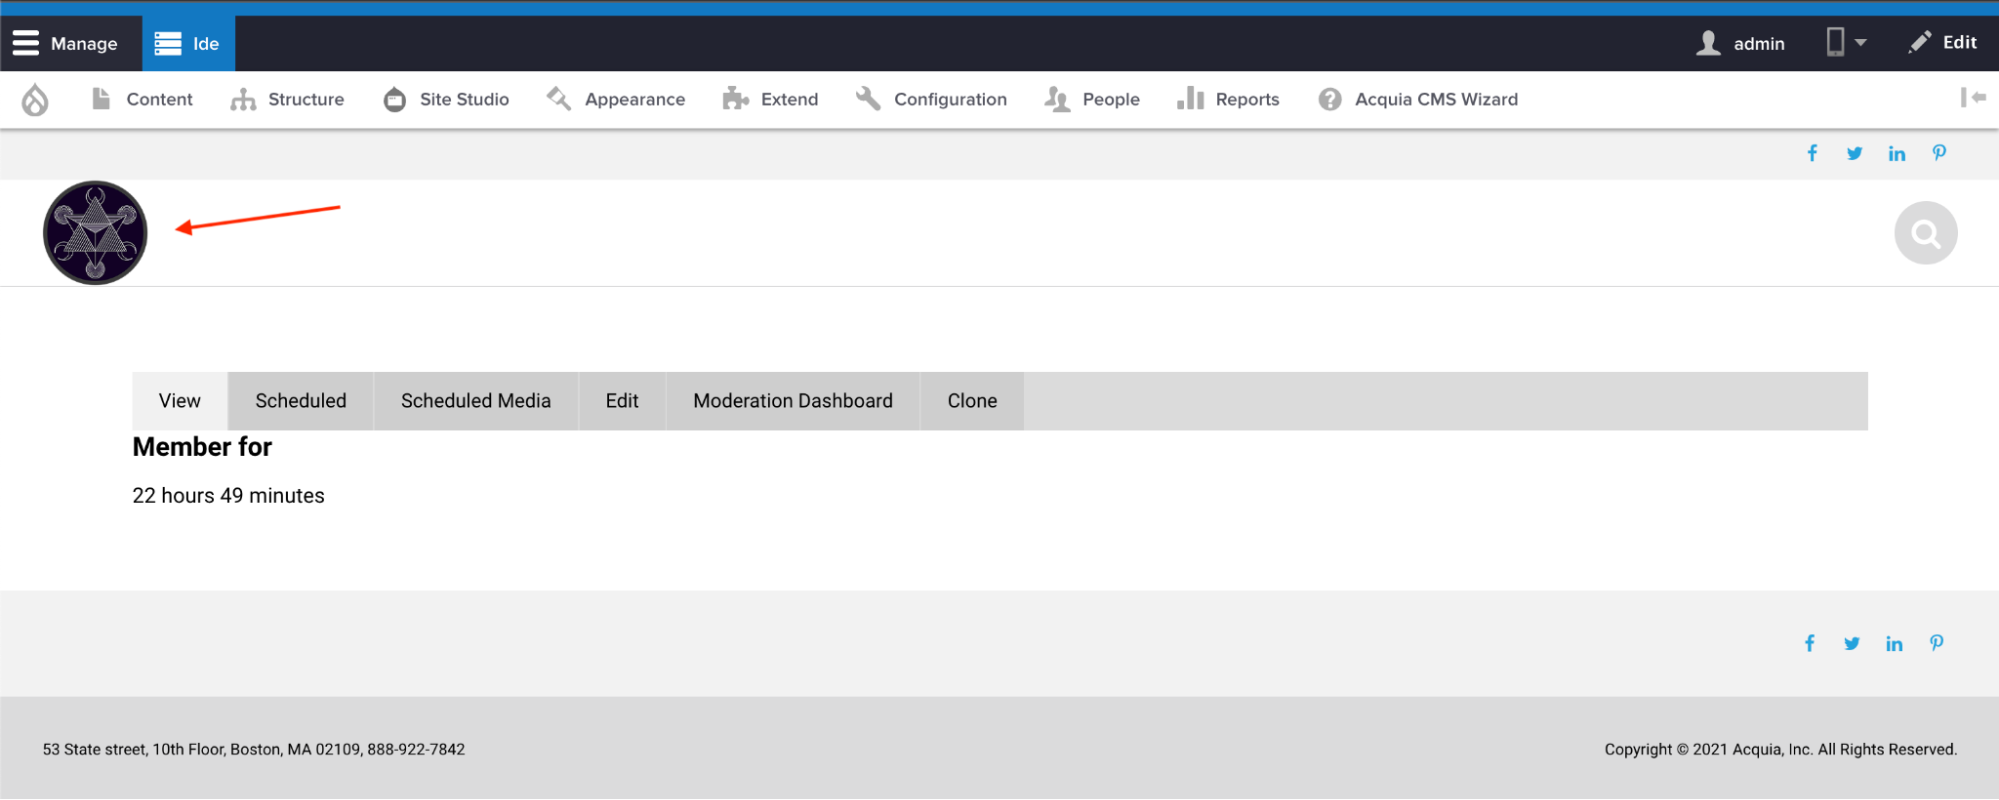
Export your new Drupal and Site Studio configuration
Run the following BLT command each time there is a core update or if a new module was installed:
blt recipes:acsf:init:drushExport the new Drupal configuration:
drush cexSignorelli IDE:~/project (main) $ drush cex [notice] Differences of the active config to the export directory: +------------+------------------------+-----------+ | Collection | Config | Operation | +------------+------------------------+-----------+ | | core.extension | Update | | | config_ignore.settings | Update | +------------+------------------------+-----------+ The .yml files in your export directory (/home/ide/project/config/default) will be deleted and replaced with the active config. (yes/no) [yes]: > yes [success] Configuration successfully exported to /home/ide/project/config/default. /home/ide/project/config/default Signorelli IDE:~/project (main *) $Export the new Site Studio configuration:
drush sitestudio:package:exportFiles in your export directory (../config/site_studio_sync/) will be deleted and replaced with the package config and files. (yes/no) [yes]: > yes ➜ ➜ Exported 264 config and 39 non-config files. ➜ /home/ide/project/config/default Signorelli IDE:~/project (main *) $Deploy your new codebase changes to ACSF
First, you need to push your new codebase changes to your repository:
git add -A
git commit -m "BLT-003: Shield module and new Site Studio Logo Icon."
git push
Deploy your codebase to ACSF:
blt artifact:deployI named this new deployed code: 1.0.2-tamacsf
Signorelli IDE:~/project (main) $ blt artifact:deploy
Would you like to create a tag? (y/n) y
Enter a valid commit message [BLT-004: Shield module and new Logo Icon.]
Enter the tag name for the deployment artifact, e.g., 1.0.0-build 1.0.2-tamacsf
Go to the ACSF Management Console of one of your lower environments, for this tutorial, I’m using the test environment. Navigate to Administration -> Update code:
Image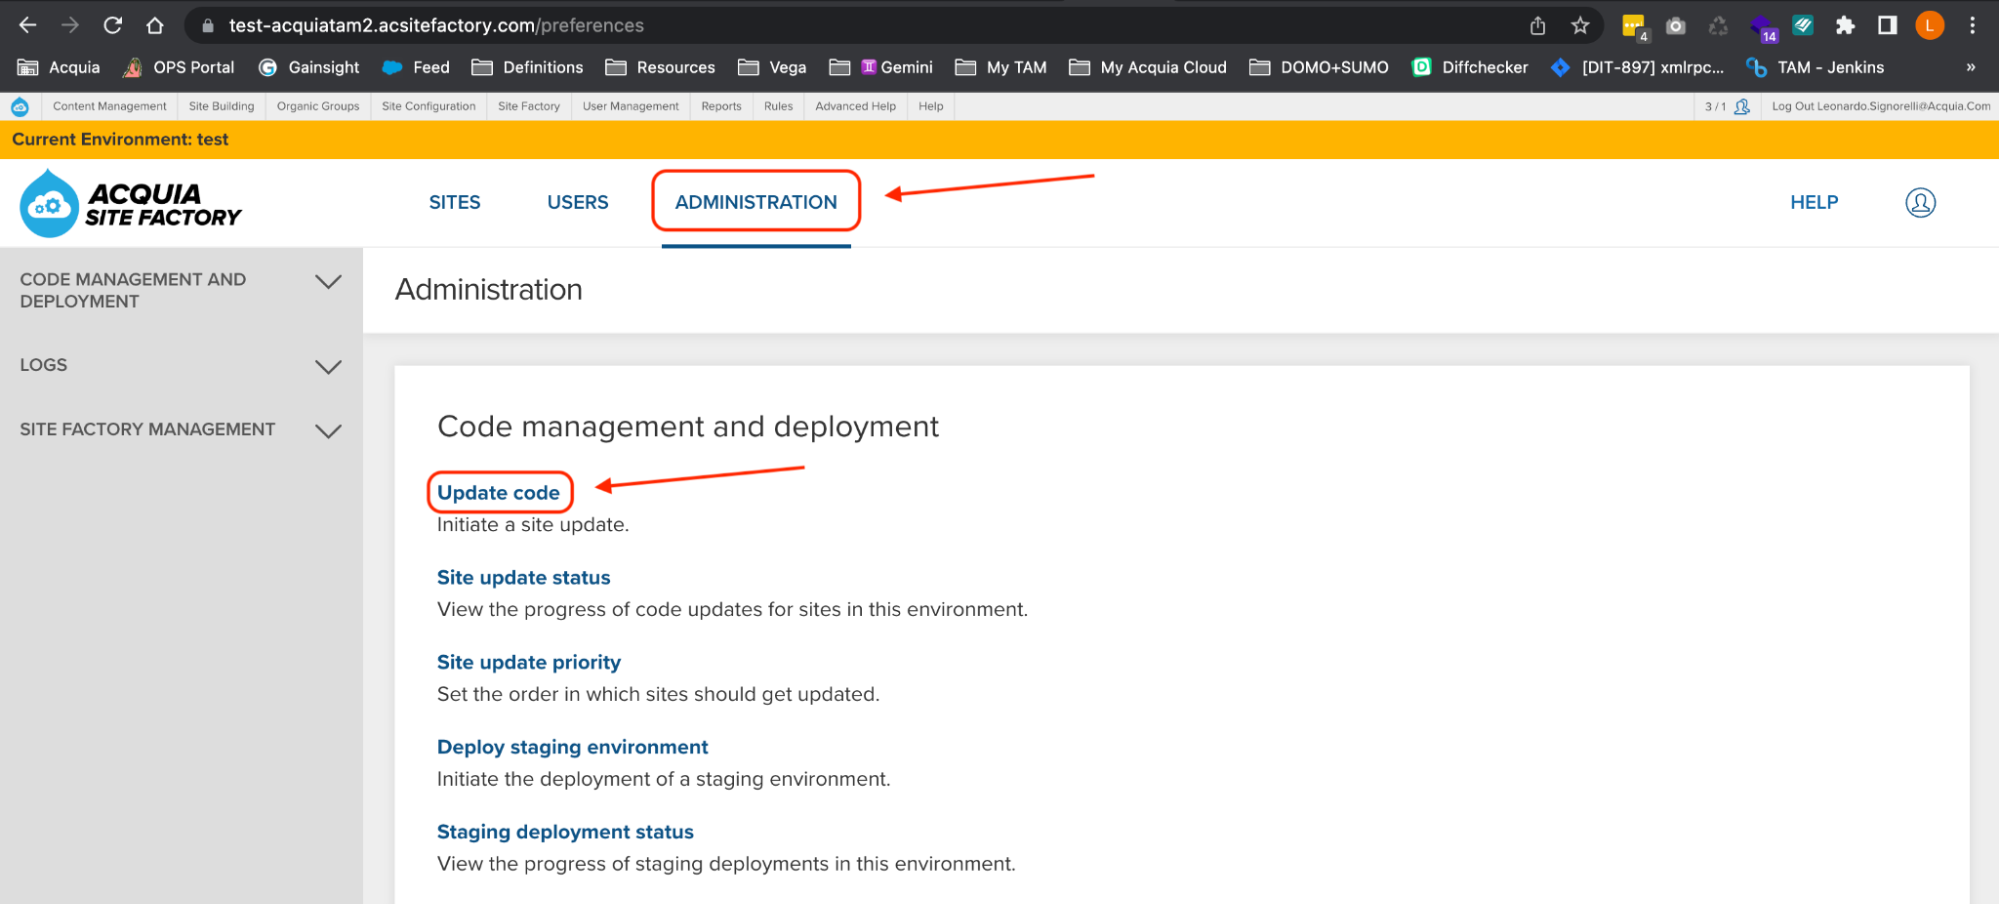
On the Site Update page, use the dropdown to select your new codebase (1.0.2-tamacsf):
Image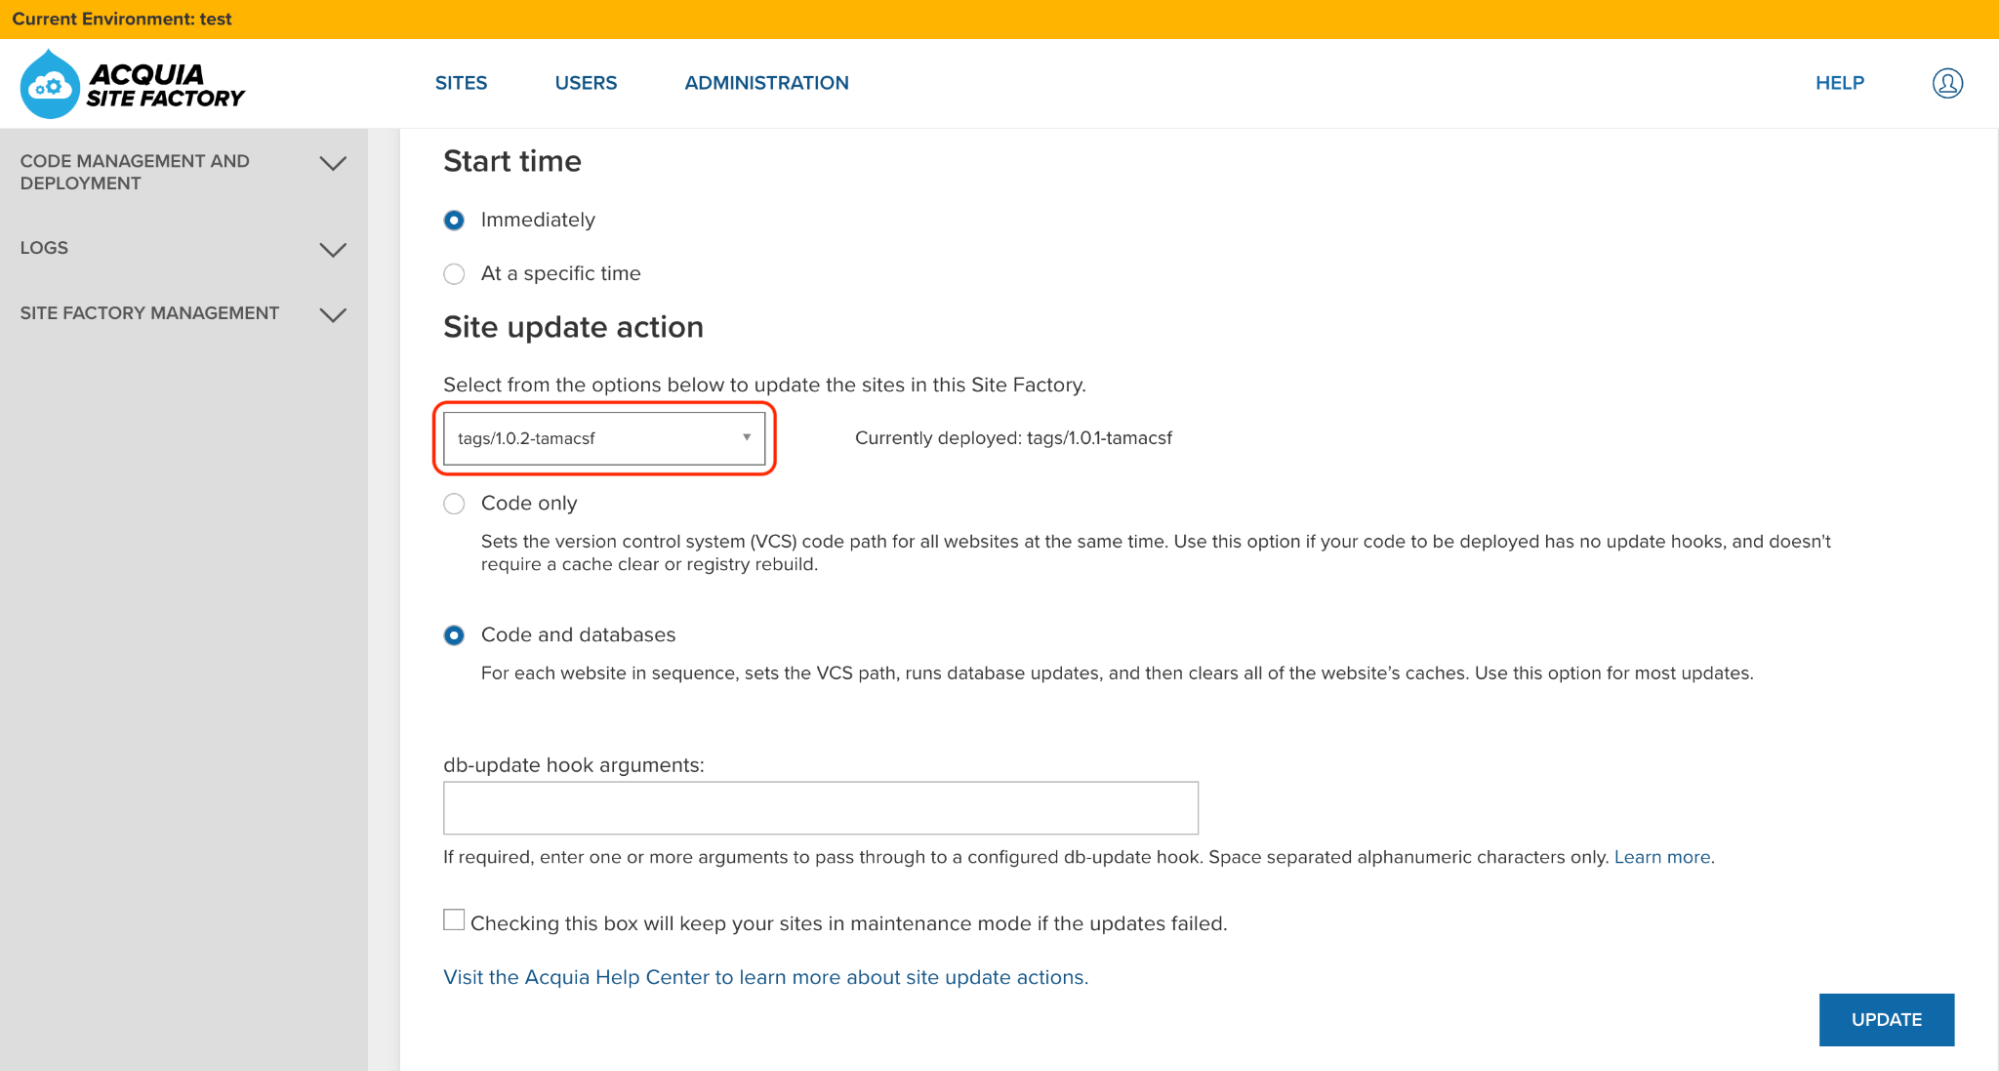
Click the Update button and wait until the update process finishes:
Image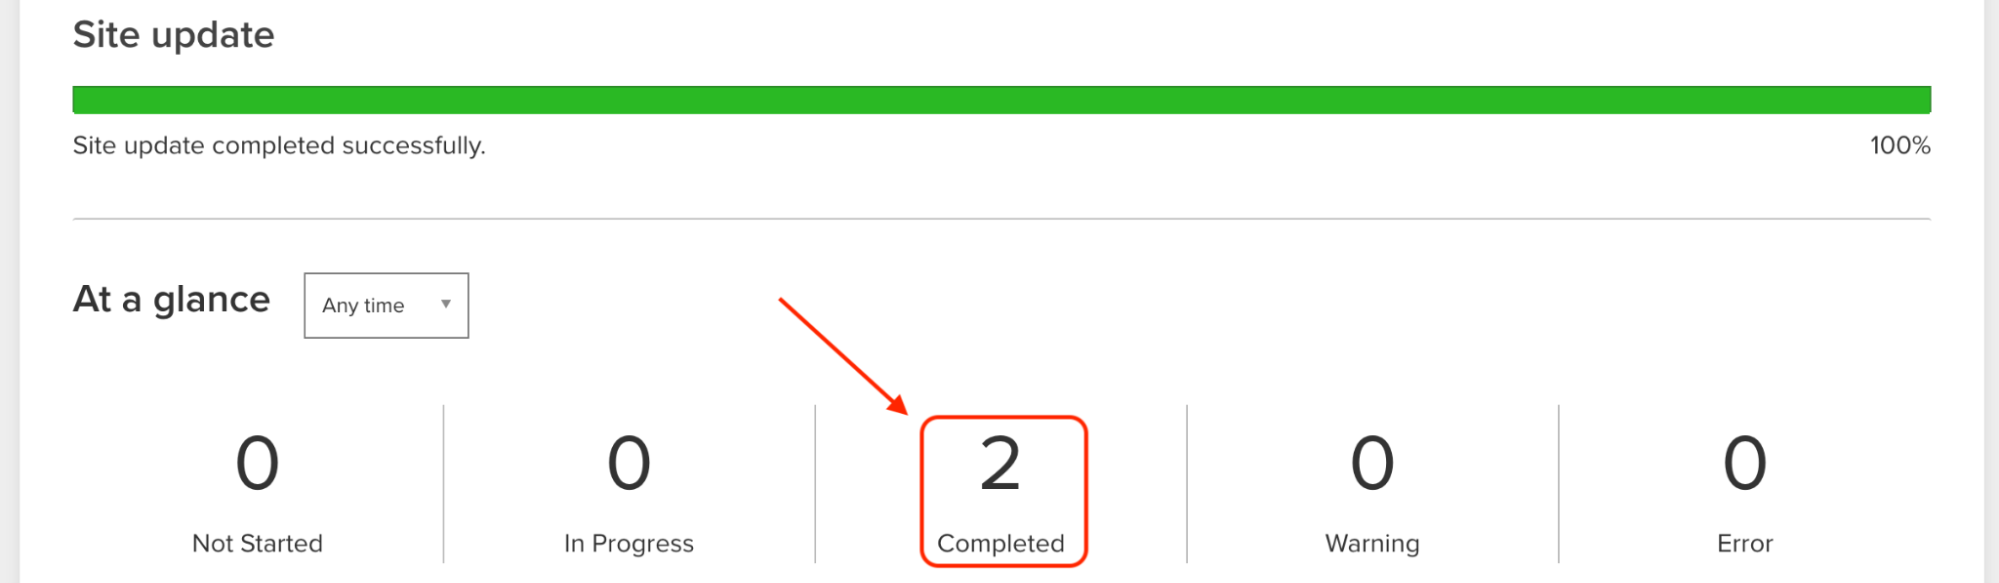
Check the changes in your existing ACSF sites
After you pushed your new codebase to the test environment and updated all the existing sites in there, you should always check that the changes were applied successfully to your sites.
Check your sites to see if they are using the new Logo Icon:
Image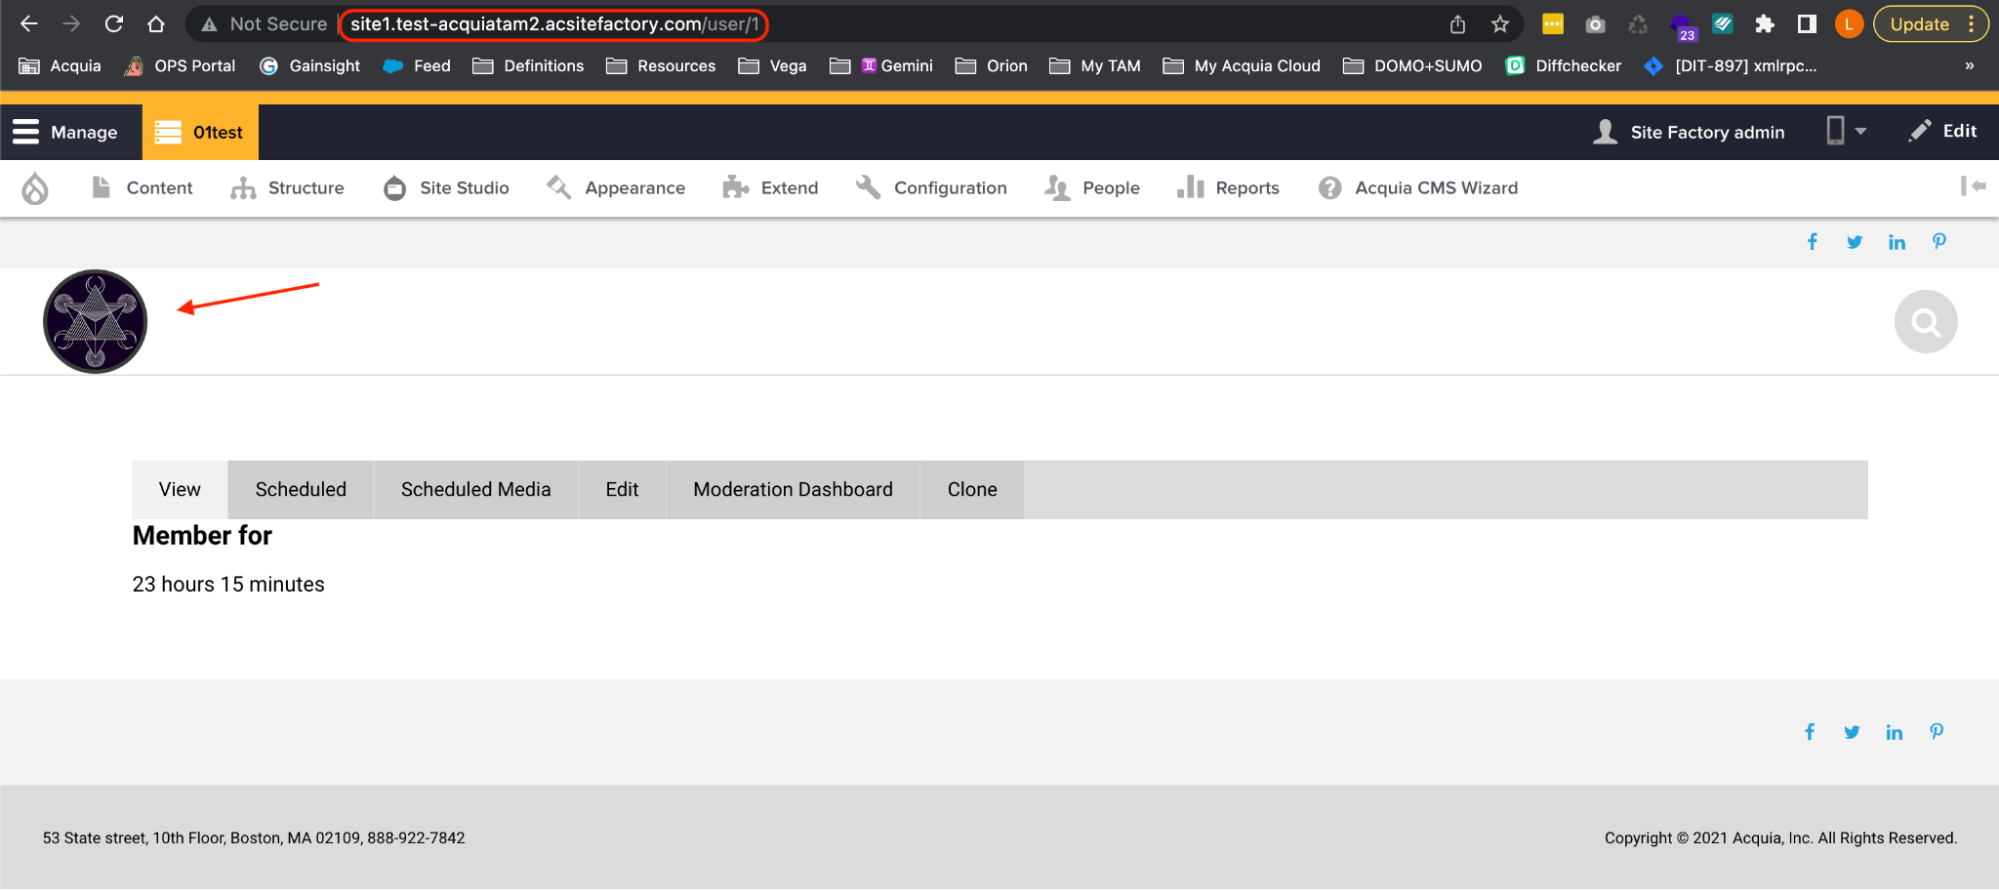
Go to the Config Ignore admin page of one of your ACSF sites to check if it has the new “shield.settings” configuration entity in the list.
Enable the Shield module and check for Configuration Differences
Let’s activate and configure the Shield module on one of your ACSF sites. Go to the Shield module admin page ( /admin/config/system/shield) and click the “Save configuration” button without activating the Shield module and making any changes yet. This will generate the default shield.settings configuration for this site:
Image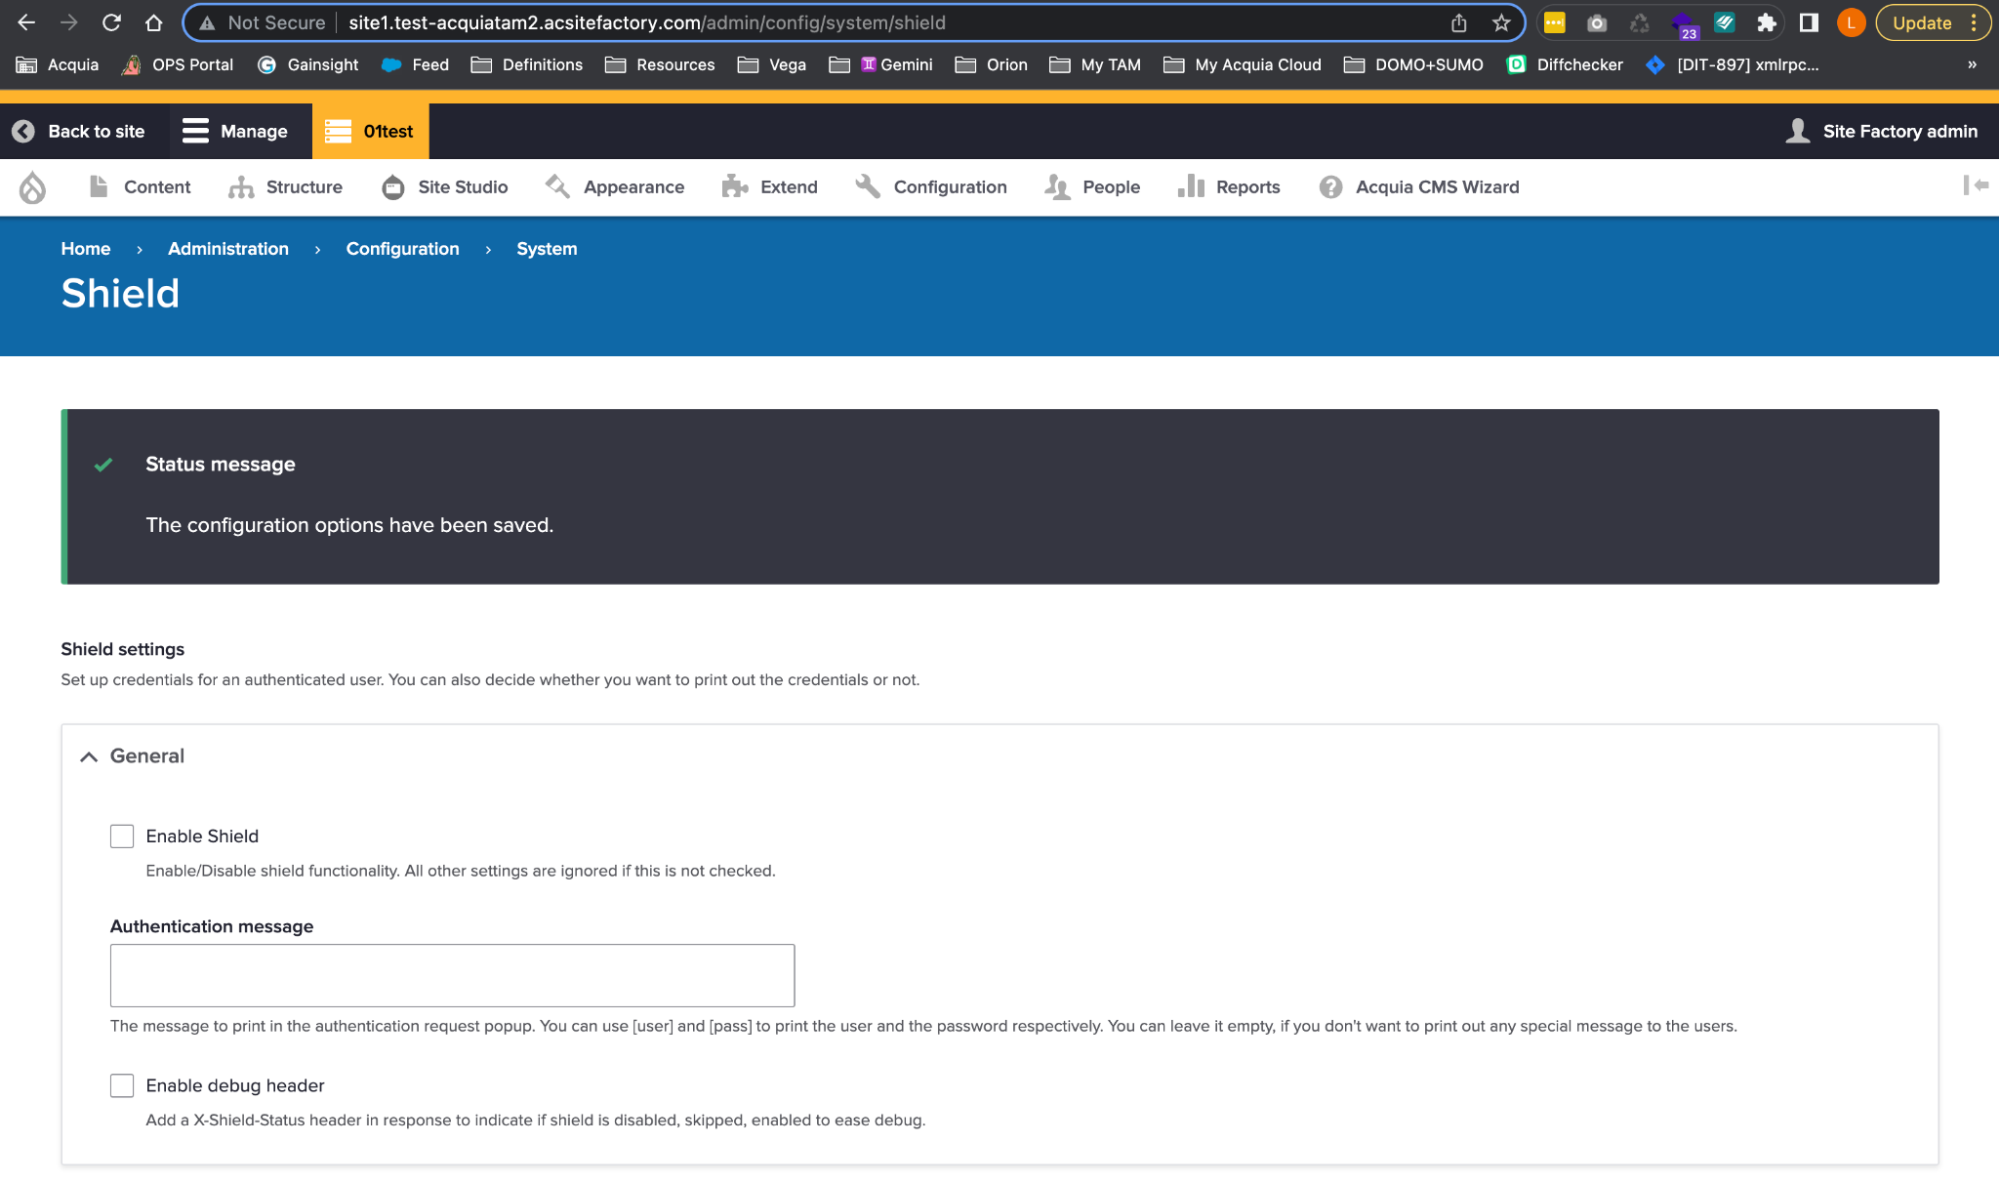
Now that the shield.settings configuration exists on this site’s database, check the “Enable Shield” checkbox and assign a user and password under the Credentials section. Click the “Save configuration” button to save the changes:
Image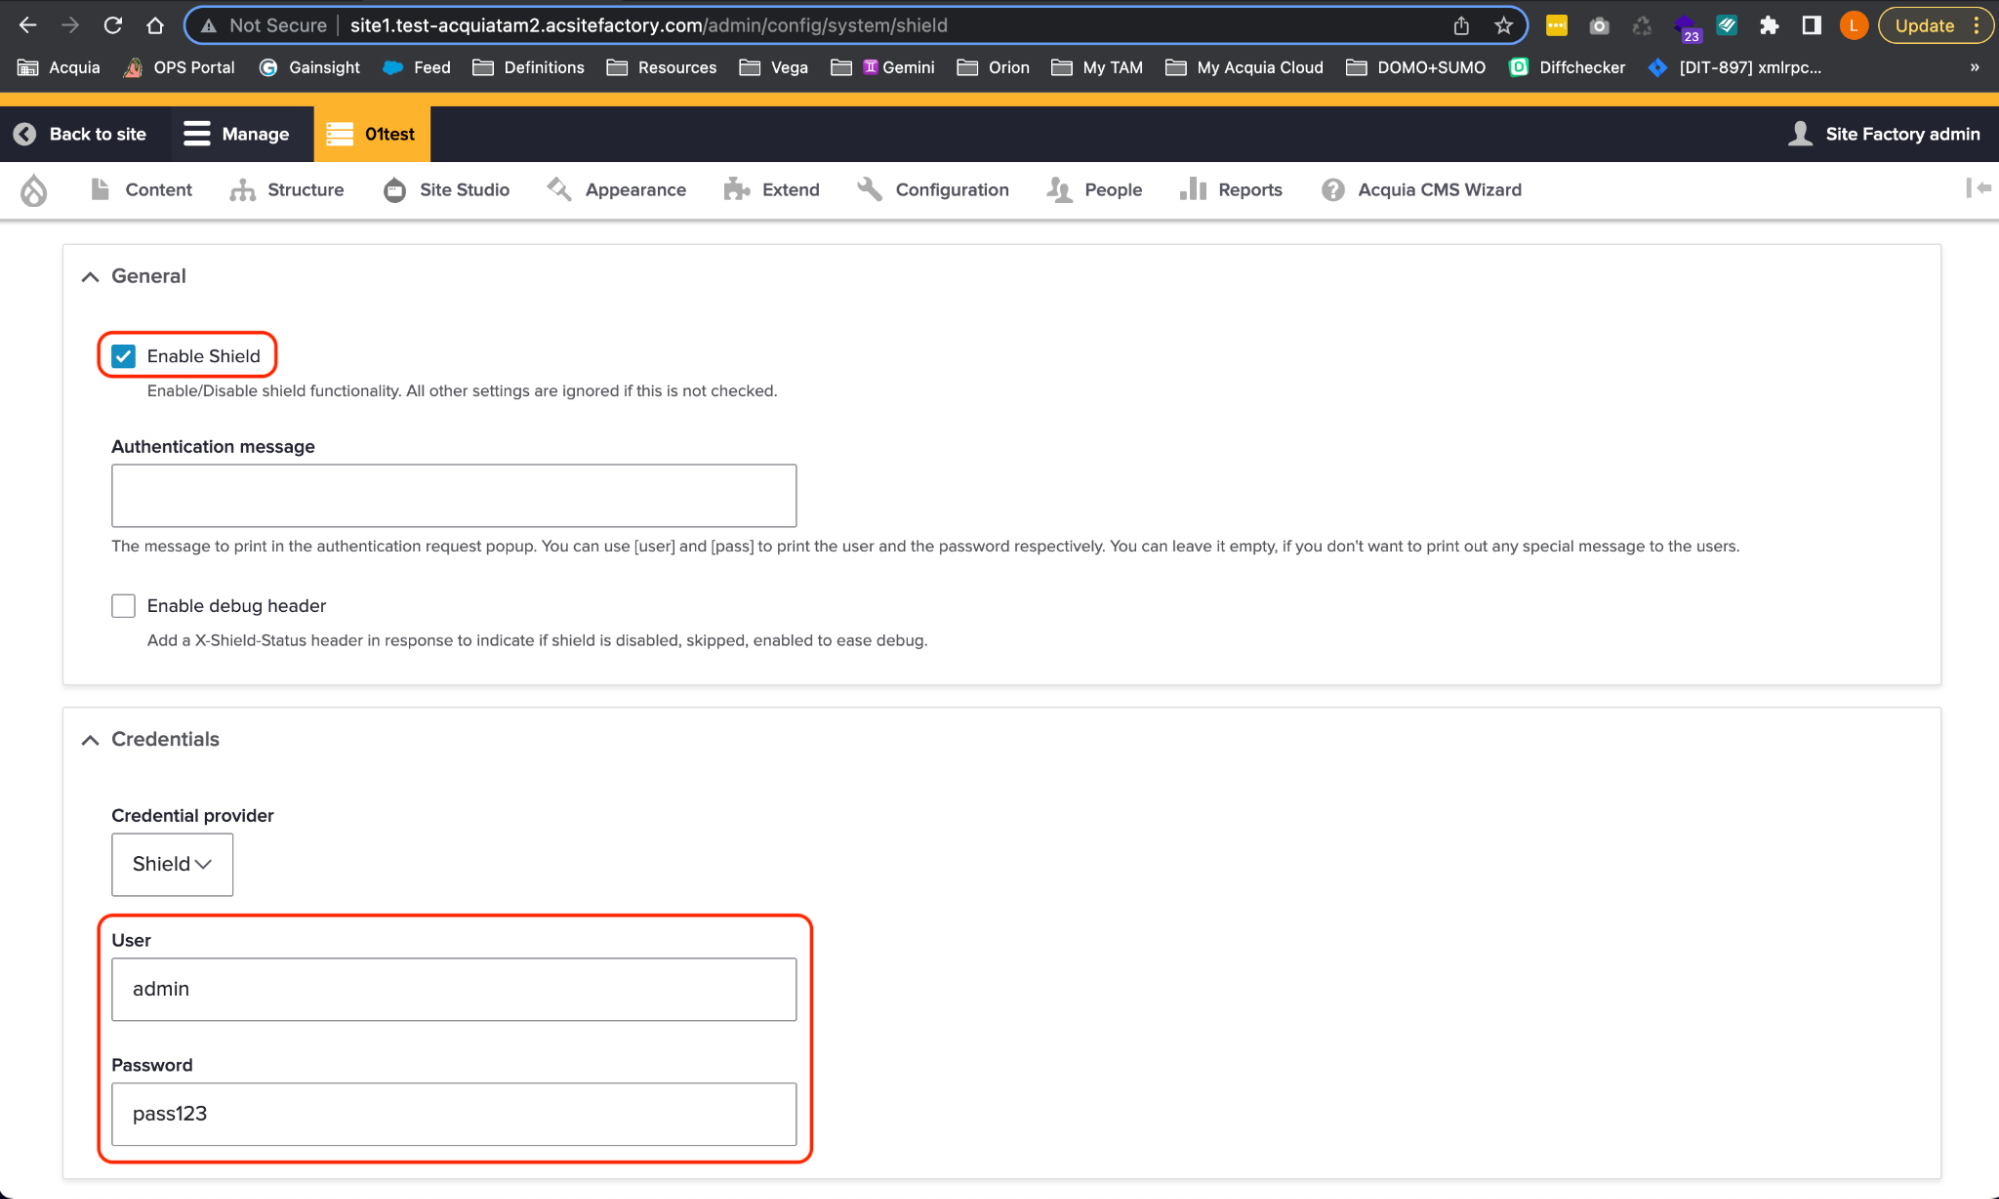
You should see the Shield “Sign In” prompt right after you hit the “Save configuration” button:
Image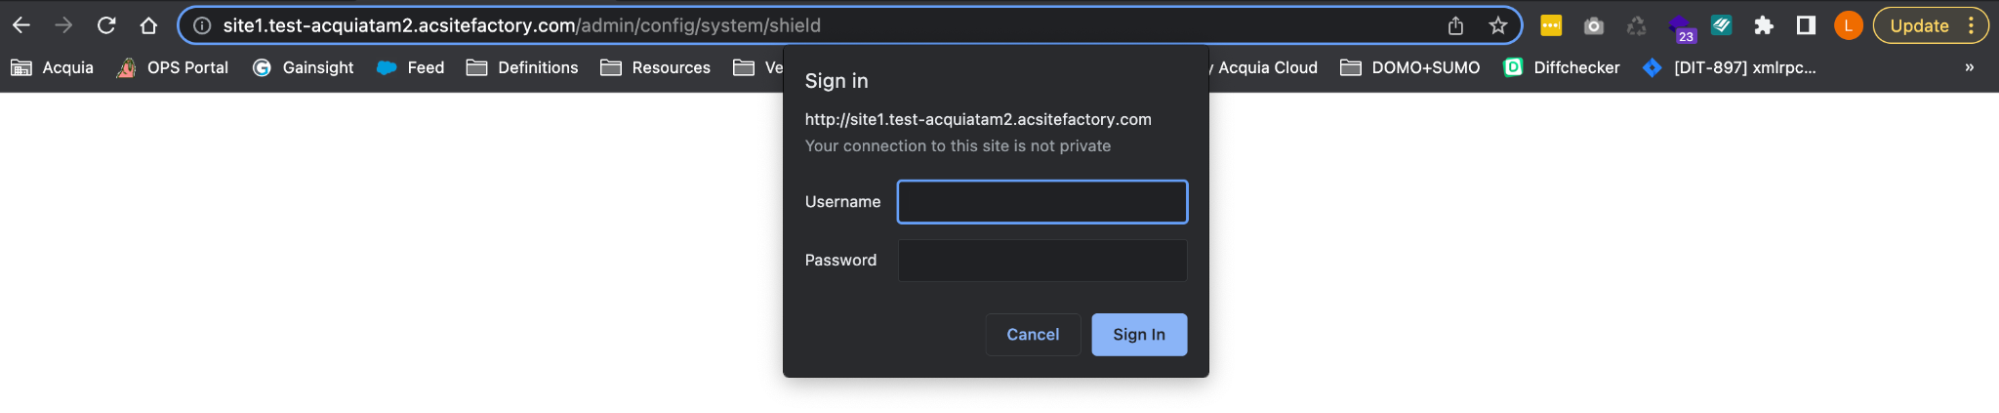
Enter your Shield credentials to test everything is working fine.
Check for configuration differences
Now that one of your sites has the Shield module activated, you should check if there are any configuration differences.
Go to your Cloud IDE terminal and execute “drush cex” against your ACSF site that has the Shield module activated:
Signorelli IDE:~/project (main) $ drush @site1.01test cex
[notice] The active configuration is identical to the configuration in the export directory (../config/default).
../config/default
Connection to acquiatam201test.ssh.enterprise-g1.acquia-sites.com closed.
Signorelli IDE:~/project (main) $
There are no configuration differences, this indicates that we have successfully configured the Config Ignore module to ignore any configuration changes generated by the Shield module on any of your ACSF sites.
Create a new ACSF site to test your new codebase
It’s recommended that you always create a new site to test that your codebase is working fine and that it doesn’t create configuration differences.
Create a new ACSF site using your new codebase. Go to Sites and select your group:
Image
Click the “Create a new Site” button.
Provide a name to your new site (Example: site3), and click the “Create Site” button:
Image Image
Image
Check your new site for configuration differences
Go back to your Cloud IDE and create a new Drush alias for your new ACSF site using the aliasgenerator.sh bash script.
Execute the aliasgenerator.sh bash script and follow the instructions:
./aliasgenerator.shSignorelli IDE:~/project (main) $ ./aliasgenerator.sh <-------> <---------------> <---------------------------------> | Drush Alias Generator | <---------------------------------> <---------------> <-------> |---------------------| | Main Menu | |---------------------| | 1 - New Drush Alias | | 2 - Exit | |---------------------| Select a number from the Main Menu: 1 Selected: New Drush Alias ------------------------- Make sure to enter the name of a site you already created in your ACSF account. Example: If the ACSF URL assigned to your new site is site1.acquiatam2.acsitefactory.com Enter site1 Provide the name of the site you want to create a Drush alias: site3 Is this site name correct?: "site3" (Yes/No/Cancel = y/n/c) y Generating the drush alias for site3.. Ready! Going back to the Main Menu... |---------------------| | Main Menu | |---------------------| | 1 - New Drush Alias | | 2 - Exit | |---------------------| Select a number from the Main Menu: 2 Selected: Exit -------------- Exiting this script... Signorelli IDE:~/project (main) $Check your new site for configuration differences:
drush @site3.01test cexSignorelli IDE:~/project (main) $ drush @site3.01test cex [notice] The active configuration is identical to the configuration in the export directory (../config/default). ../config/default Connection to acquiatam201test.ssh.enterprise-g1.acquia-sites.com closed. Signorelli IDE:~/project (main) $There are no configuration changes in your newly installed ACSF site. That means your codebase was configured correctly.
Congratulations on successfully completing the fourth phase of the five-step guide! You have learned about the standard Site Factory deployment workflow with Site Studio by making minor modifications to the existing codebase and pushing the new updates to your ACSF sites. Furthermore, you have gained valuable knowledge on configuring Drupal to have configuration differences between your ACSF sites through the use of the Config Ignore module.
Now, let us move on to the next phase (optional), where you will expand your understanding by learning how to configure your ACSF codebase to support multiple Site Studio Configuration folders. In addition, you will also discover how to assign your ACSF sites to use the specific Site Studio configuration folder that you desire.
Next phase: Configure multiple Site Studio sync directories


