
Configure a Drupal 10 codebase with Drupal CMS and Site Studio for Site Factory: Part 5
- Last updated
- 3 minute read
Goal
Configure multiple Site Studio Sync folders.
Overview
This is the last part of a five-part comprehensive tutorial covering the set up of a new Drupal 10 codebase with Acquia CMS and Site Studio for Acquia Cloud Site Factory (ACSF). In the previous section, you learned how to configure Drupal to have configuration differences between your ACSF sites using the Config Ignore module. In this section, you are going to learn how to configure your Drupal ACSF codebase to be able to have multiple Site Studio Configuration folders and how to assign your ACSF sites to use the desired Site Studio configuration folder.
This guide has been divided into five parts:
- Set up Cloud IDE, Install Drupal 10, and Prepare your Codebase for Site Factory
- Acquia CMS and Site Studio installation and configuration for Site Factory
- Create a Custom Profile and test New Site Creation with Site Factory
- ACSF Deployment Workflow with Site Studio
- Optional: Configure multiple Site Studio sync directories
This fifth and final section of the tutorial is optional. Its purpose is to showcase how to configure multiple Site Studio Configuration folders and assign your ACSF sites to use the desired Site Studio configuration folder. The reason for having multiple Site Studio Configuration folders is to allow for distinct Site Studio templates across your ACSF sites.
To illustrate the configuration of multiple Site Studio configuration folders, I will modify the Site Logo of one of the Site Studio templates to highlight the difference between the two Site Studio templates.
However, if your only requirement is to modify logos (as shown in this guide) or make a few changes to the templates per site, there is no need for different Site Studio Configuration folders. You can achieve the same outcome by using either the included Site Studio style guide manager module or a module like Site Settings and Labels. This approach would maintain the Site Studio configuration as a single source, making management significantly easier. In the scenario where you have 100 sites and 80 of them adhere to one design system while the others require a completely different design/system, this guide is intended for you.
-
Create a new Site Studio sync directory
Go to the terminal of your Cloud IDE instance and create a new Site Studio Sync folder inside the config folder:
mkdir config/site_studio_sync_2This will be the folder where the new Site Studio styles, components, templates and assets will live.
-
Make changes to your Site Studio master templates
Now we will modify the existing Site Studio master templates to create a new variation that some of our ACSF sites will use.
The config/site_studio_sync folder is going to be used to store the “default” Site Studio styles, components, templates and assets. We will use the new config/site_studio_sync_2 folder to store our new Site Studio styles, components, templates and assets.
We are going to make a simple change to the master templates. Login to your Cloud IDE site, navigate to “Site Studio -> Templates -> Master templates” and click the Edit button next to the Master template:
Image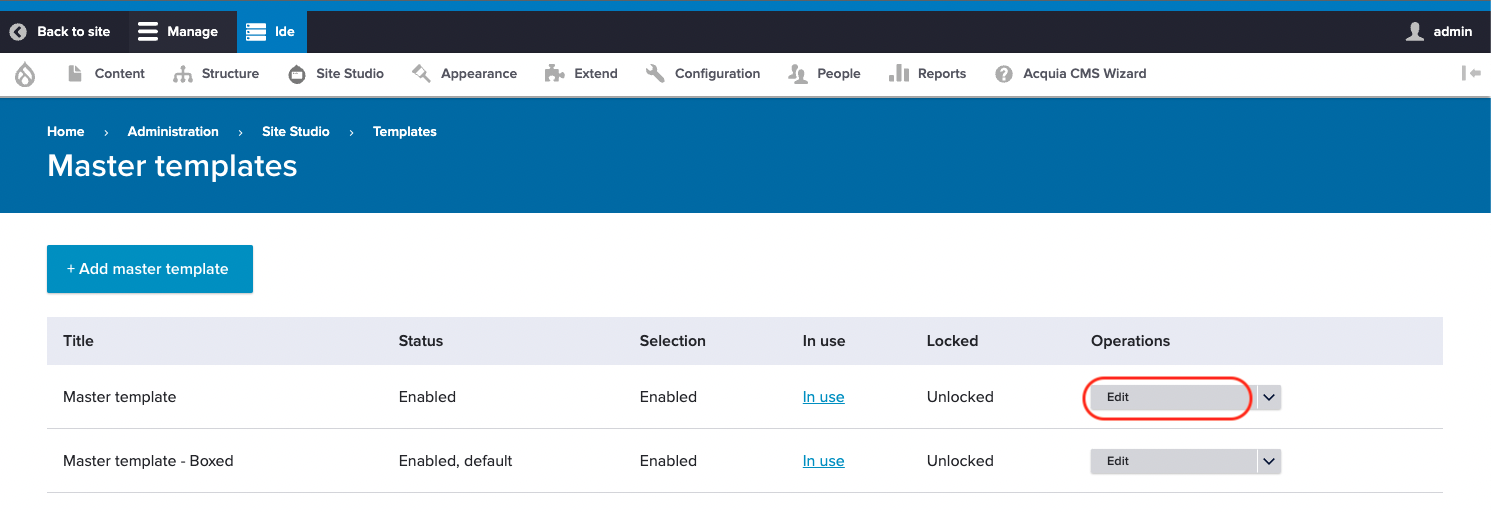
Double click the “Site header” component to replace the existing Site logo with a new one. Click the remove button of the existing Site logo, then click the “Select image” button:
Image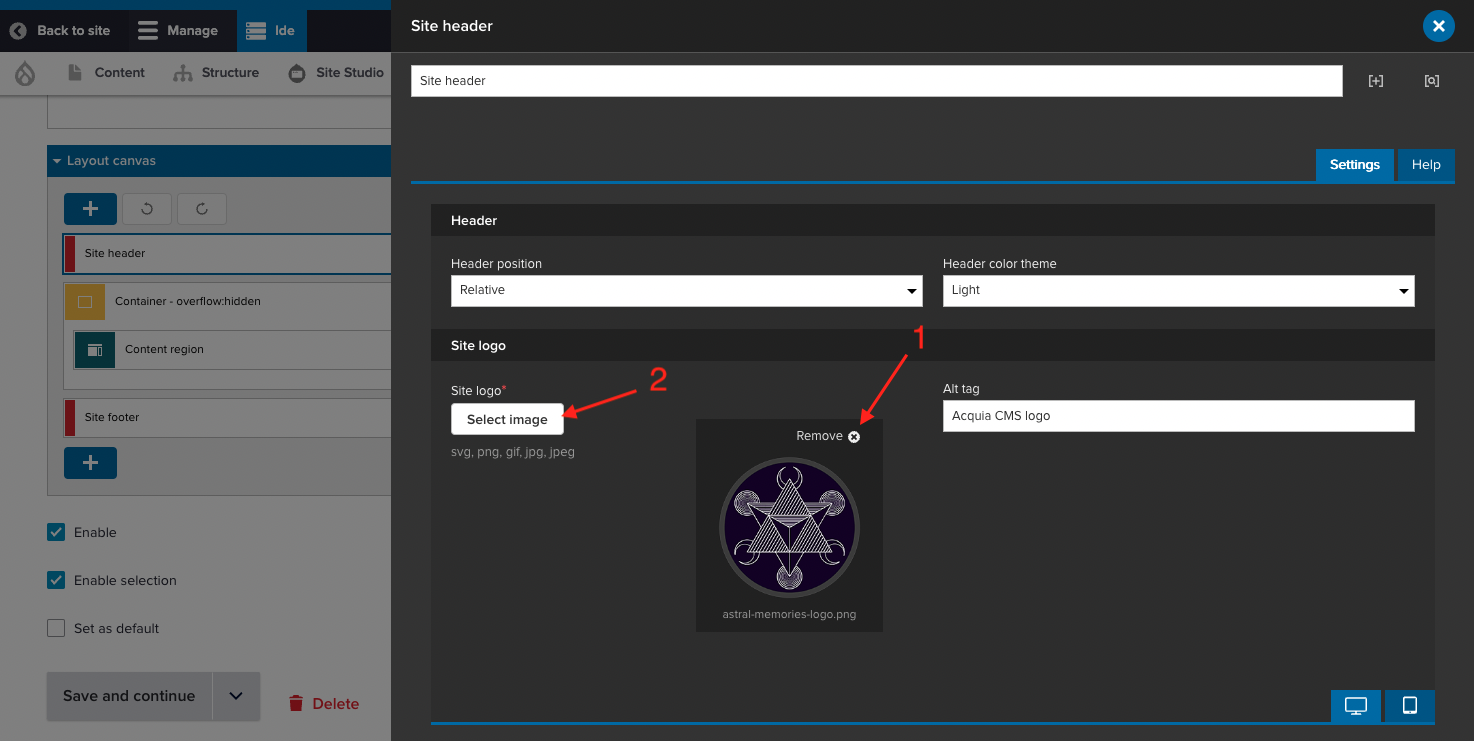
The Imce File Manager window will appear. Click the Upload button and then click the “Add file” button:
Image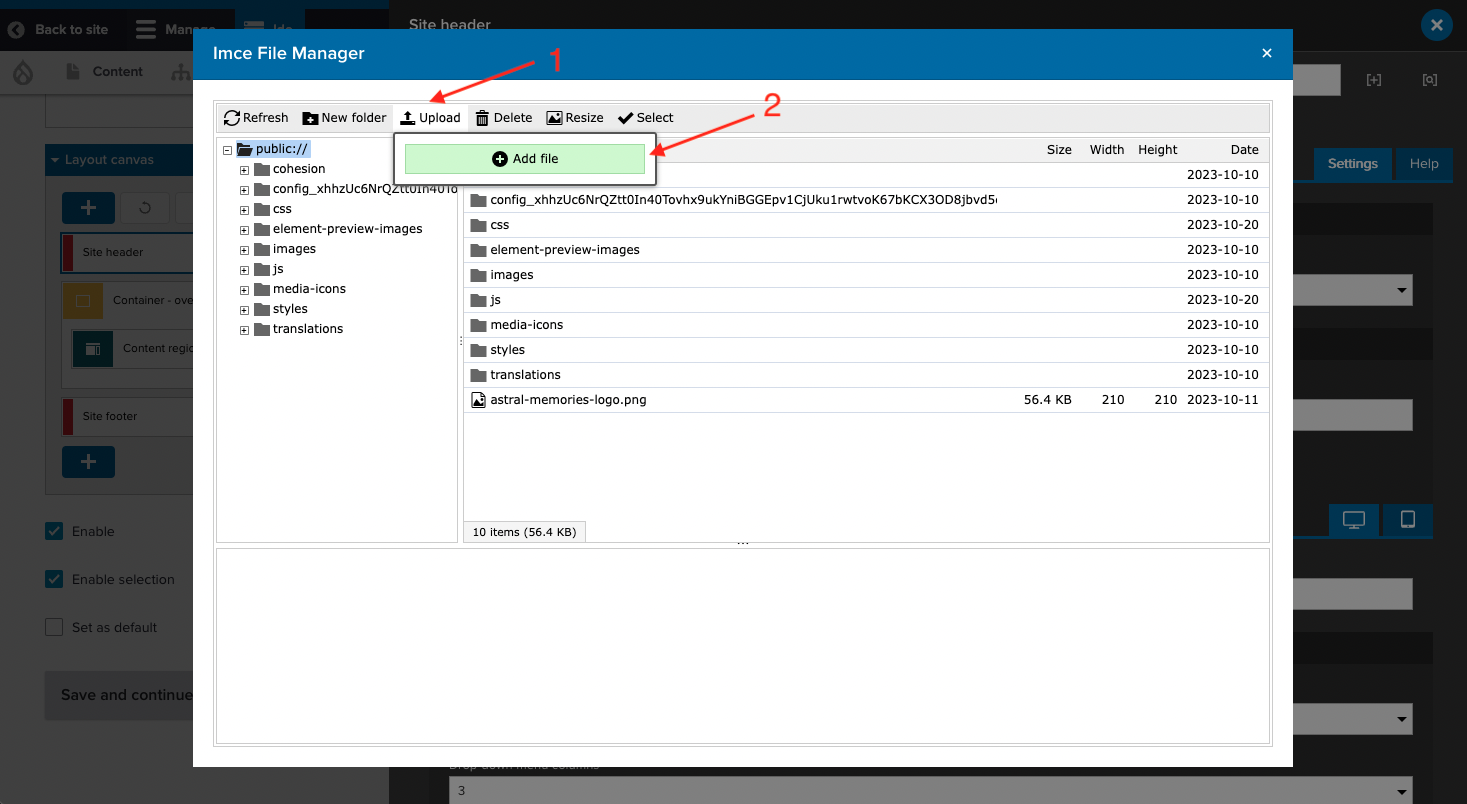
Upload a new image from your computer for the Site logo, make sure the new image is selected and click the “Select” button:
Image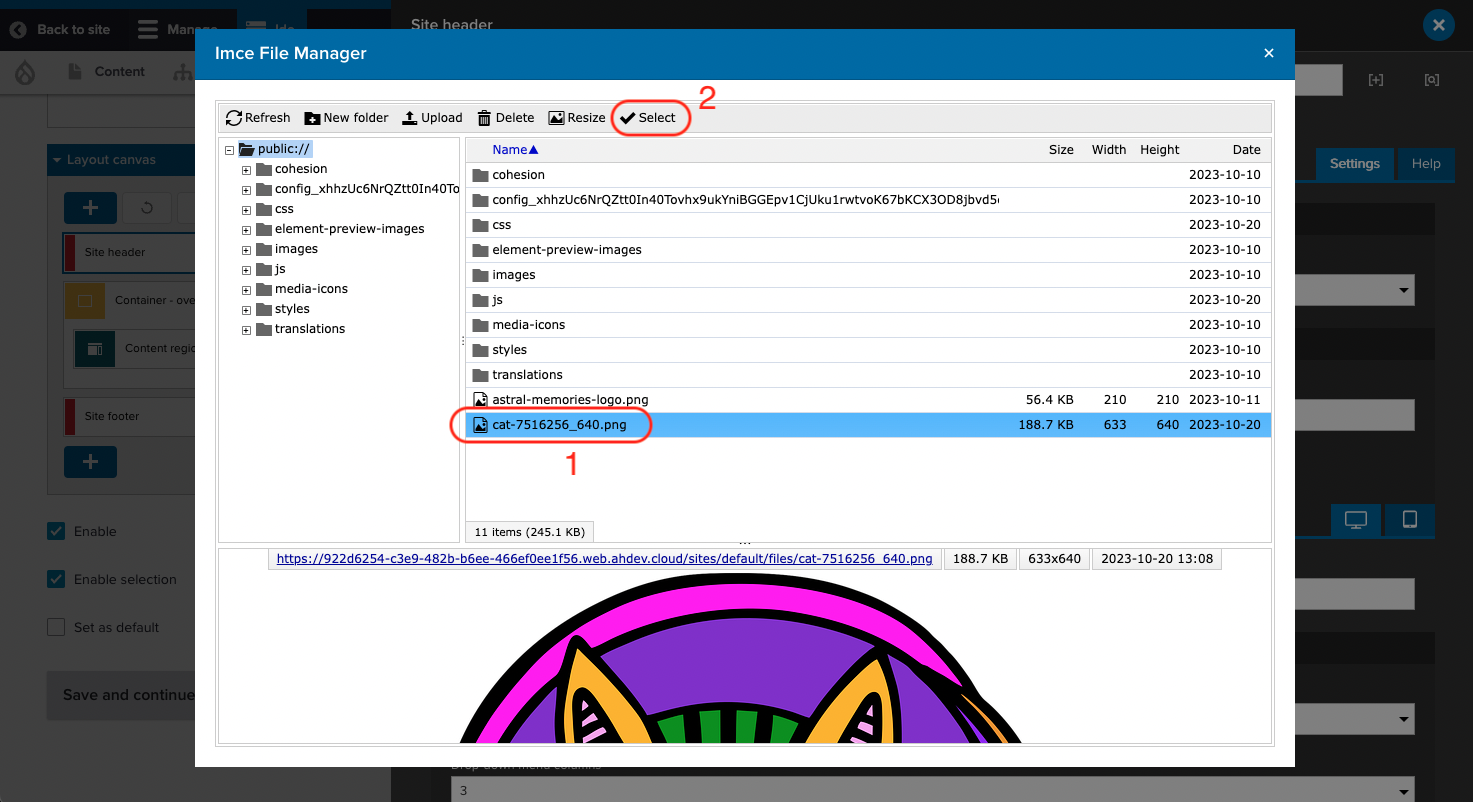
Click the “Apply” button to save the changes to the “Site header” component:
Image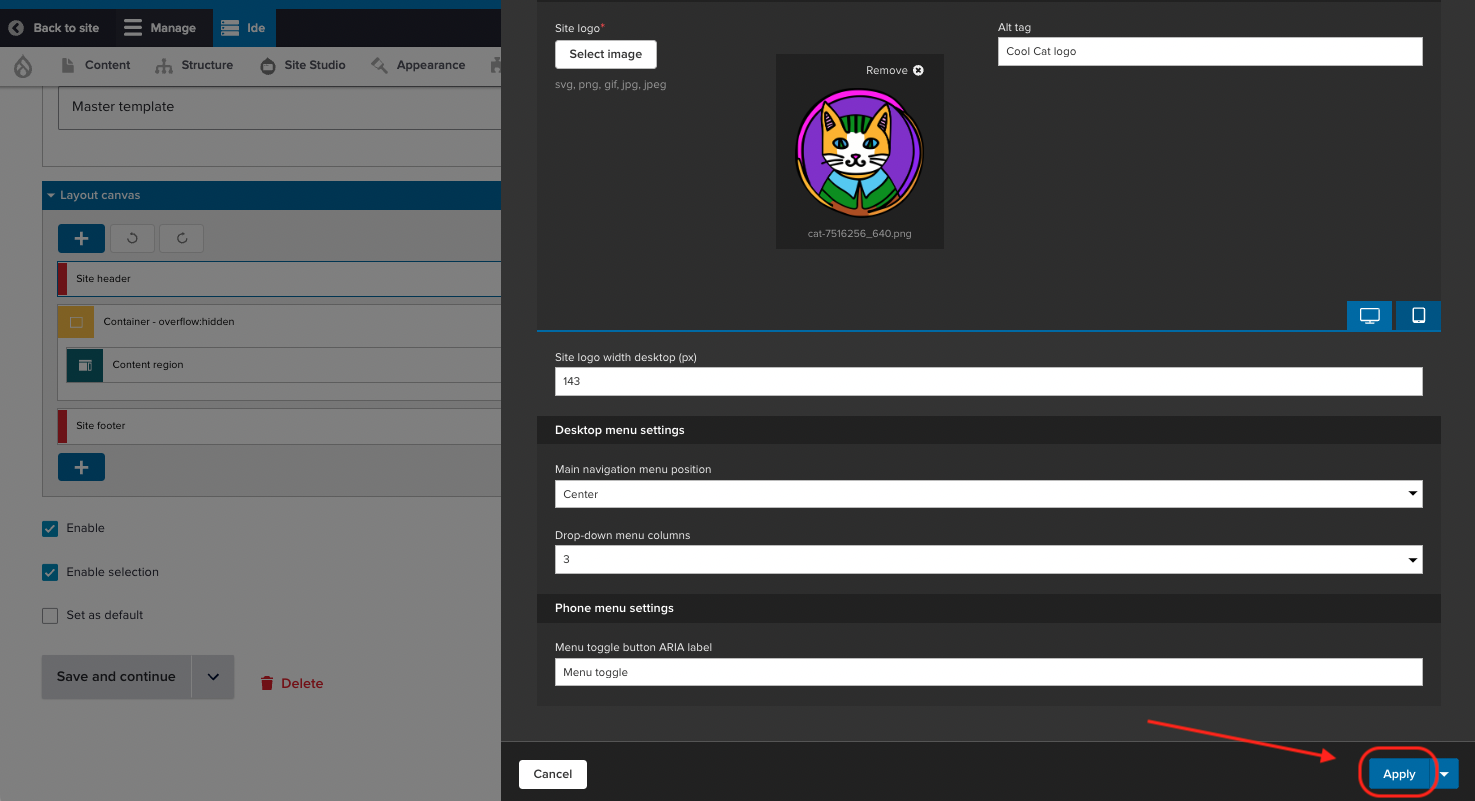
And finally click the “Save and continue” button to save the changes to the master template:
Image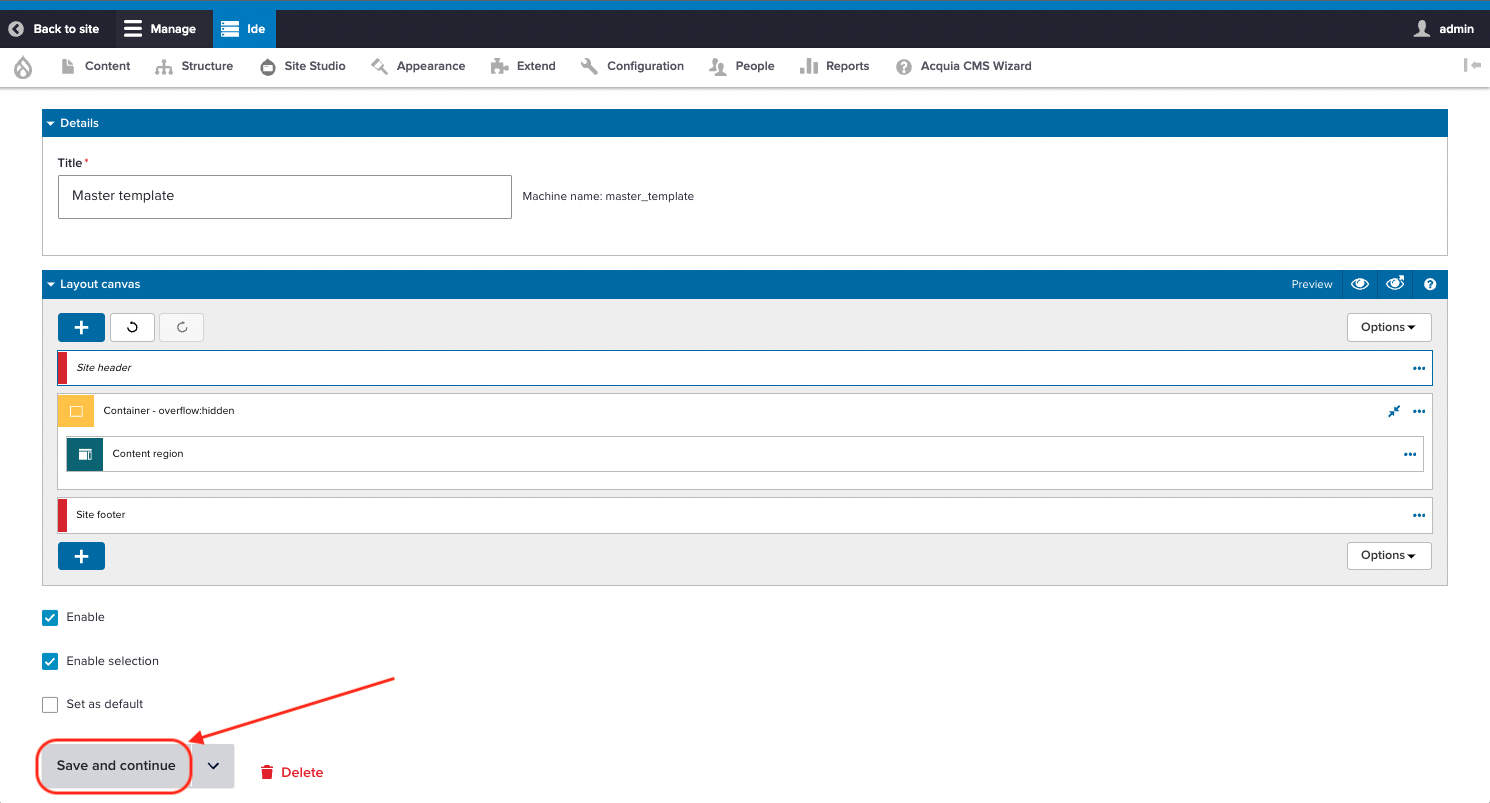
Navigate to “Site Studio -> Templates -> Master templates” and follow the same steps to replace the Site logo of the “Master template - Boxed”:
Image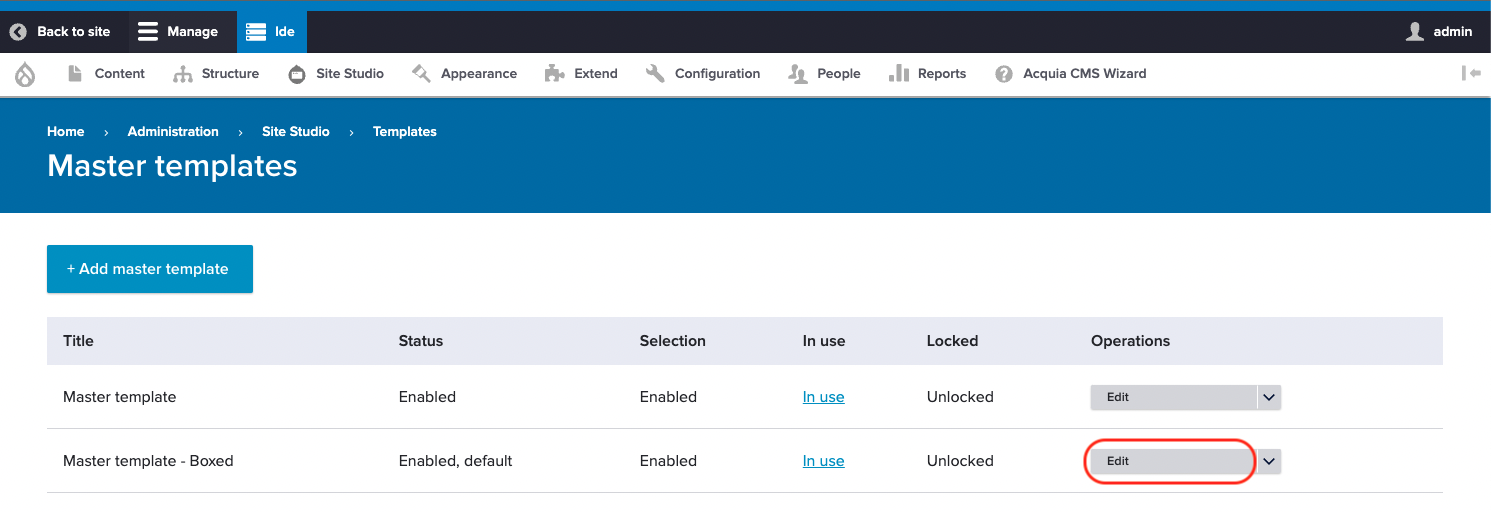
Now when you visit your site, you should see the new Site logo:
Image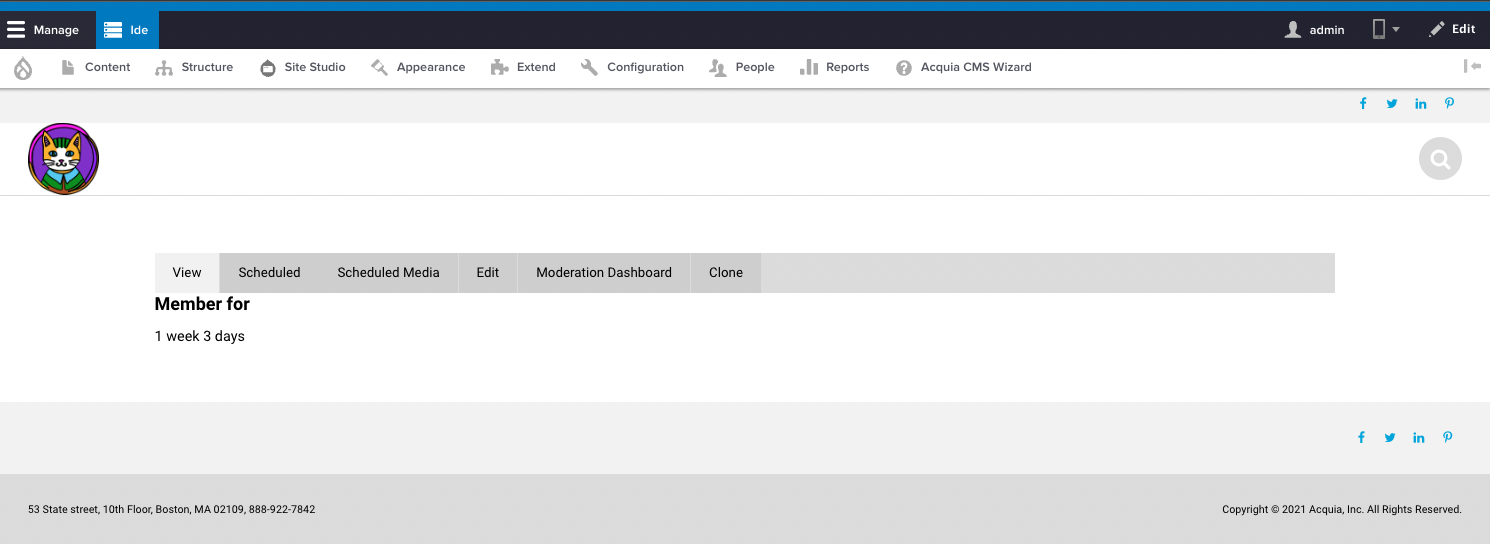
-
Export the new Site Studio changes
Use the following command to export the new Site Studio changes to the new “config/site_studio_sync_2” folder:
drush sitestudio:package:export --path=../config/site_studio_sync_2/Signorelli IDE:~/project (main *) $ drush sitestudio:package:export --path=../config/site_studio_sync_2/ ➜ ➜ Exported 264 config and 39 non-config files. ➜ Signorelli IDE:~/project (main *) $Image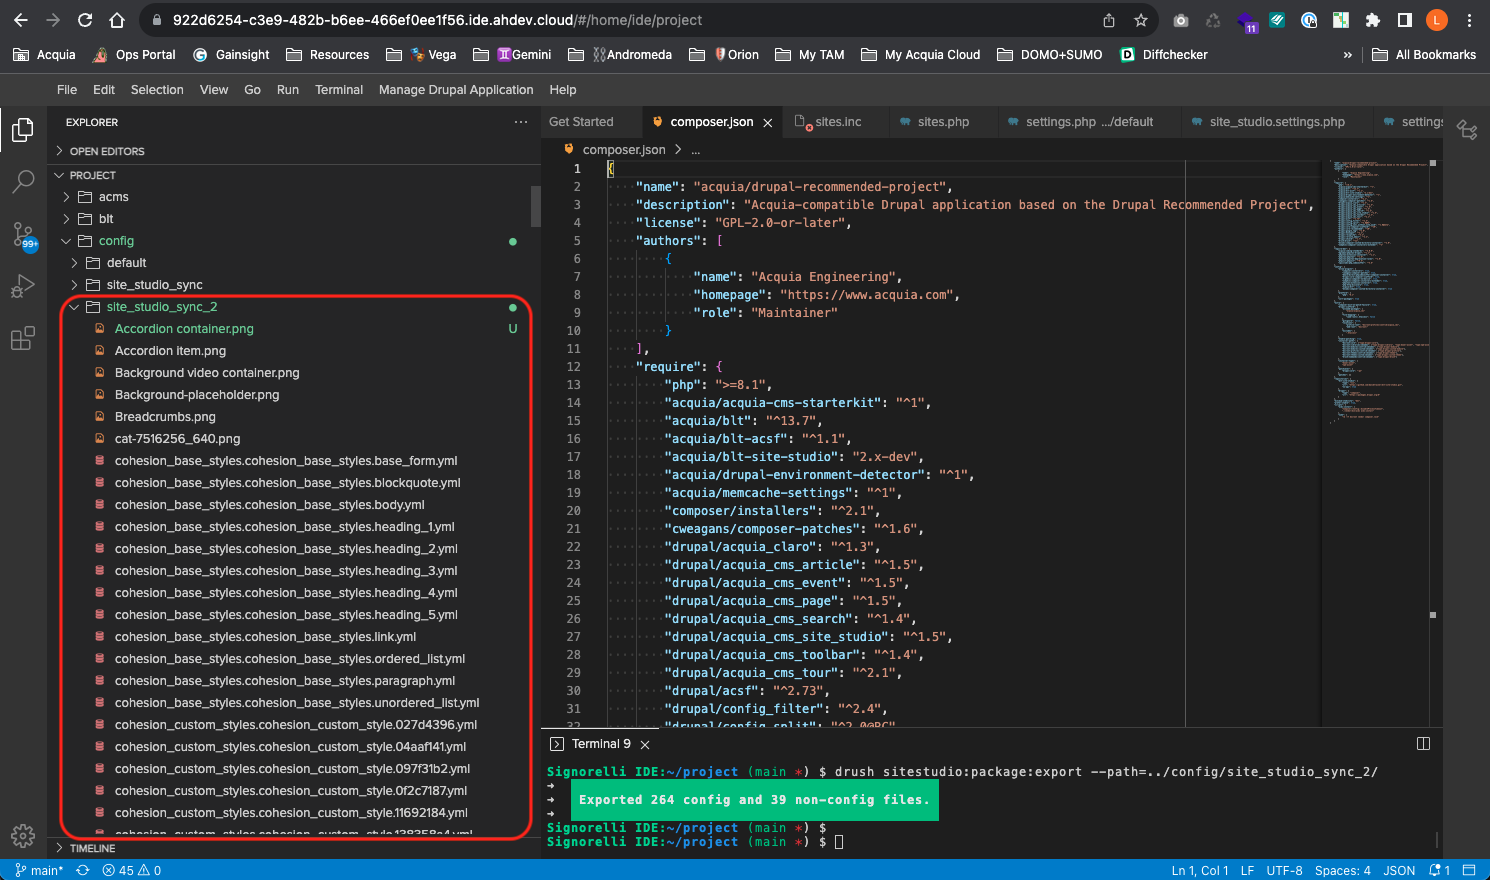
-
Configure the site_studio.settings.php file
To properly assign the correct Site Studio Sync folder for your ACSF sites, we'll make changes to the “site_studio.settings.php” file found in the "docroot/sites/settings/" directory, and with the help of Site Factory site variables, we will inform Drupal of the corresponding Site Studio sync folder for each site within Site Factory.
Assigning Site Factory site variables is achieved through the Site Factory console UI, simplifying the task of associating the appropriate Site Studio Sync folder with each Site Factory site.
Replace the contents of the “site_studio.settings.php” file with the following code:
<?php
/**
 * Define the Site Studio sync directory for the current Site Factory site.
 */
// Check if this is an Acquia environment
if (isset($_ENV['AH_SITE_ENVIRONMENT'])) {
  // Check the environment
  switch ($_ENV['AH_SITE_ENVIRONMENT']) {
    case '01dev':
    case '01test':
    case '01live':
      // Check if this site should use a different Site Studio Sync folder
      if ($GLOBALS['gardens_site_settings']['flags']['cohesion'] == 'site_studio_sync_2') {
        $settings['site_studio_sync'] = '../config/site_studio_sync_2';
      } else {
        $settings['site_studio_sync'] = '../config/site_studio_sync';
      }
      break;
    case 'ide':
      $settings['site_studio_sync'] = '../config/site_studio_sync';
      break;
    default:
      $settings['site_studio_sync'] = '../config/site_studio_sync';
  }
} else { // This is not an Acquia environment, use the default Site Studio Sync folder.
  $settings['site_studio_sync'] = '../config/site_studio_sync';
}
$settings['site_studio_package_multiline'] = TRUE;
The switch case in the new "site_studio.settings.php" code ensures that the logic is executed exclusively in the designated Site Factory environments.
// Check if this is an Acquia environment
if (isset($_ENV['AH_SITE_ENVIRONMENT'])) {
  // Check the environment
  switch ($_ENV['AH_SITE_ENVIRONMENT']) {
    case '01dev':
    case '01test':
    case '01live':
Within the switch case, the if statement verifies whether Drupal contains a site variable called "cohesion" with the value of "site_studio_sync_2".
// Check if this site should use a different Site Studio Sync folder
if ($GLOBALS['gardens_site_settings']['flags']['cohesion'] == 'site_studio_sync_2') {
 $settings['site_studio_sync'] = '../config/site_studio_sync_2';
} else {
 $settings['site_studio_sync'] = '../config/site_studio_sync';
}
If this statement is True, Drupal will assign the folder "../config/site_studio_sync_2" to the Site Studio configuration variable "$settings['site_studio_sync']".
Refer to the Acquia documentation on Site Factory site variables for more detailed information:
Site Factory - Setting site variables on websites
https://docs.acquia.com/site-factory/manage/settin-site-variable -
Assigning Site Factory site variables
We will assign a new site variable to the site3 site. Access the Site Factory console UI and go to the "Sites" admin page. Click on the down arrow next to the “LOG IN” button of the site3 site to reveal additional options, then select the "Configure Site Variables" link:
Image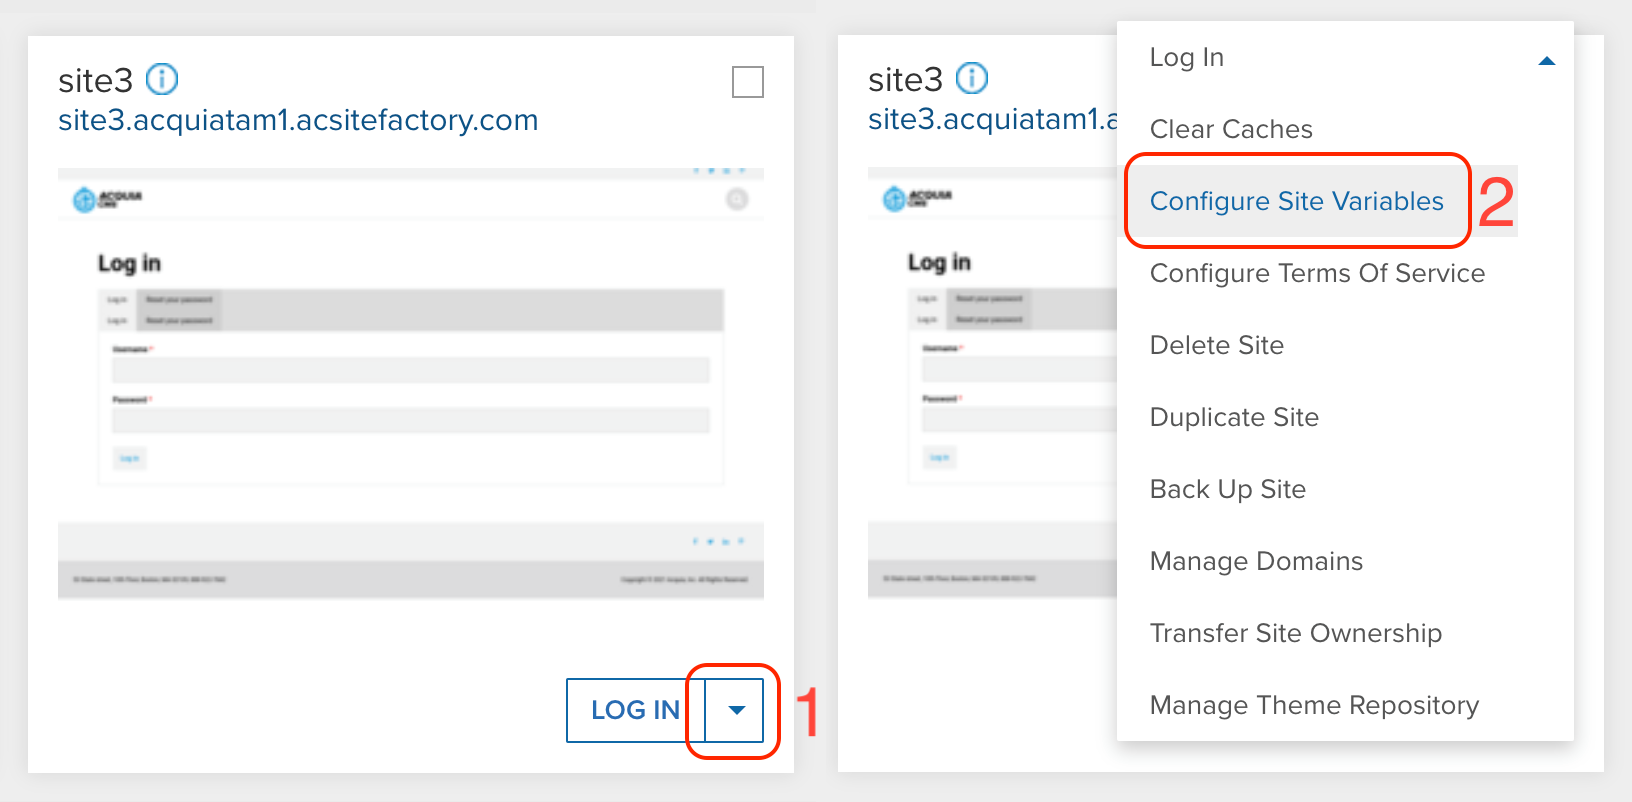
On the Site Variables page, locate and click on the "Add Variable" button. Enter "cohesion" in the field designated for the variable name, and input "site_studio_sync_2" as the corresponding variable value:
Image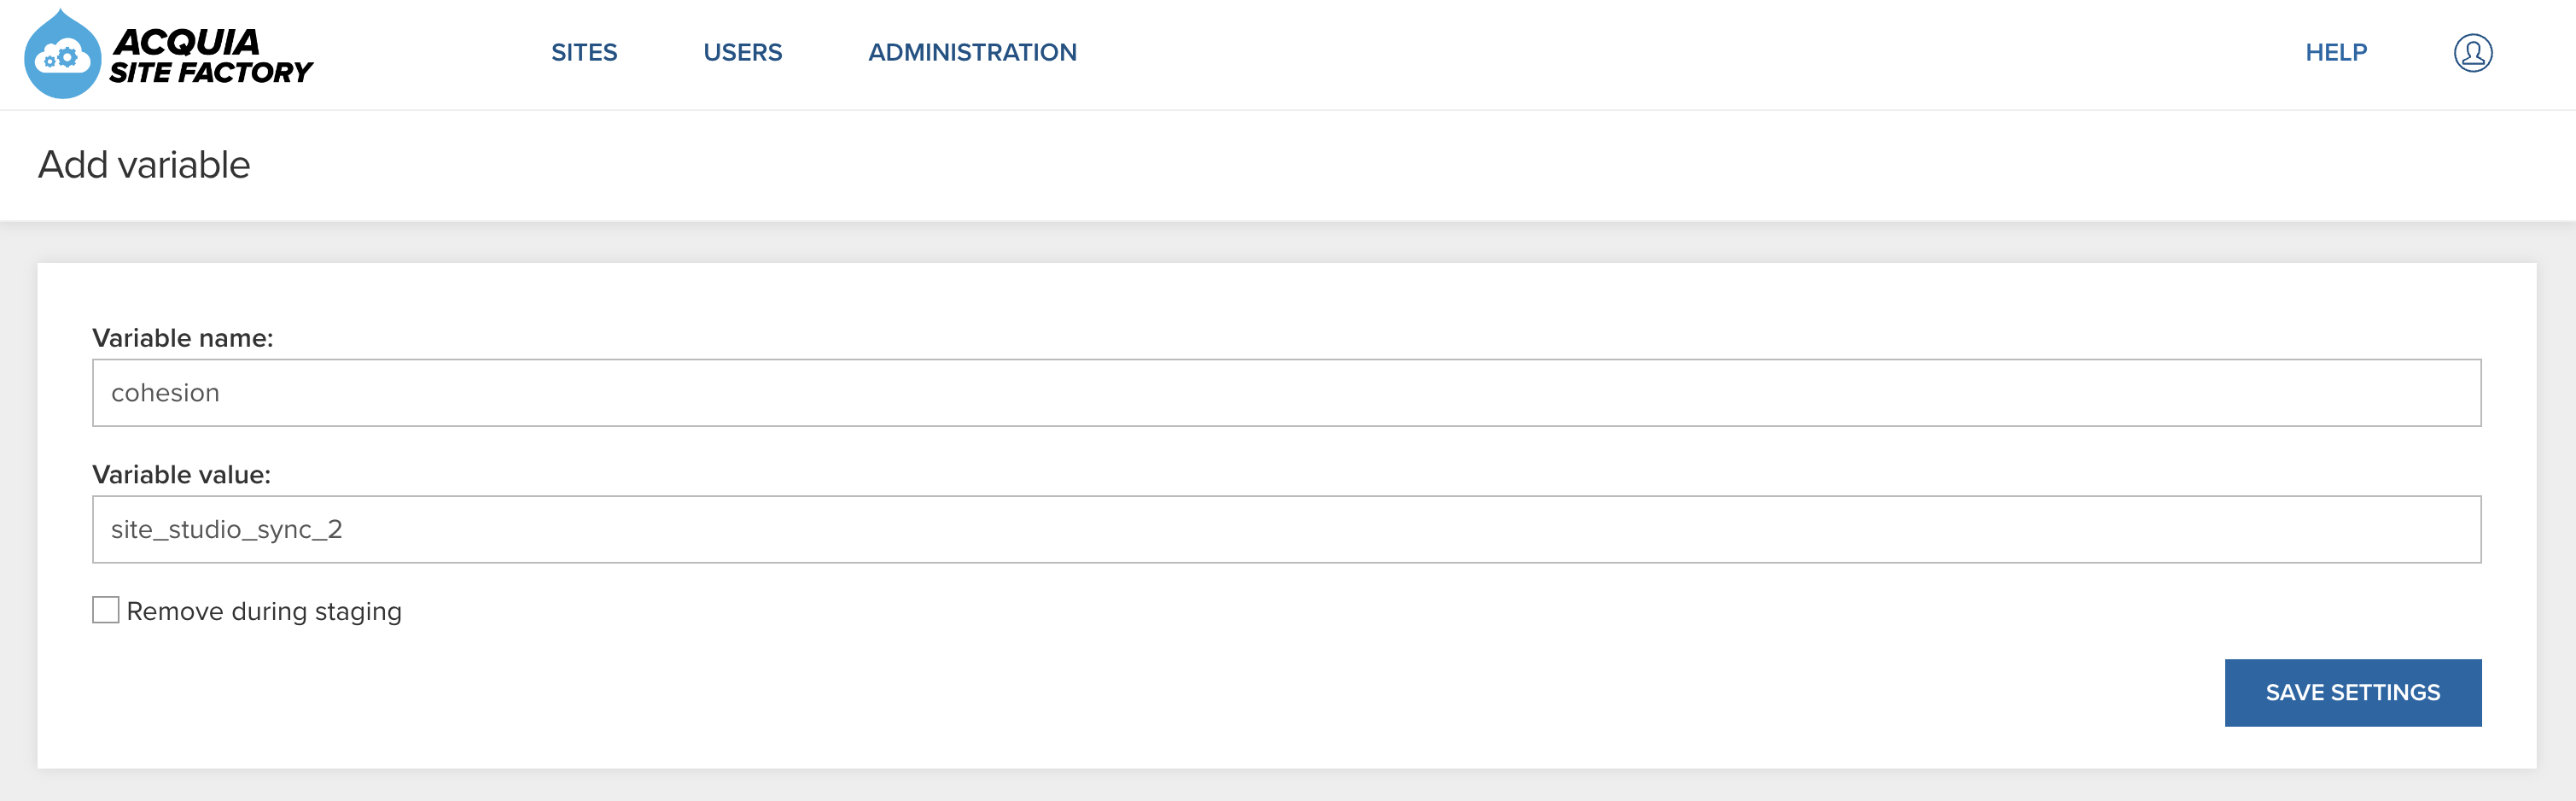
Click the “Save settings” button to save the new site variable.
-
Deploy your new Site Studio changes to ACSF
Before you deploy your new codebase to ACSF, it is important to revert back your Cloud IDE site to use the default Site Studio configuration and templates. Execute the following Drush command to import the default Site Studio packages to your Cloud IDE site:
drush sitestudio:package:importCheck that your Cloud IDE site is using the default Site Studio configuration:
Image
Now it’s time to push your new codebase changes to your repository:
git add -A
git commit -m "BLT-004: New Site Studio Sync folder and site_studio.settings.php."
git push
Deploy your new codebase to ACSF:
blt artifact:deployI named this new deployed code: 1.0.3-tamacsf
Signorelli IDE:~/project (main) $ blt artifact:deploy
Would you like to create a tag? (y/n) y
Enter a valid commit message [BLT-004: Shield module and new Logo Icon.]
Enter the tag name for the deployment artifact, e.g., 1.0.0-build 1.0.3-tamacsf
Go to the ACSF Management Console of one of your lower environments, for this tutorial, I’m using the test environment. Navigate to Administration -> Update code:
Image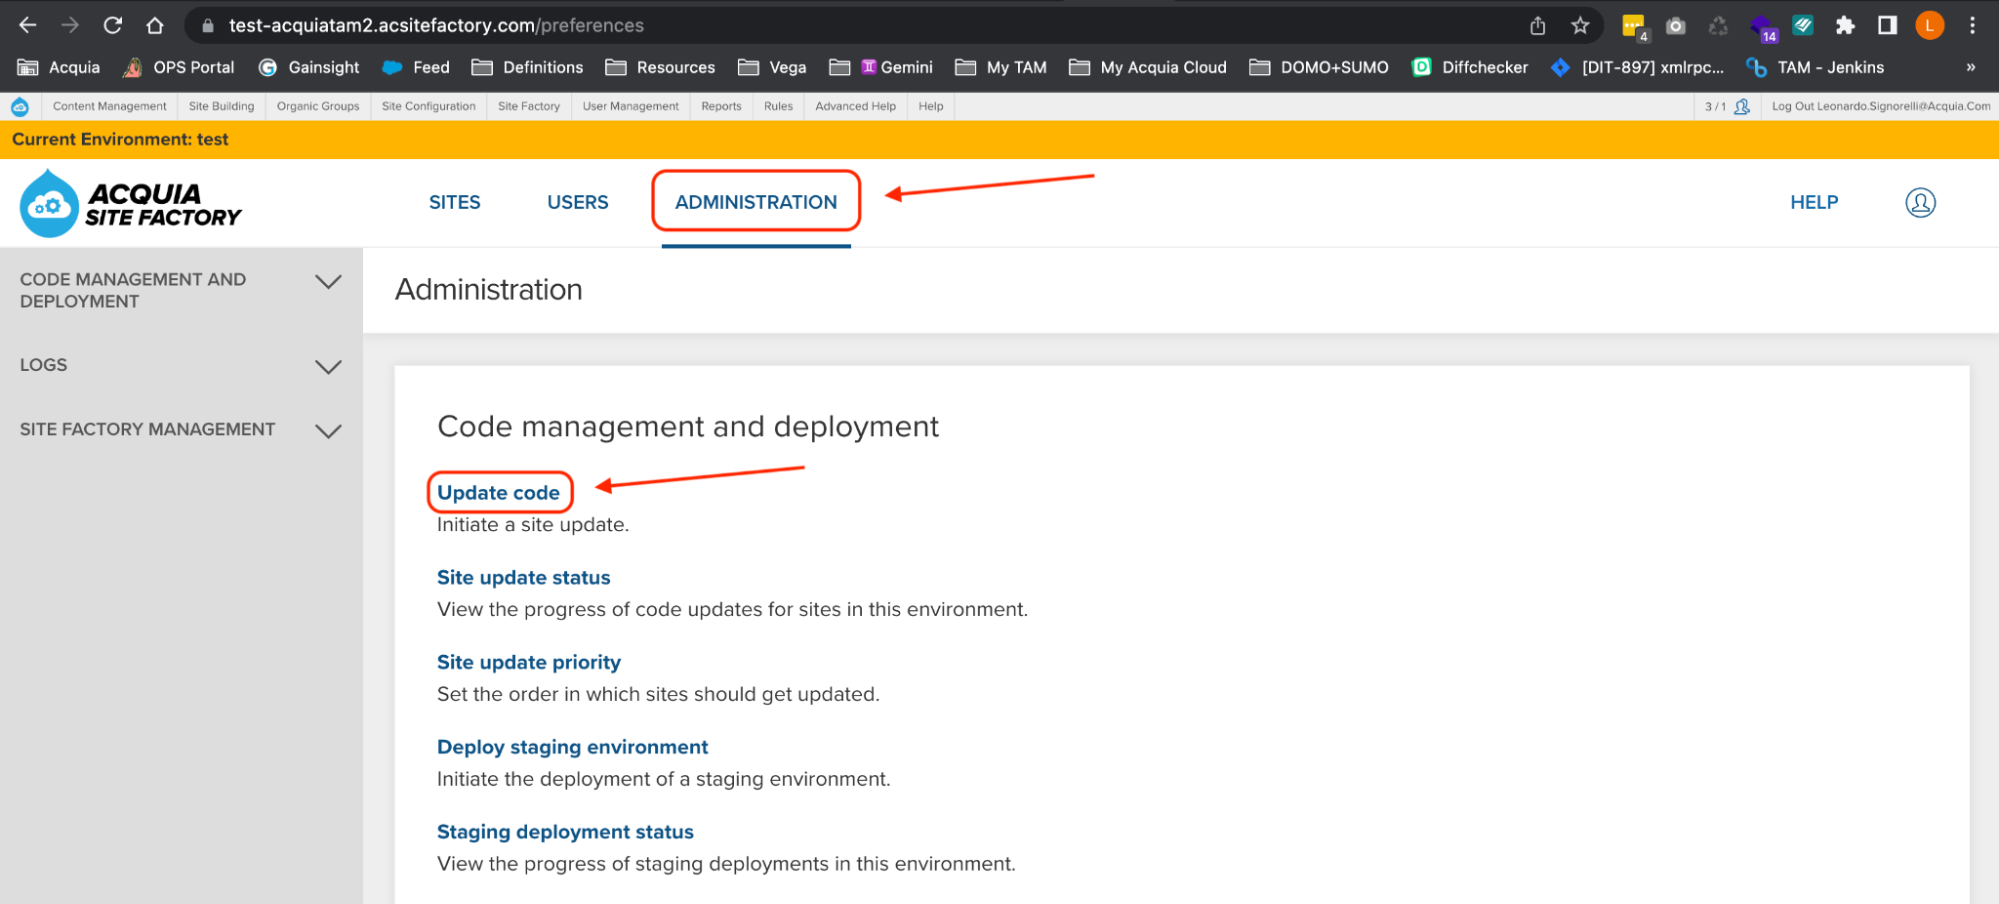
In the Site Update page, use the dropdown to select your new codebase (1.0.3-tamacsf):
Image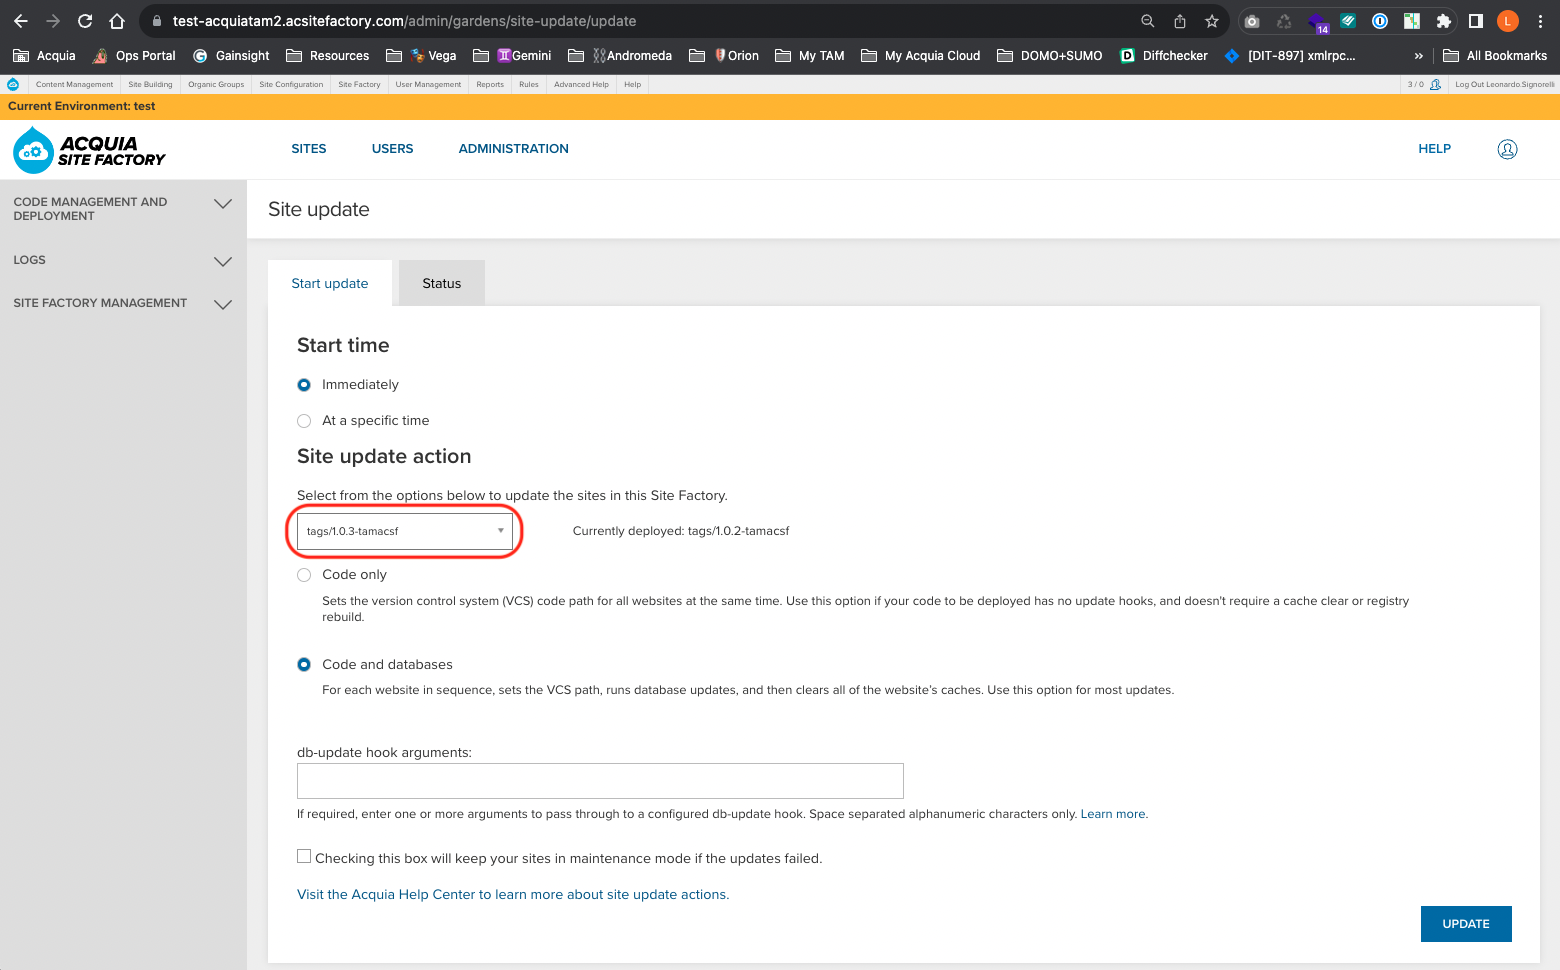
Click the Update button and wait until the update process finishes:
Image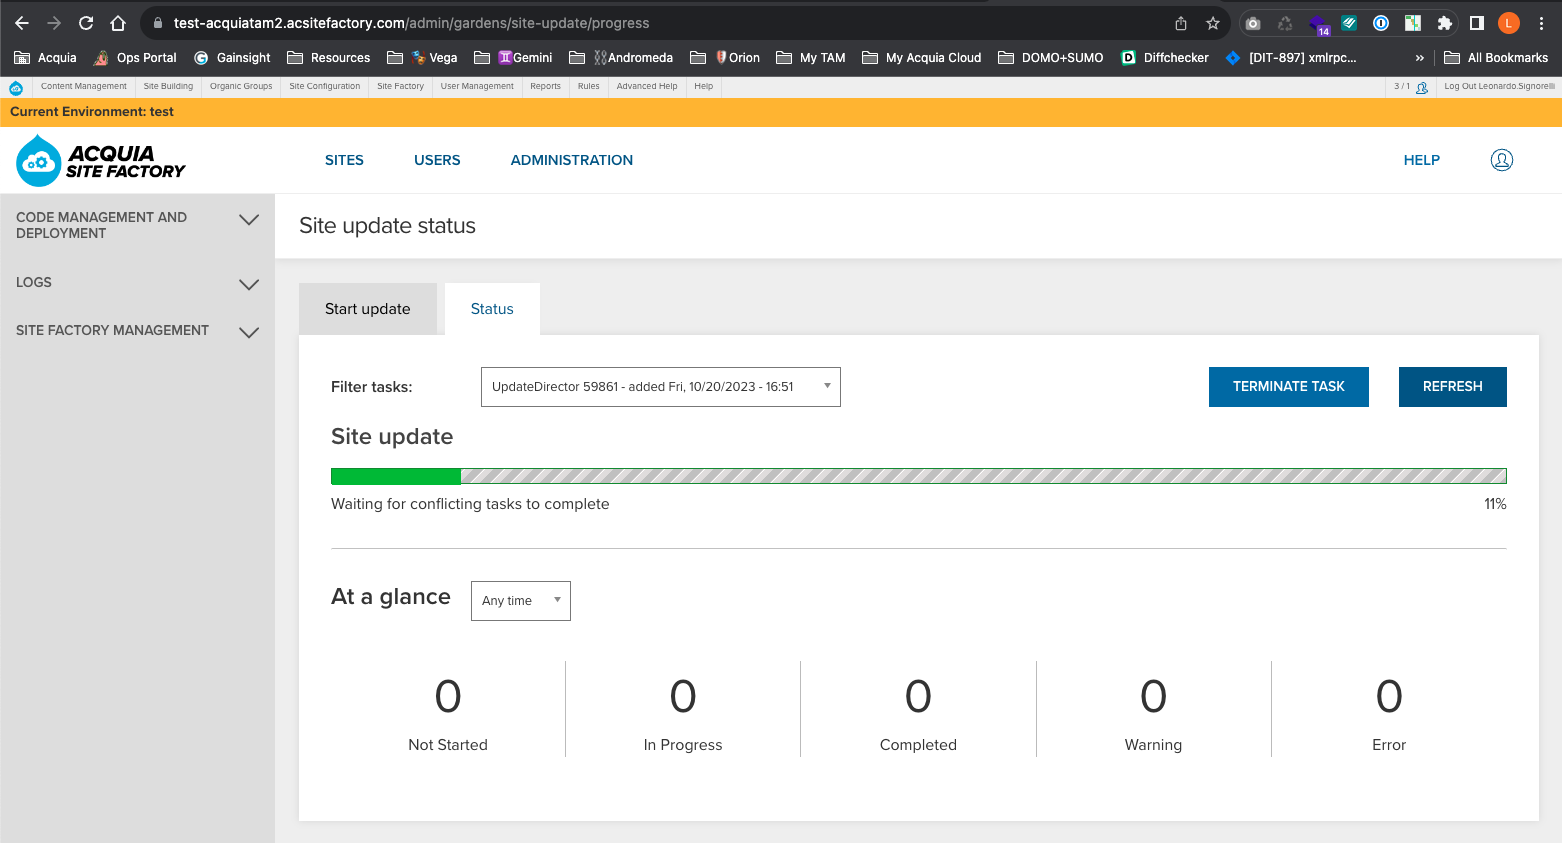
After the update process finishes, checkout the Site3 ACSF site, you should see that this site is using the new Site Studio configuration files from the “config/site_studio_sync_2” folder:
Image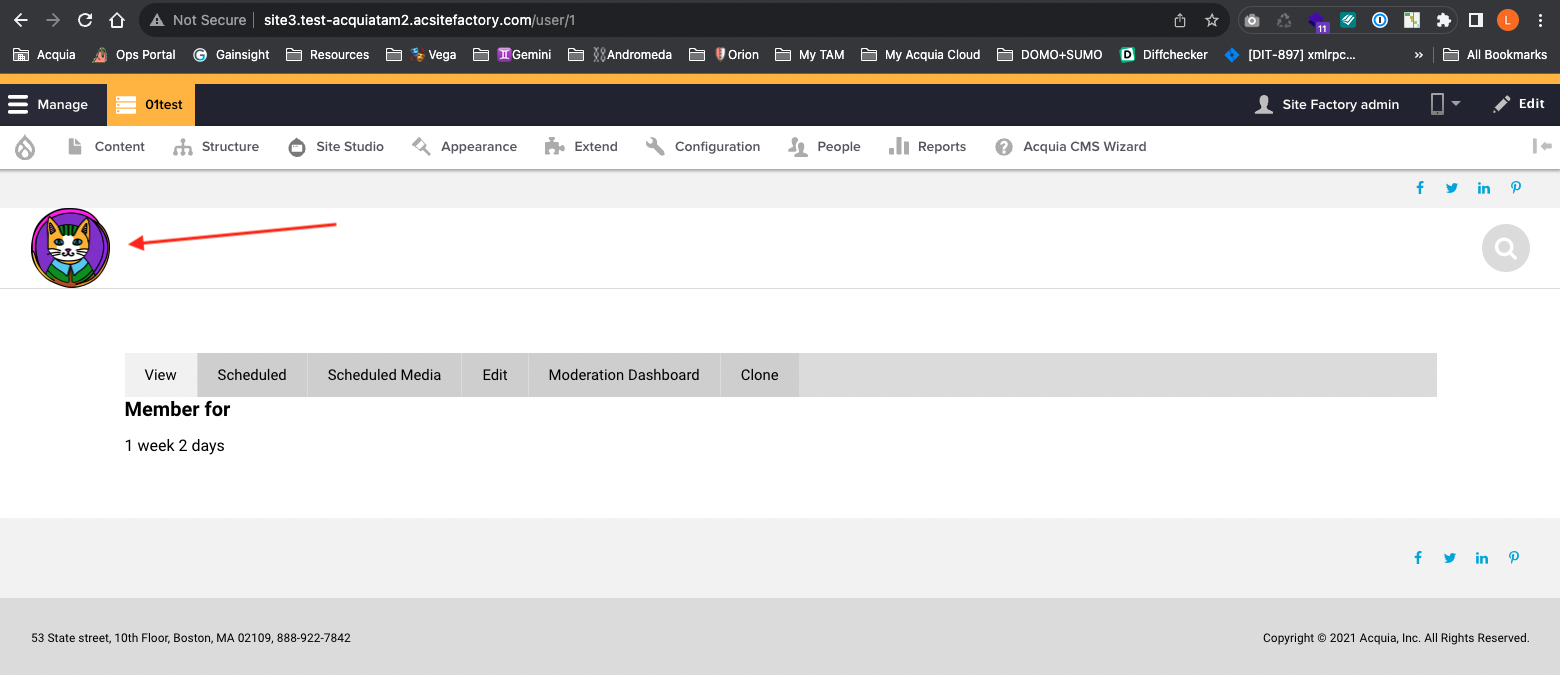
Checkout the ACSF sites site2 and site1, you will observe that these sites are currently utilizing the default Site Studio configuration files found in the "config/site_studio_sync" folder:
Image Image
Image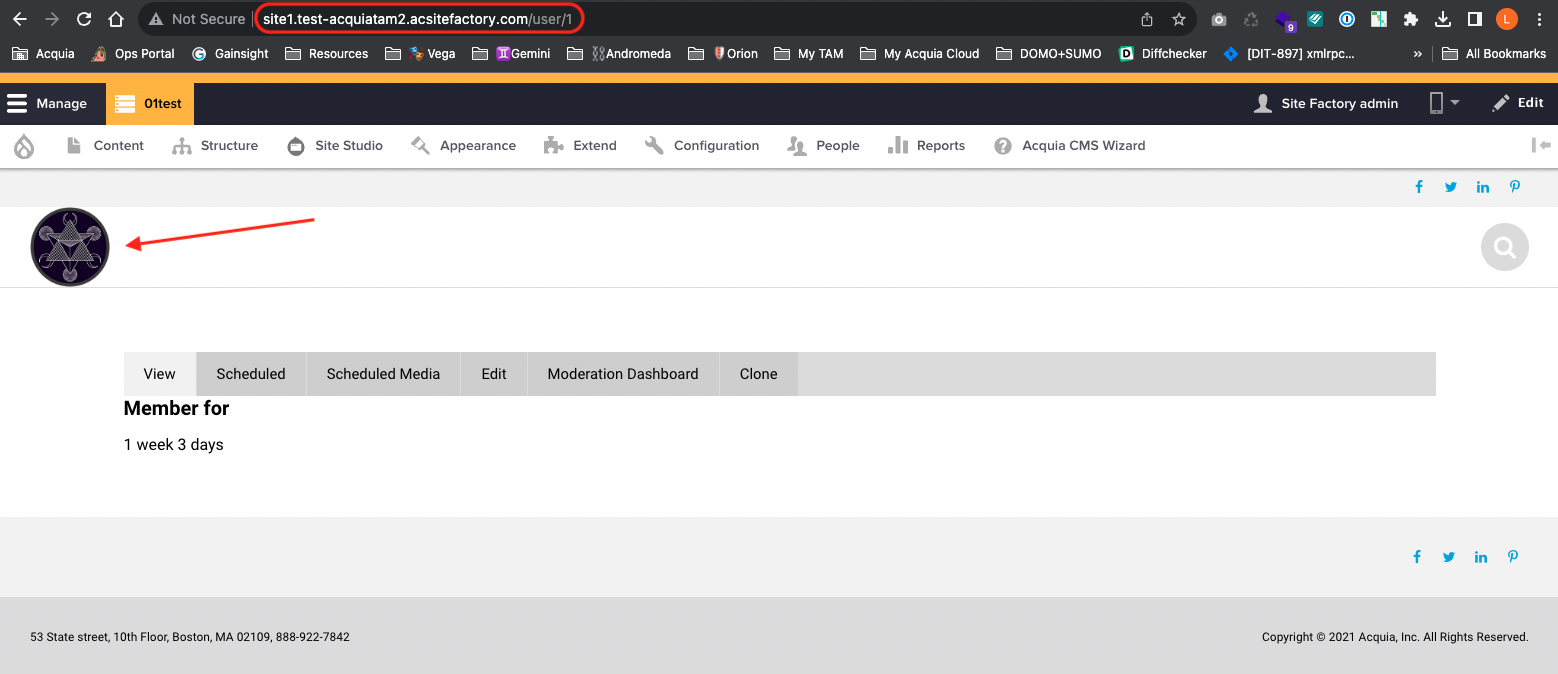
-
Create a new ACSF site to test your new codebase
It’s recommended that you always create a new site to test that your codebase is working fine, and that it doesn’t create configuration differences.
Go to Sites and select your group:
Image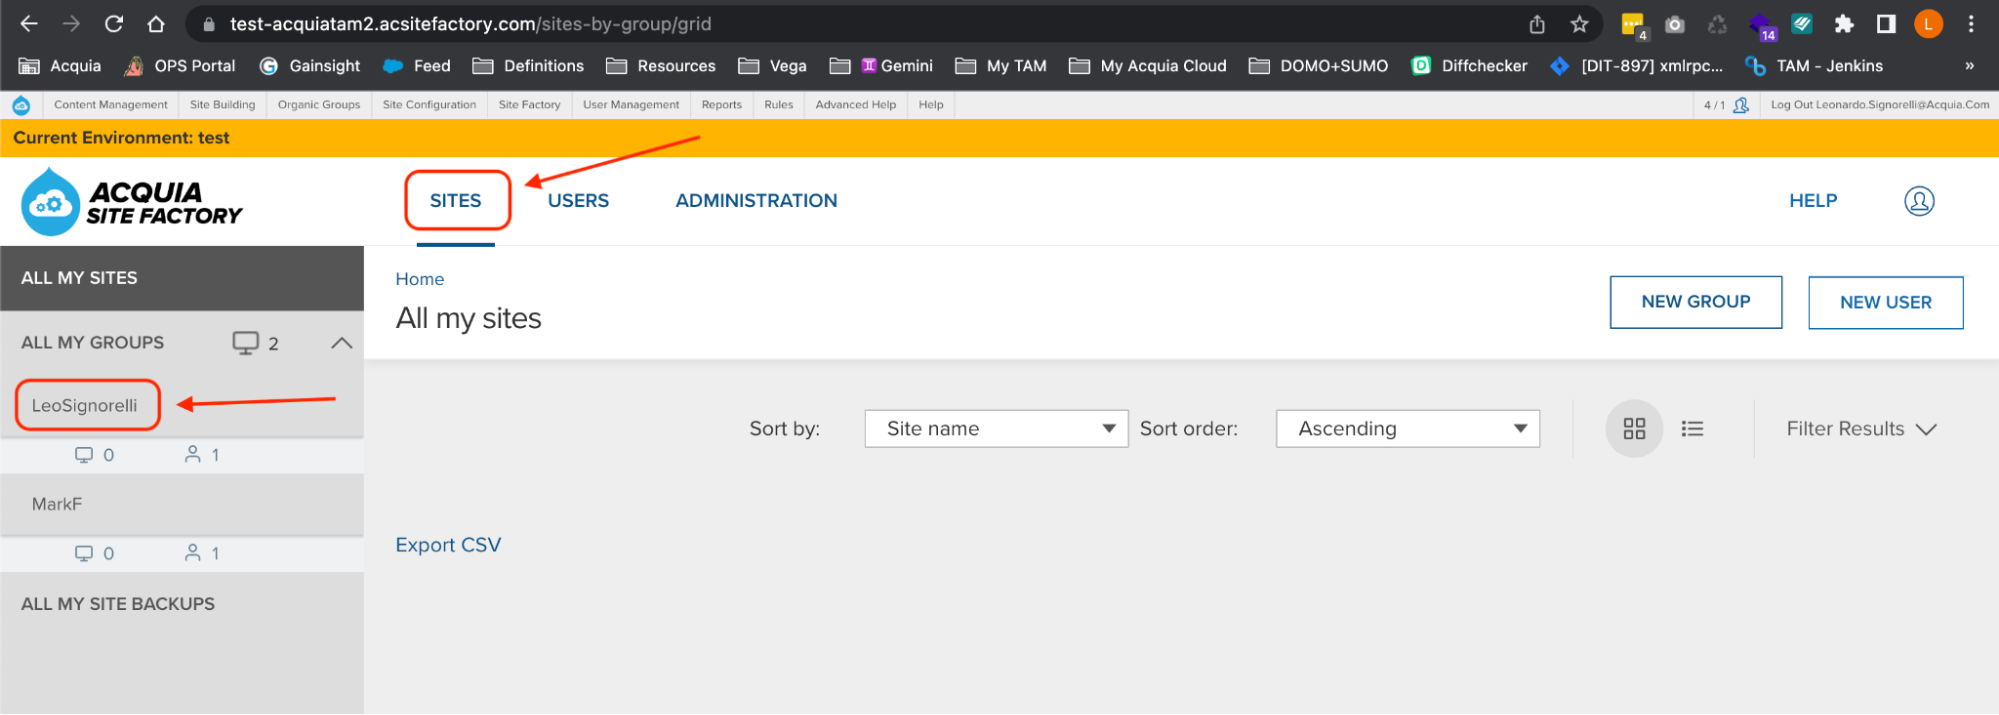
Click the “Create a new Site” button.
Name your new site “site4”, and click the “Create Site” button:
Image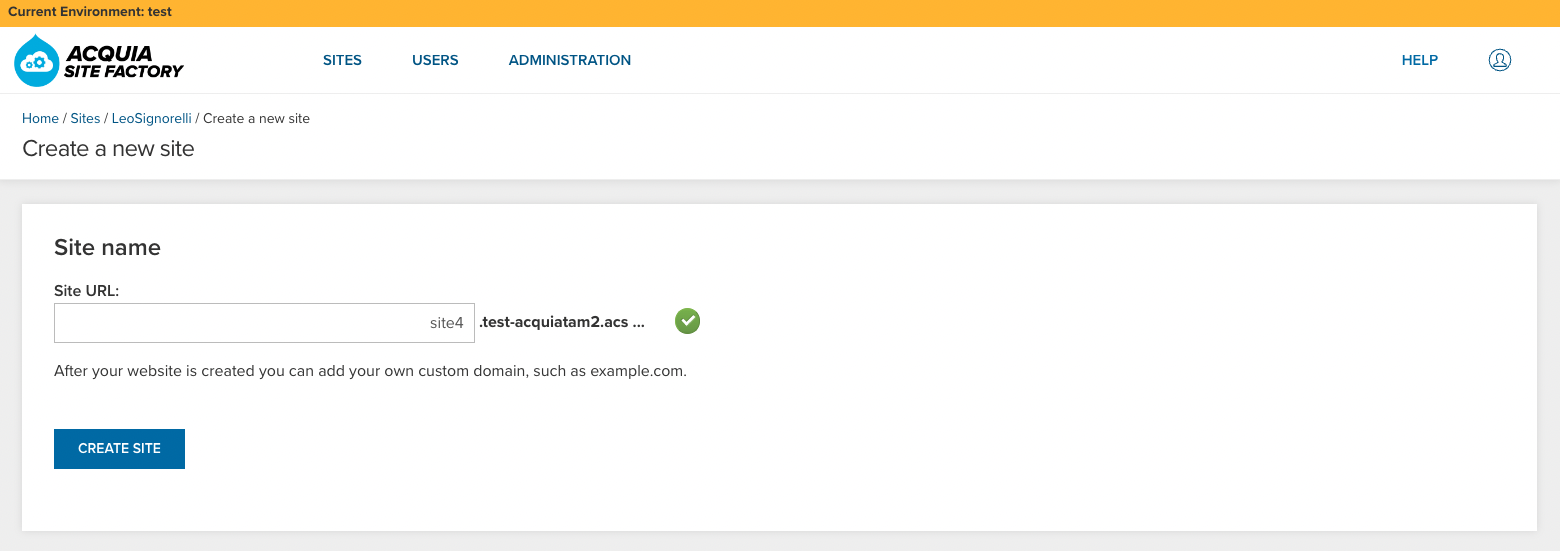 Image
Image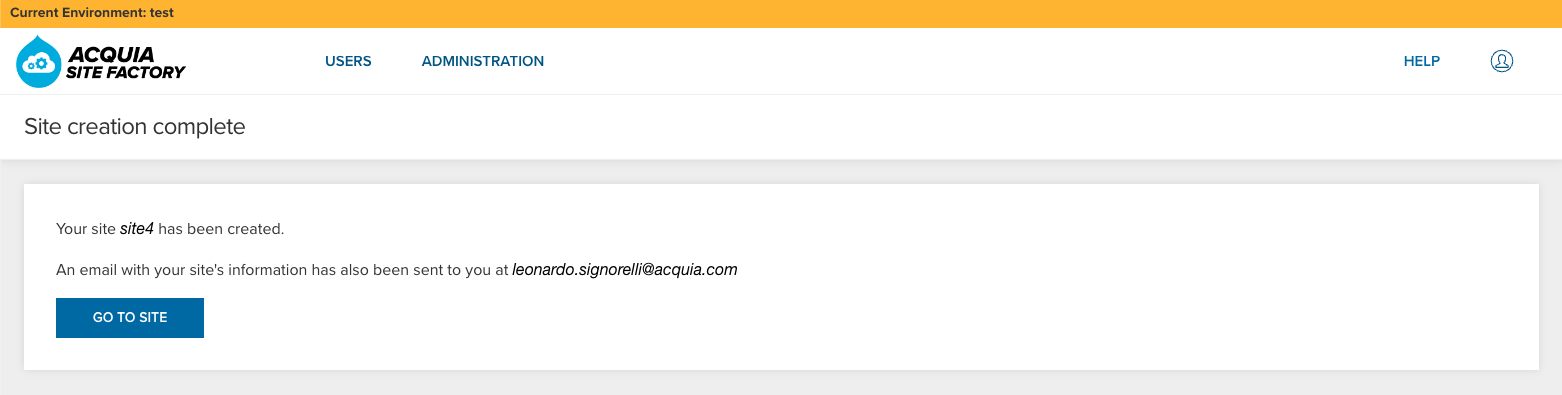
Assign a site variable to the new ACSF site
If you visit the new “site4” website, you will see that it’s using the default Site Studio sync folder (config/site_studio_sync).
Let’s assign a site variable to the new site4 website. Access the Site Factory console UI and navigate to the "Sites" admin page. Click on the down arrow next to the “LOG IN” button of the new site4 website to reveal additional options, then select the "Configure Site Variables" link.
On the Site Variables page, locate and click on the "Add Variable" button. Enter "cohesion" in the field designated for the variable name, and input "site_studio_sync_2" as the corresponding variable value:
Image
Click the “Save settings” button to save the new site variable.
Create a new Drush alias for your new ACSF site
Go back to your Cloud IDE and create a new Drush alias for your new ACSF site using the aliasgenerator.sh bash script.
Execute the aliasgenerator.sh bash script and follow the instructions:
./aliasgenerator.shSignorelli IDE:~/project (main) $ ./aliasgenerator.sh <-------> <---------------> <---------------------------------> | Drush Alias Generator | <---------------------------------> <---------------> <-------> |---------------------| | Main Menu | |---------------------| | 1 - New Drush Alias | | 2 - Exit | |---------------------| Select a number from the Main Menu: 1 Selected: New Drush Alias ------------------------- Make sure to enter the name of a site you already created in your ACSF account. Example: If the ACSF URL assigned to your new site is site1.acquiatam2.acsitefactory.com Enter site1 Provide the name of the site you want to create a Drush alias: site3 Is this site name correct?: "site4" (Yes/No/Cancel = y/n/c) y Generating the drush alias for site3.. Ready! Going back to the Main Menu... |---------------------| | Main Menu | |---------------------| | 1 - New Drush Alias | | 2 - Exit | |---------------------| Select a number from the Main Menu: 2 Selected: Exit -------------- Exiting this script... Signorelli IDE:~/project (main) $Make sure your new site doesn’t have configuration differences:
drush @site4.01test cexSignorelli IDE:~/project (main) $ drush @site4.01test cex [notice] The active configuration is identical to the configuration in the export directory (../config/default). ../config/default Connection to acquiatam201test.ssh.enterprise-g1.acquia-sites.com closed. Signorelli IDE:~/project (main) $There are no configuration changes in your newly installed ACSF site. That means your codebase was configured correctly.
Apply the Site Studio Sync 2 styles to the new ACSF site
Now that there is a Drush alias assigned to the new site4 website, proceed to your Cloud IDE terminal and execute the following Site Studio Drush command to import the Site Studio styles from the designated Site Studio sync folder (config/site_studio_sync_2) as specified in the Site Variable you previously configure for the new site4 website.
drush @site4.01test sitestudio:package:importSignorelli IDE:~/project (main) $ drush @site4.01test sitestudio:package:import ➜ ➜ Imported 1 new and updated 0 existing non-config files. ➜ [notice] Synchronized configuration: update cohesion_templates.cohesion_master_templates.mstr_tpl_master_template_boxed. [notice] Synchronized configuration: update cohesion_templates.cohesion_master_templates.master_template. [notice] Finalizing configuration synchronization. [success] The configuration was imported successfully. ➜ ➜ Doing partial rebuild. ➜ > [notice] Building cohesion_master_templates - Master template - master_template > [notice] Securing twig template directory. > [notice] Flushing render cache. > [notice] Message: Entities in use have been rebuilt. > ➜ ➜ Rebuild complete. ➜ Connection to acquiatam101live.ssh.enterprise-g1.acquia-sites.com closed. Signorelli IDE:~/project (main) $Once the import is complete, clear the Drupal cache and proceed to review your new website:
drush @site4.01test crImage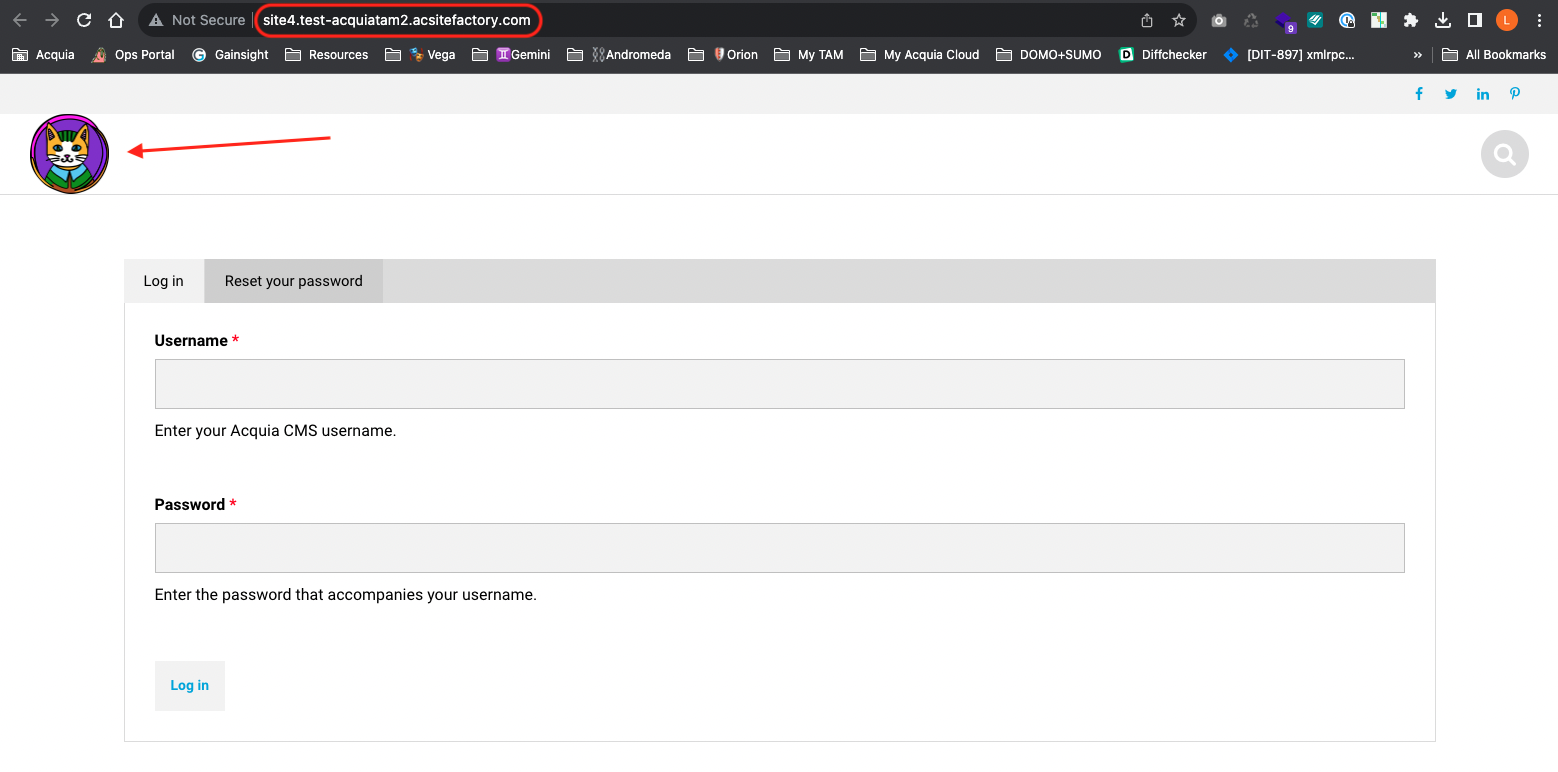
As you can see, the new site is using the Site Studio configuration files from the “config/site_studio_sync_2” folder.
Final thoughts and thanks
I was really excited about putting together this five-step tutorial guide. My goal was to create a tutorial that could help both our current and future ACSF customers succeed when using Acquia CMS and Acquia Site Studio to build their websites in ACSF.
In the first three parts of the tutorial, I showed how to set up a new Drupal 10 site using Cloud IDE with Acquia CMS, Site Studio, BLT, and a custom Drupal profile. The key was getting the configuration of various components right so they all played well together.
In the fourth part, I demonstrated the ACSF deployment process and how to handle changes to your Drupal and Site Studio configurations. I explained how to use the Config Ignore module to handle differences between ACSF sites and even showed how to add a new module to your codebase and apply the changes to all your existing ACSF sites.
In the fifth and final section, I showcased the configuration of multiple Site Studio Configuration folders and explained how to assign them to your ACSF sites. This enables the utilization of distinct Site Studio templates across different ACSF sites.
Before wrapping up, I really want to give a big shout-out to Pavlos Daniel for his invaluable assistance in making this project happen. Special thanks also go to the TAM teams Vega, Gemini and Andromeda, Jed O’Connor, Mark Felton, and last but not least, Chris Thomas and his team from The Penn State University for their patience, kindness, and trust in me for this big project.
Thank you!


