How to set up Slack notifications with Code Studio
- Last updated
- 2 minute read
Goal
Configuring Slack notifications with Acquia Code Studio
Prerequisites
- Access to Code Studio Maintainer role (More on Gitlab Roles)
- Slack administrative access to create incoming webhooks
Overview

Today’s DEVops workflow can consist of a number of different tools from code review to visual regression testing. Having an internal communication strategy has become an important part of the process, especially when it comes to notification. Knowing who to inform for what tasks can be a challenge. Acquia Code Studio has notification tools for integrating everything from Jira, Drone, Datadog to Slack, sending notifications and syncing your data to help bridge the gap between some of these tools.
As Slack has become a major player in the team communication space it is positioning itself to be a tool for teams to build their communication strategy around it. Code Studio has a simple integration into Slack that allows your team to customize the push notifications for sending information about the actions in the table below. Each action can be pushed to a separate slack channel or notify individual people. You also can control the branches for which notifications are to be sent and the labels or behaviors to be notified.
Triggers for Slack notifications
The following triggers are available for Slack notifications:
|
|
|
|
|
|
|
|
|
|
|
|
|
|
|
|
|
|
|
|
|
|
|
|
|
|
|
|
|
|
|
|
|
|
|
|
|
|
|
Below we will show you how to enable some simple notifications from Code Studio to Slack in 3 easy steps.
-
Add Slack notifications integration
-
Configure Slack Webhooks
-
Complete Code Studio Notification Settings
-
Test your new notifications
-
Add Slack notifications integration
-
On the top bar, select Menu > Projects and find your project.
-
On the left sidebar, select
Settings > Integrations
.
-
There are a number of integrations you can add, but let's focus on Slack notifications to send notifications about project events to Slack.
Image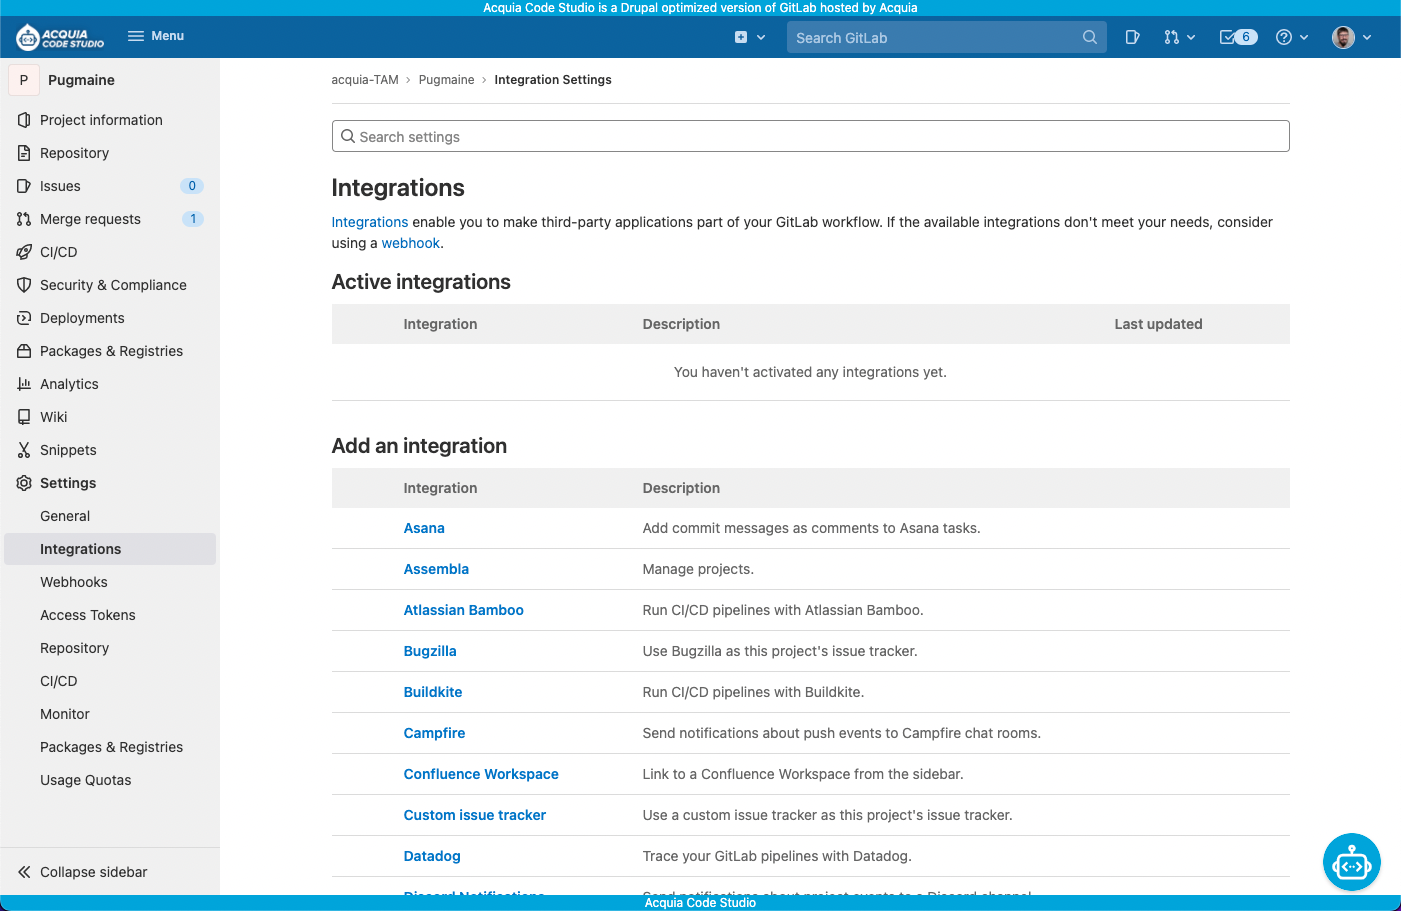
-
-
Configure Slack Webhooks
-
Next, open a new browser tab and sign in to your Slack team and start a new Incoming WebHooks configuration.
-
Identify the Slack channel where notifications should be sent to by default. Select Add Incoming WebHooks integration to add the configuration.
-
Copy the Webhook URL to use later when you configure GitLab.
Image
* Please note, this is a legacy custom integration - an outdated way for teams to integrate with Slack but find this to be the easiest way to connect Code Studio to Slack at this time. We recommend checking out their replacement: Slack apps and come back later for an update to this article.
-
-
Complete Code Studio Notification Settings.
-
On the left sidebar, go back to Settings > Integrations.
-
Select Slack notifications.
-
In the Enable integration section, select the Active checkbox.
-
In the Trigger section, select the checkboxes for each type of GitLab event to send to Slack as a notification. For a full list, see Triggers for Slack notifications. By default, messages are sent to the channel you configured during Slack configuration.
Optional. To send messages to a different channel, multiple channels, or as a direct message:
- To send messages to channels, enter the Slack channel names, separated by commas.
- To send direct messages, use the Member ID found in the user's Slack profile.
- NOTE: Usernames and private channels are not supported.
-
In Webhook, enter the webhook URL you copied in the Slack configuration step.
-
Optional. In Username, enter the username of the Slack bot that sends the notifications.
-
Select the Notify only broken pipelines checkbox to notify only on failures.
-
In the Branches for which notifications are to be sent dropdown, select which types of branches to send notifications for.
-
Leave the Labels to be notified field blank to get all notifications, or add labels that the issue or merge request must have to trigger a notification.
-
Select Test settings to verify your information, and then select Save changes.
-
-
Review new Slack Notification
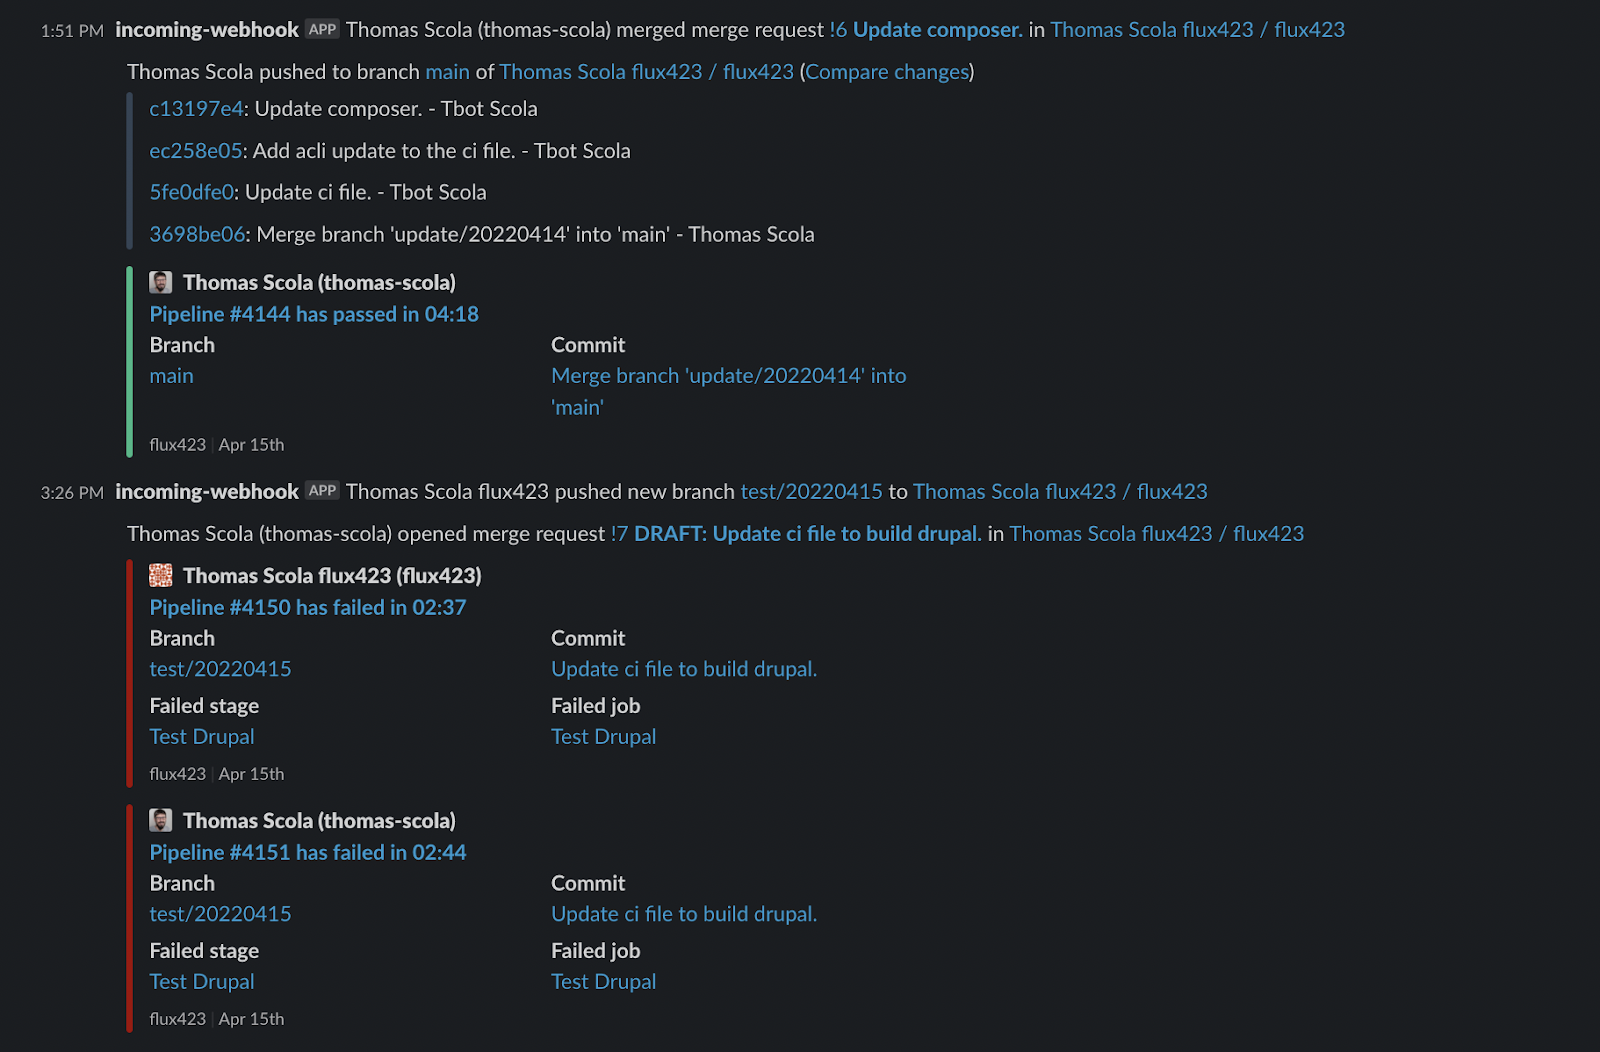
After completing the prior step, you should start to see new notifications in Slack. All you have to do now is test.
Below is an example of an incoming Webhook creating a notification in slack when a new branch is merged has failed.
Image