Image Optimization in Acquia Cloud
- Last updated
- 1 minute read
Goal
Implement image optimization best practices so your site can serve images at the smallest possible file size
Overview
Optimizing the images on your website is crucial for performance, and in turn, User Experience, SEO, and more generally, the success of your site. The good news is that the Acquia Cloud Platform has built-in capabilities to help your site serve great-looking images that load quickly.
Let's break down the steps needed to put these capabilities to use:
-
Use the Built-in Utilities
Among the supported software you can use on Acquia Cloud, are ready-to-use versions of PngCrush and JpegTran. We also recommend using the installed ImageMagick library instead of the Drupal default GD library, which is installed by default in most LAMP stacks. The main benefit of Imagemagick is that unlike GD, it doesn’t use Apache’s processes, and puts a lower demand on server resources. To make this change, install the ImageMagick module and then update the setting at /admin/config/media/image-toolkit in your site to use it:
![Page in the Drupal admin UI for choosing the graphics toolkit]()
-
Set Up Image Optimize
To optimize your images with the locally available versions of PngCrush and JpegTran, install the Image Optimize and Image Optimize Binaries modules. At /admin/config/media/imageapi-optimize-pipelines of your site create a new pipeline, and add the PngCrush and JpegTran processors:
![Editi the Image Optimize pipeline]()
-
Configure JpegTran
Note that for JpegTran, it’s recommended to force the creation of jpeg files as progressive, which can be done with a simple checkbox:
![Altering the jpegtran processor configuration to make the images progressive]()
-
Set Your Pipeline As Default
After you’re done, set your new pipeline as the sitewide default if you want to use it everywhere, otherwise you can manually choose a specific pipeline in the settings for any image style.
-
Add WebP Support
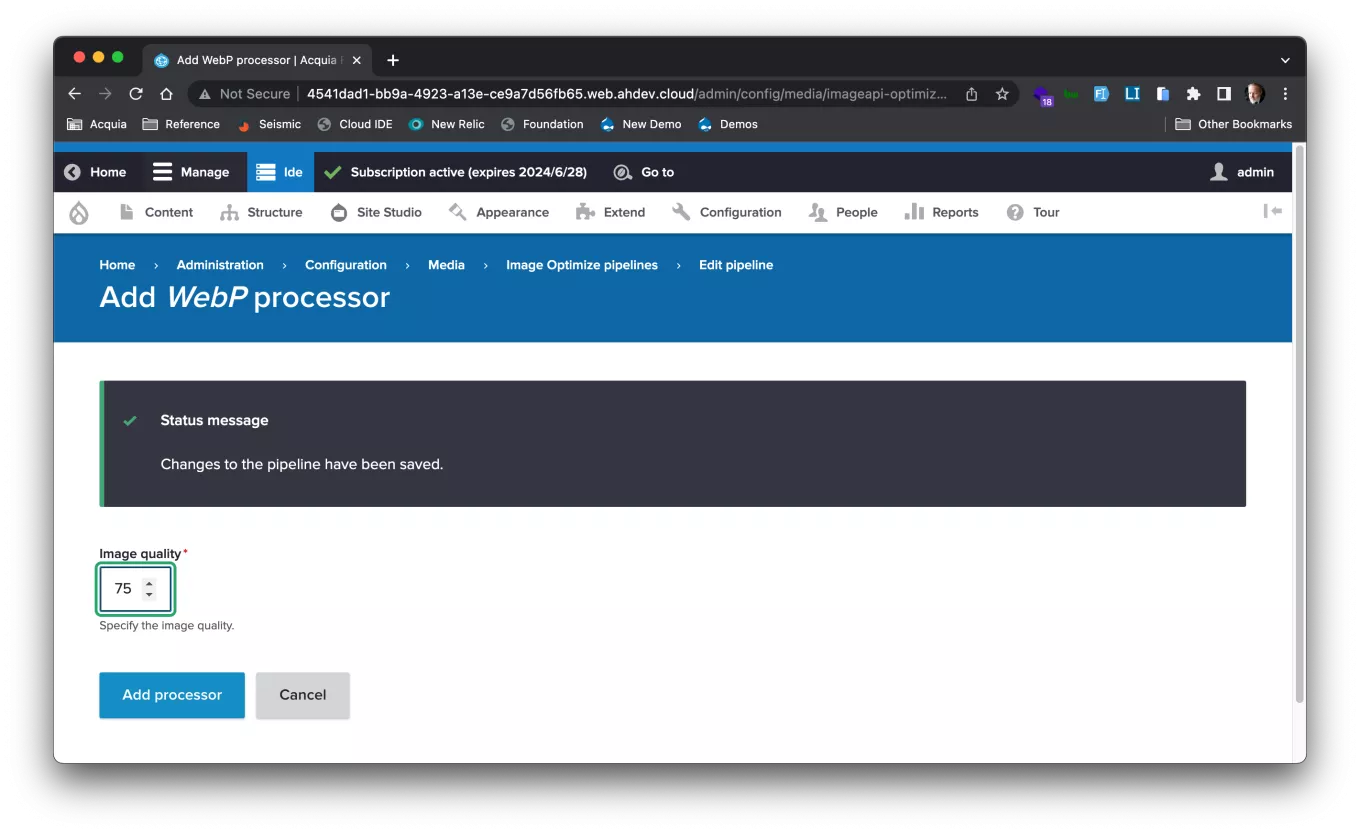
You can also allow this pipeline to create processed images as webp with a jpeg format by adding the WebP processor. Note that this will only apply as part of responsive images, where a <scrset> tag will be created to provide the webp images. To implement that here, install the WebP module, and add and configure the processor to your Image Optimize pipeline:
![Adding the WebP processor to the pipeline]()
In particular you’ll likely want to set the image quality lower than the default of 100.
-
Profit!
By following the steps above, Drupal is now able to generate a variety of image variants to provide an optimized experience for visitors across a variety of browsers and screen sizes, all from a single uploaded image:
![Code showing the multiple images being rendered at different sizes for an optimized responsive image]()