
Implementing Configuration Management on Site Factory: Part 3
- Last updated
- 1 minute read
Goal
Learn about configuration management and the end-to-end deployment workflow that enables success with Site Factory!
Overview
This is the final segment of a three-part guide covering on how to create a Drupal 10 codebase for Acquia Cloud Site Factory (ACSF). With this end-to-end approach, you can quickly install new Drupal sites or update existing sites so they will inherit the managed configuration in your codebase. We will be working with Acquia's Cloud IDE to simplify the development and deployment process.
This guide has been divided into three parts:
- Set up Cloud IDE, Install Drupal 10, and Prepare your Codebase for Site Factory
- Create a Custom Profile and test New Site Creation with Site Factory
- Implementing Configuration Management and Proving out the Site Factory Deployment Workflow
I hope this last phase will help you gain a deeper understanding of the process and feel more confident in your ability to successfully deploy your code changes to ACSF.
-
Making changes to your Codebase: Config Ignore minimal configuration
In order to have configuration differences between your ACSF sites, you will need to list inside the Config Ignore module the configuration files that you wish to be different between your sites.
For example, If you want to have different site names and different blocks added to the Block Layout admin page of each site, you should add the following configurations names to your Config Ignore module:
- system.site
- block.block.* (will ignore all config entities that starts with block.block)
In your Cloud IDE site, go to the Config Ignore admin page ( /admin/config/development/configuration/ignore) and add the following:
system.site
block.block.*
webform.webform.*
system.menu.*
system.theme
views.view.*
taxonomy.*
Image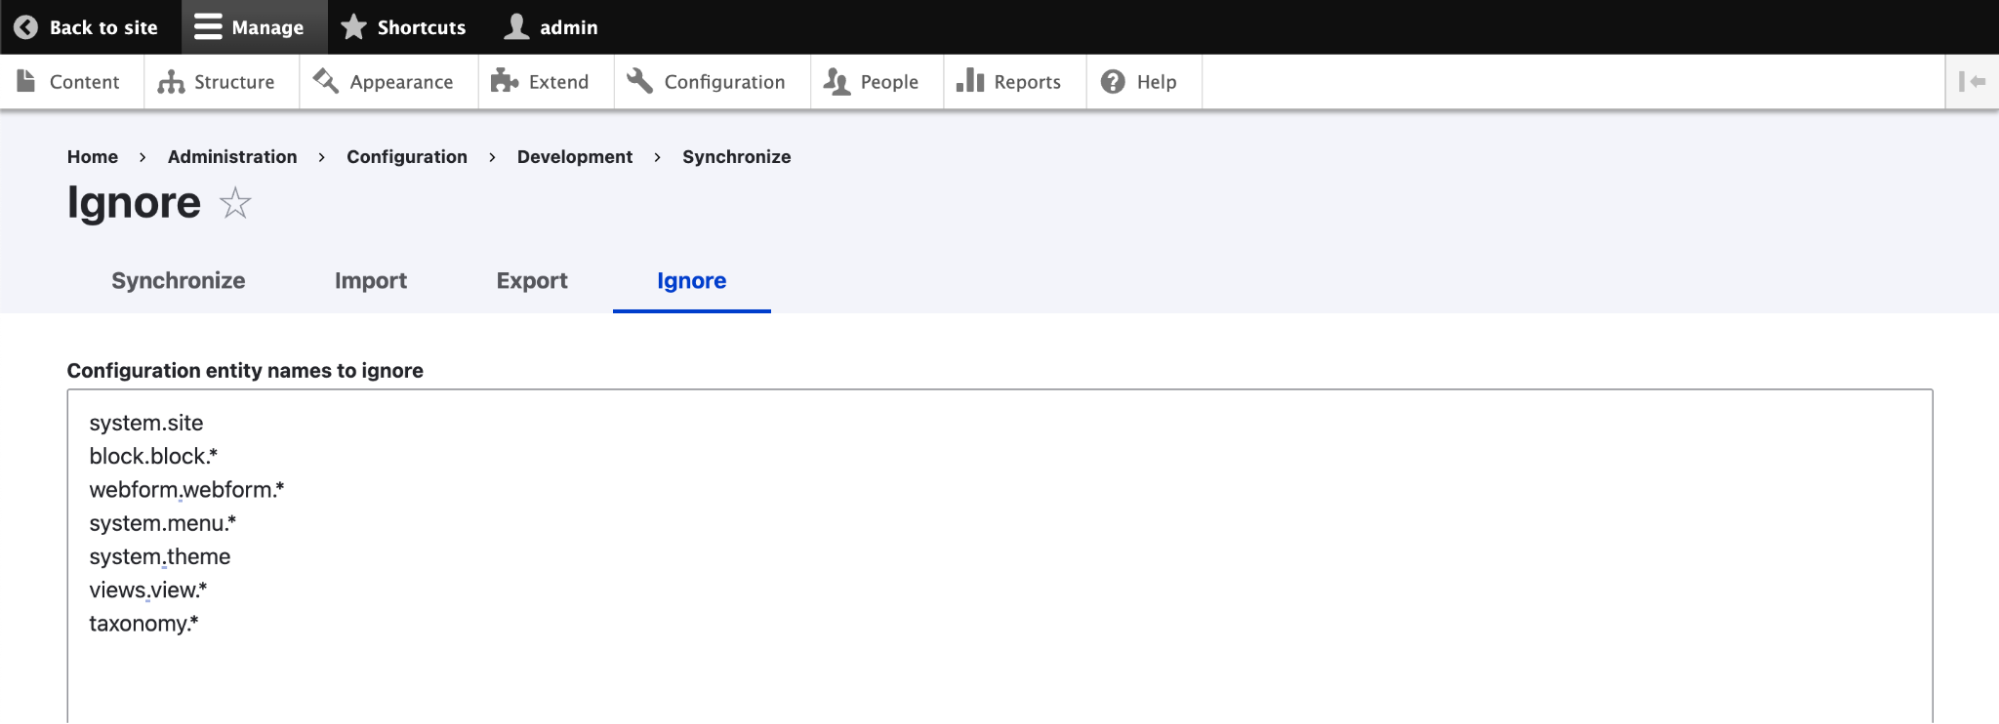
Save your changes.
Export the configuration changes
After you make changes to your codebase, it’s a good idea to check for Database updates:
Signorelli IDE:~/project (main) $ drush updb
[success] No pending updates.
Export the new Drupal configuration:
drush cexSignorelli IDE:~/project (main) $ drush cex [notice] Differences of the active config to the export directory: +------------+------------------------+-----------+ | Collection | Config | Operation | +------------+------------------------+-----------+ | | config_ignore.settings | Update | +------------+------------------------+-----------+ The .yml files in your export directory (/home/ide/project/config/default) will be deleted and replaced with the active config. (yes/no) [yes]: > yes [success] Configuration successfully exported to /home/ide/project/config/default. /home/ide/project/config/default Signorelli IDE:~/project (main *) $Deploy your codebase changes to ACSF
First, you need to push your new codebase changes to your repository:
git add -A
git commit -m "BLT-003: Config Ignore minimal configuration."
git push
Deploy your codebase to ACSF:
blt artifact:deployI named this new deployed code: 1.0.1-d10acsf
Signorelli IDE:~/project (main) $ blt artifact:deploy
Would you like to create a tag? (y/n) y
Enter a valid commit message [BLT-003: Config Ignore minimal configuration.]
Enter the tag name for the deployment artifact, e.g., 1.0.0-build 1.0.1-d10acsf
Go to the ACSF Console UI of one of your lower environments and navigate to Administration -> Update code:
Image
In the Site Update page, use the dropdown to select your new codebase (1.0.1-d10acsf):
Image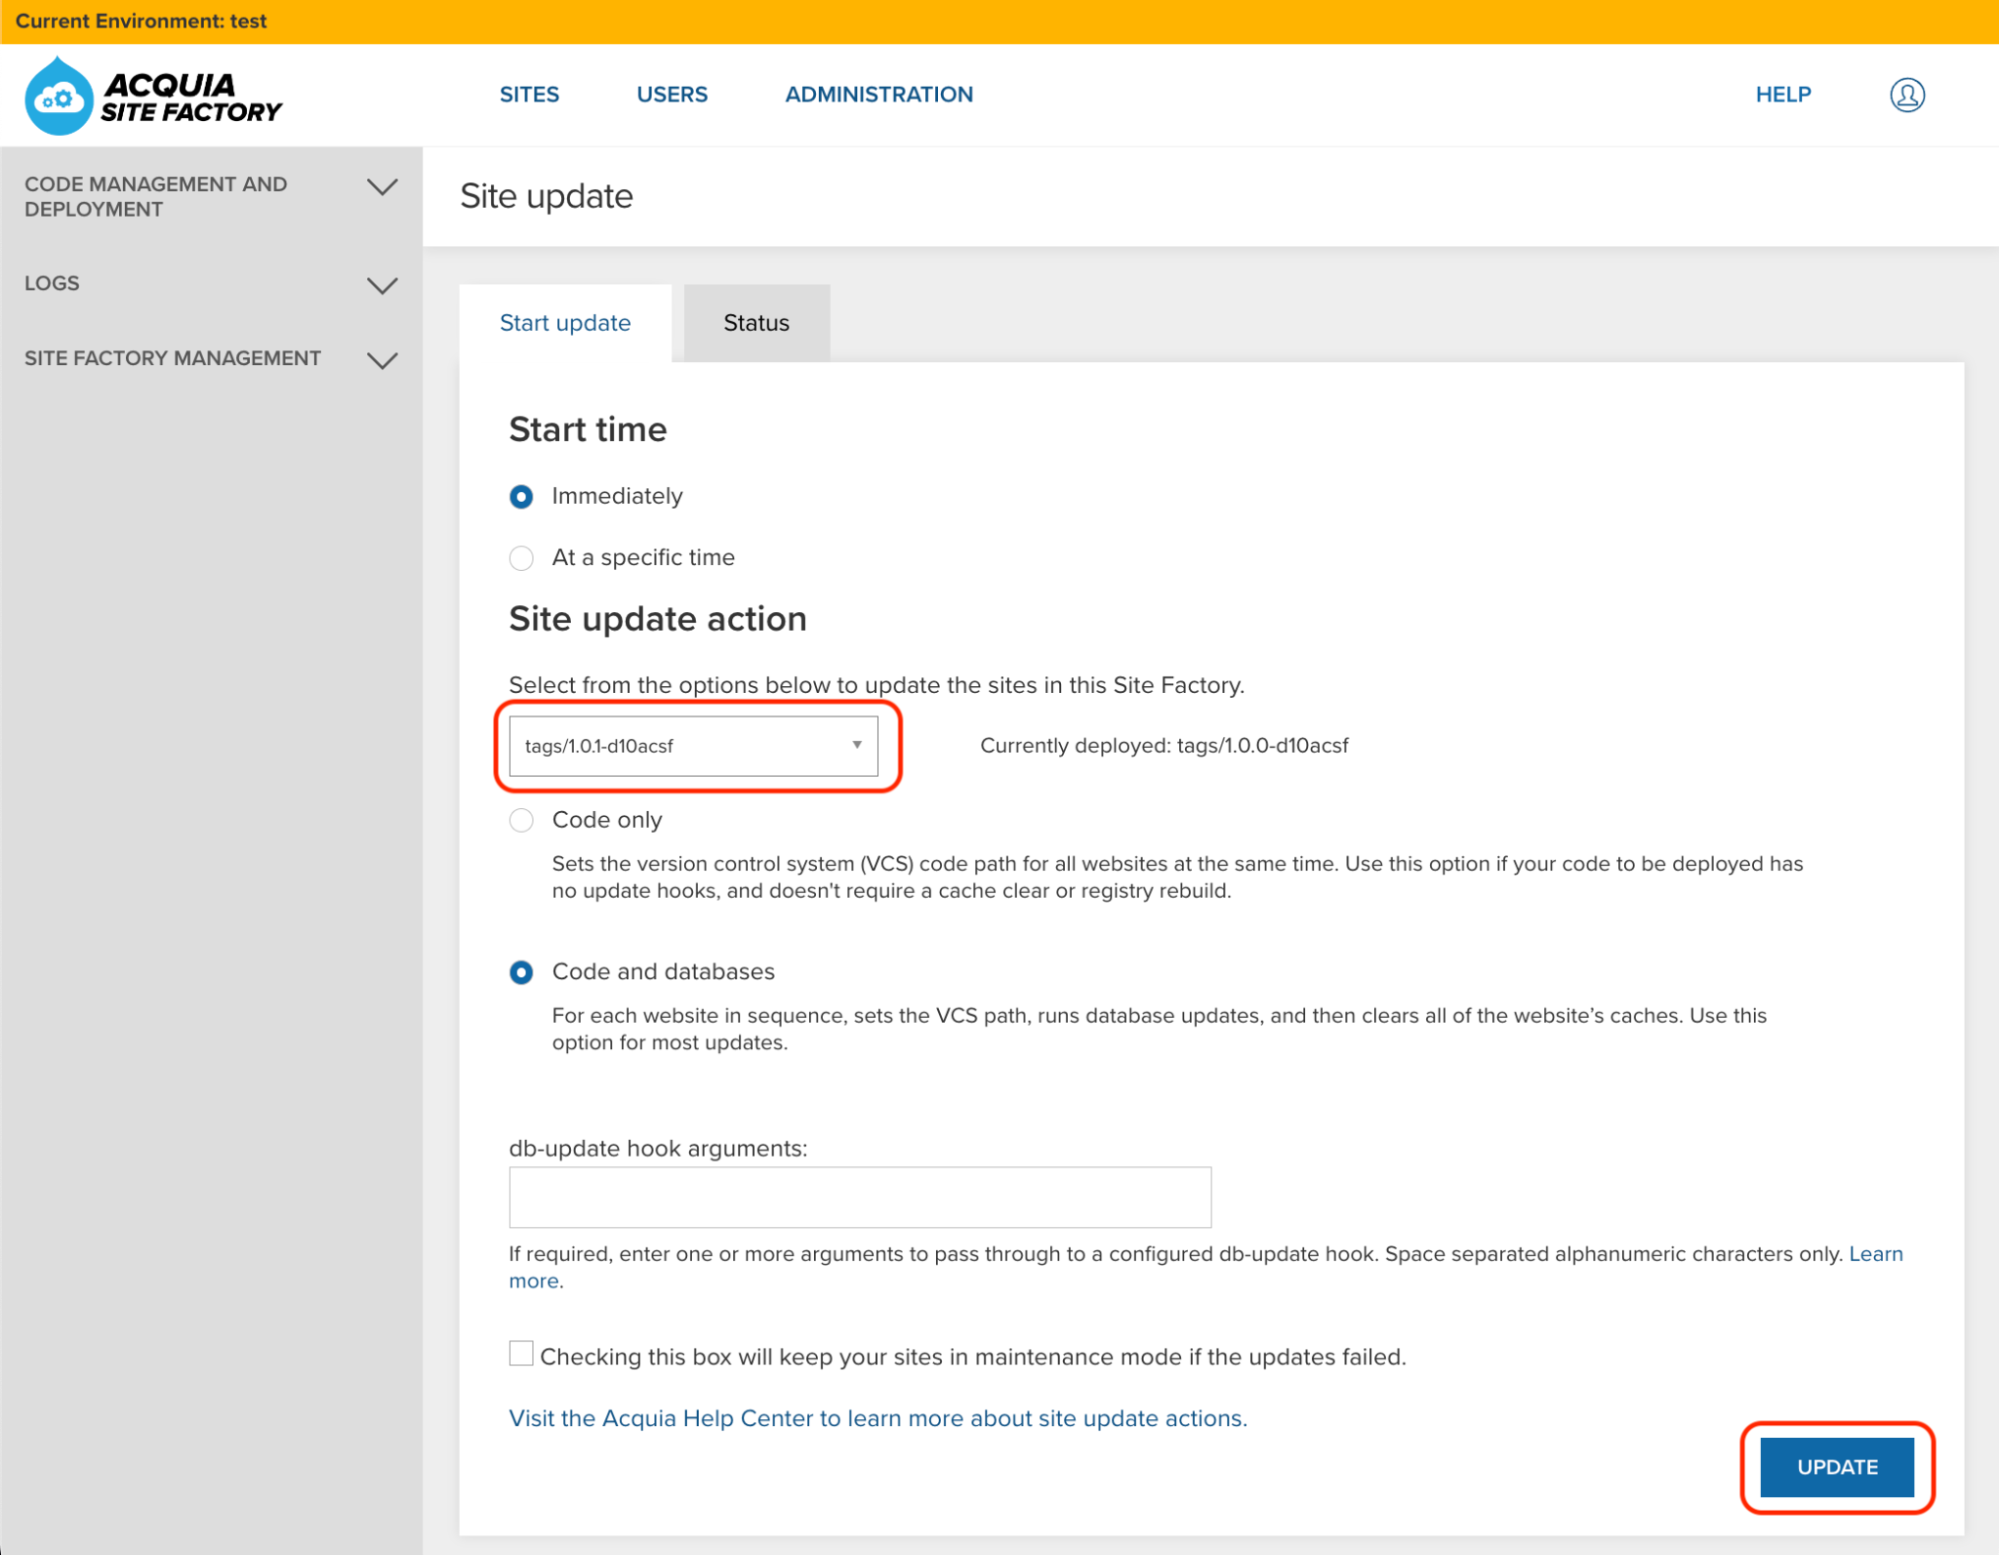
Click the Update button and wait until the update process finishes:
Image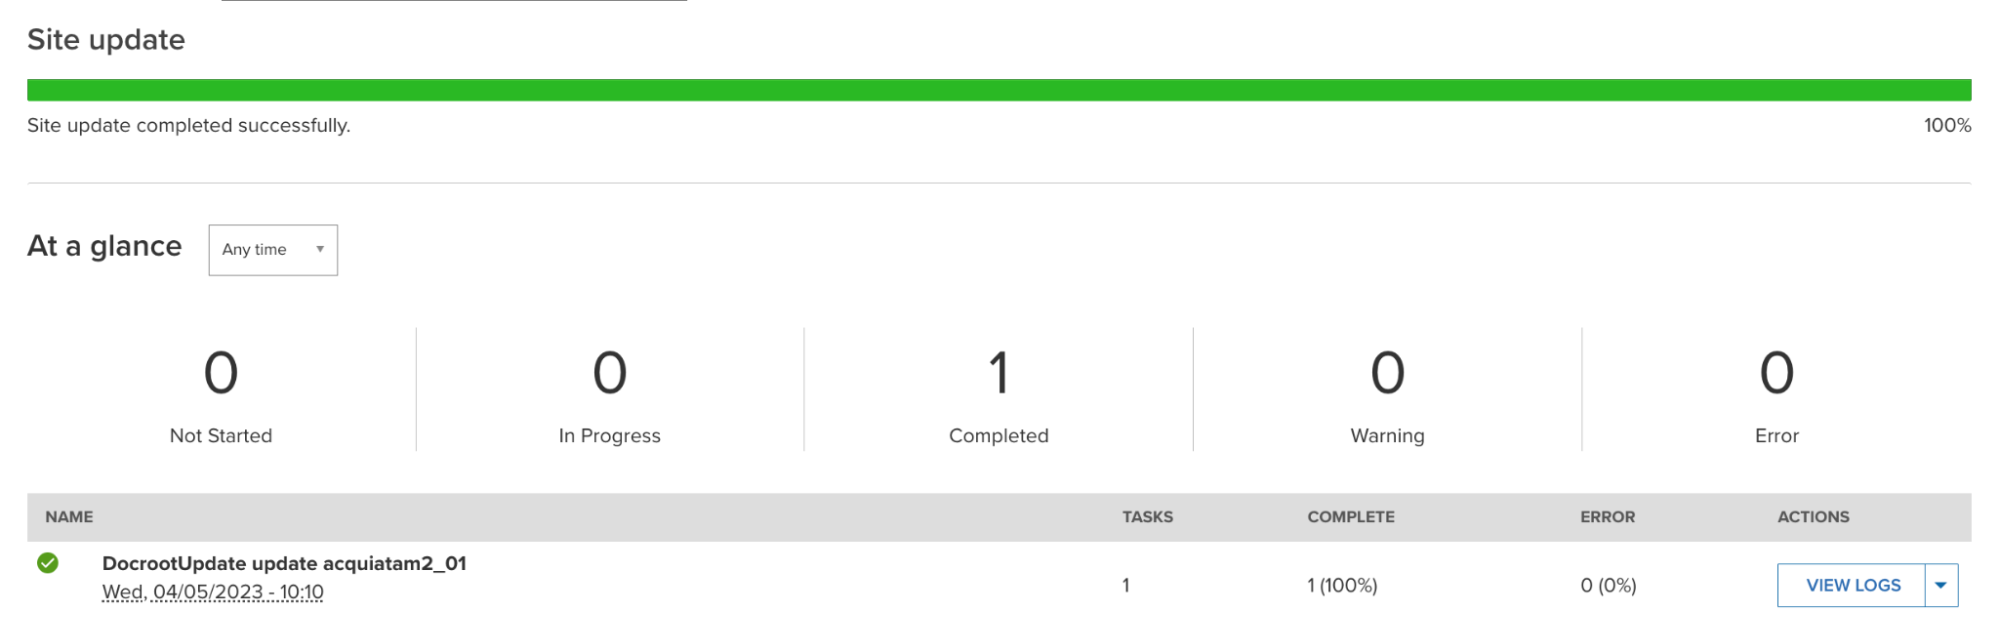
Check for configuration differences: Create your second ACSF site
It’s recommended that you always create a new site to test that your codebase is working fine, and that it doesn’t create configuration differences.
Create a new ACSF site using your new codebase. Go to Sites and select your group:
Image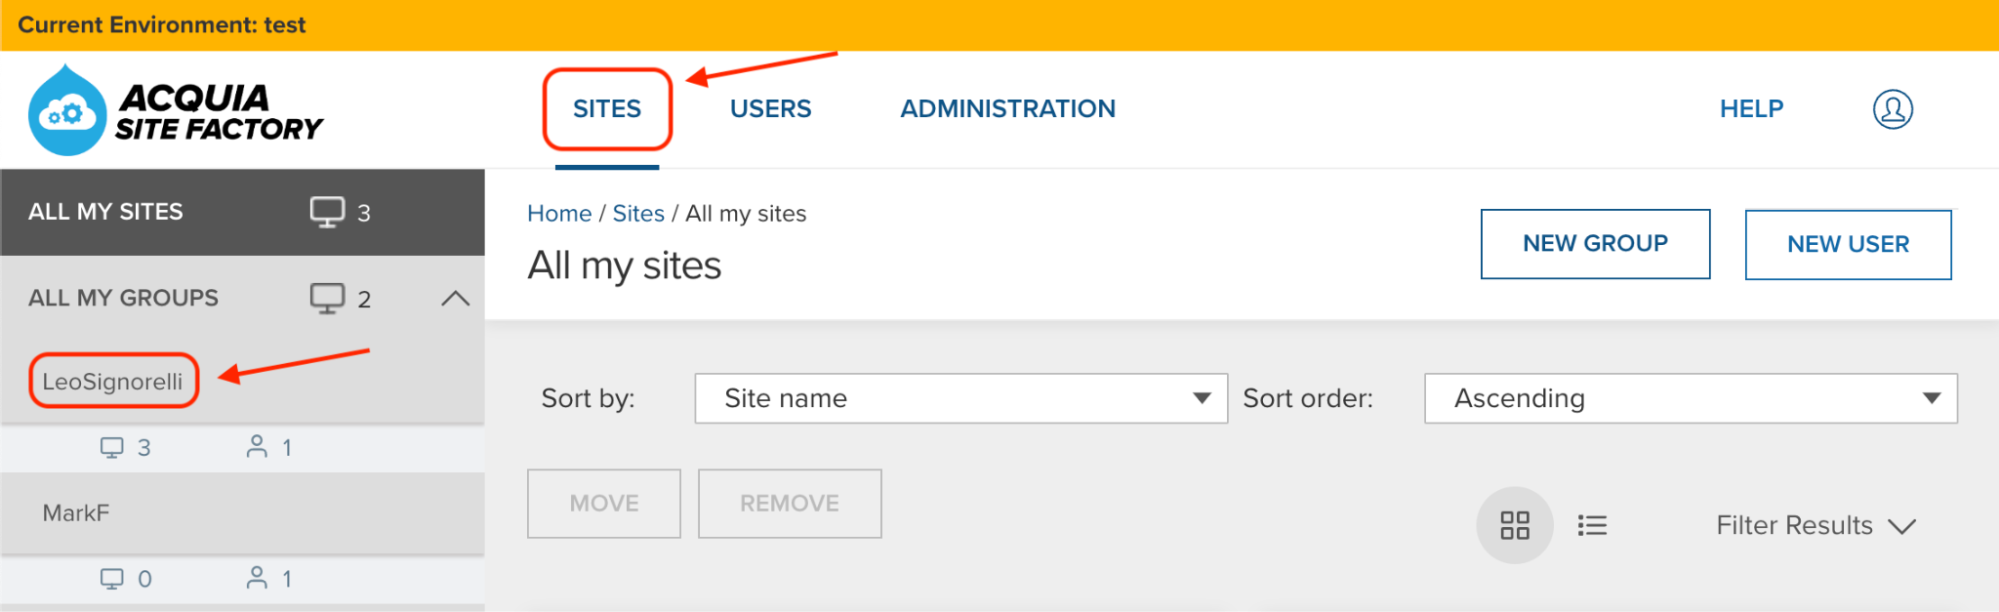
Click the “Create a new Site” button:
Give a name to your new site (Example: site2), and click the “Create Site” button:
Image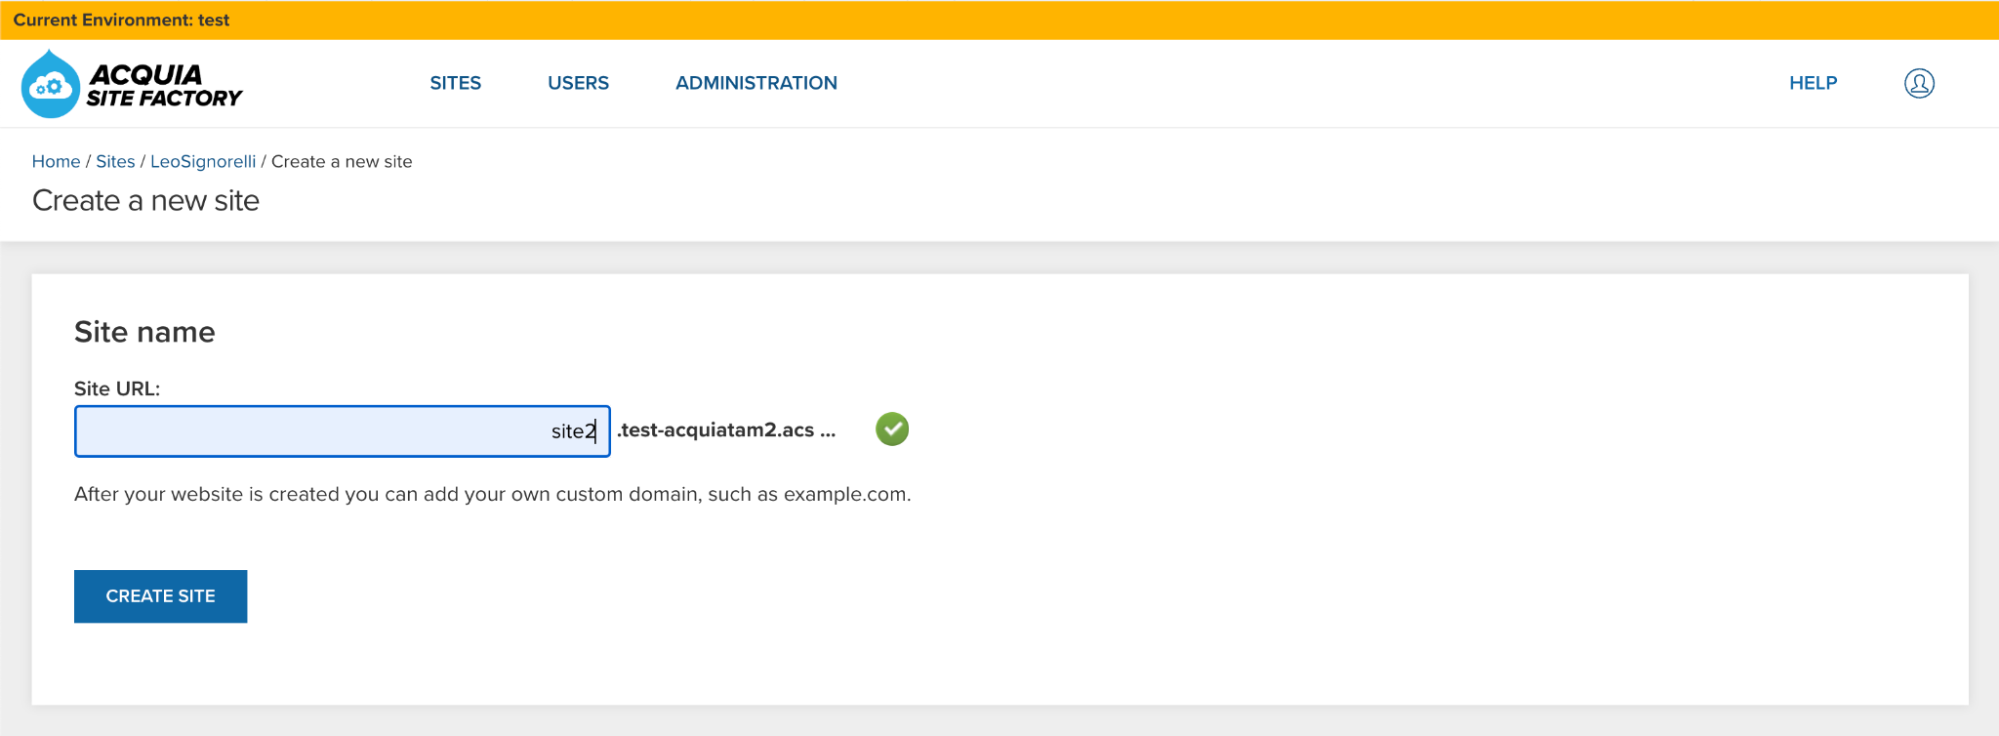 Image
Image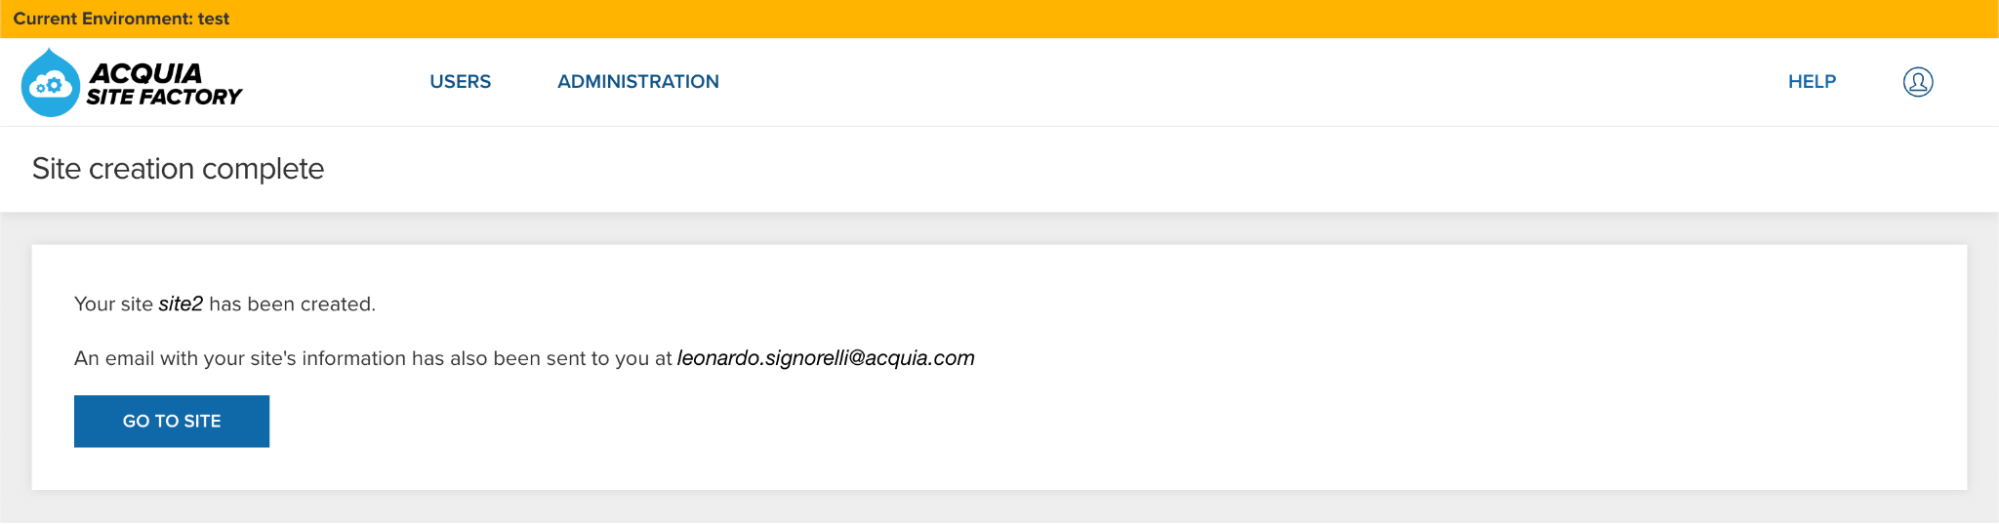
Create a new Drush alias for your new ACSF site
Go back to your Cloud IDE and create a new Drush alias for your new ACSF site using the aliases.sh bash script. Execute the aliasgenerator.sh bash script and follow the instructions:
./aliasgenerator.shSignorelli IDE:~/project (main) $ ./aliasgenerator.sh <-------> <---------------> <---------------------------------> | Drush Alias Generator | <---------------------------------> <---------------> <-------> |---------------------| | Main Menu | |---------------------| | 1 - New Drush Alias | | 2 - Exit | |---------------------| Select a number from the Main Menu: 1 Selected: New Drush Alias ------------------------- Make sure to enter the name of a site you already created in your ACSF account. Example: If the ACSF URL assigned to your new site is site1.acquiatam2.acsitefactory.com Enter site1 Provide the name of the site you want to create a Drush alias: site2 Is this site name correct?: "site2" (Yes/No/Cancel = y/n/c) y Generating the drush alias for site2.. Ready! Going back to the Main Menu... |---------------------| | Main Menu | |---------------------| | 1 - New Drush Alias | | 2 - Exit | |---------------------| Select a number from the Main Menu: 2 Selected: Exit -------------- Exiting this script...Check that your new site doesn’t have configuration differences:
drush @site2.01test cexSignorelli IDE:~/project (main) $ drush @site2.01test cex [notice] The active configuration is identical to the configuration in the export directory (../config/default). ../config/default Connection to acquiatam201test.ssh.enterprise-g1.acquia-sites.com closed. Signorelli IDE:~/project (main) $Testing your new codebase: Change the site name of your second site
Login to your new ACSF site using drush uli:
drush @site2.01test uliGo to the “Basic site settings” admin page (/admin/config/system/site-information) and change the name of your new site:
Image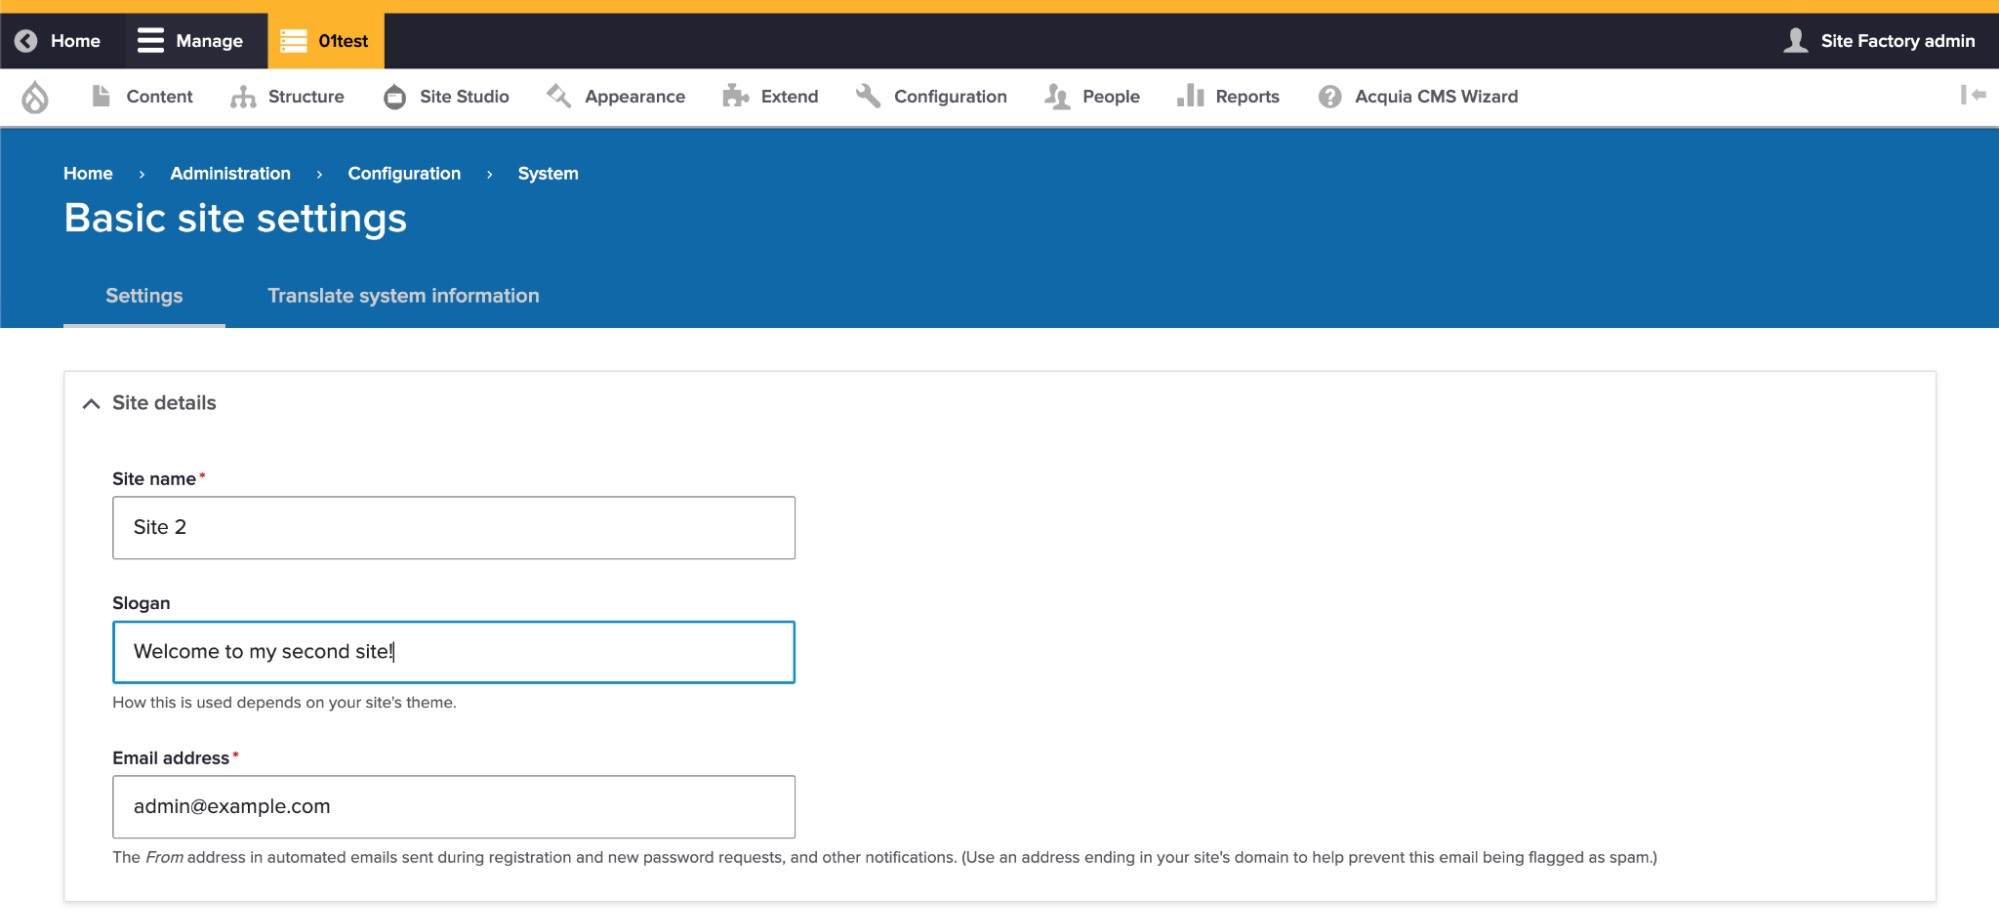
Save your changes.
Check that this new change in your second site didn’t create a configuration difference:
drush @site2.01test cexSignorelli IDE:~/project (main) $ drush @site2.01test cex [notice] The active configuration is identical to the configuration in the export directory (../config/default). ../config/default Connection to acquiatam201test.ssh.enterprise-g1.acquia-sites.com closed. Signorelli IDE:~/project (main) $ -
Making changes to your Codebase: Install a new module
I will install the Shield module to demonstrate the process of adding a new module to your codebase.
Install the new module with Composer
Go to your Cloud IDE instance and execute the following composer command to install the Shield module:
composer require 'drupal/shield:^1.7'Enable the Shield module:
drush en shieldGo to the Shield module configuration page to make sure the module was installed and enabled successfully (/admin/config/system/shield):
Image
Add the Shield module to the Config Ignore module
If you wish to have the ability to use different Shield credentials per site, you will need to add the Shield configuration file to the Config Ignore module.
Open a new Terminal window in your Cloud IDE instance and execute “drush cex” to find out the filename of the Shield configuration file. Respond NO to the prompt as we don’t want to export the configuration changes at this moment:
drush cexSignorelli IDE:~/project (main) $ drush cex [notice] Differences of the active config to the export directory: +------------+-----------------+-----------+ | Collection | Config | Operation | +------------+-----------------+-----------+ | | shield.settings | Create | | | core.extension | Update | +------------+-----------------+-----------+ The .yml files in your export directory (/home/ide/project/config/default) will be deleted and replaced with the active config. (yes/no) [yes]: > no In ConfigExportCommands.php line 155: Cancelled. Signorelli IDE:~/project (main) $Go to the Config Ignore admin page of your Cloud IDE site and add “shield.settings” to the end of the list (/admin/config/development/configuration/ignore):
Image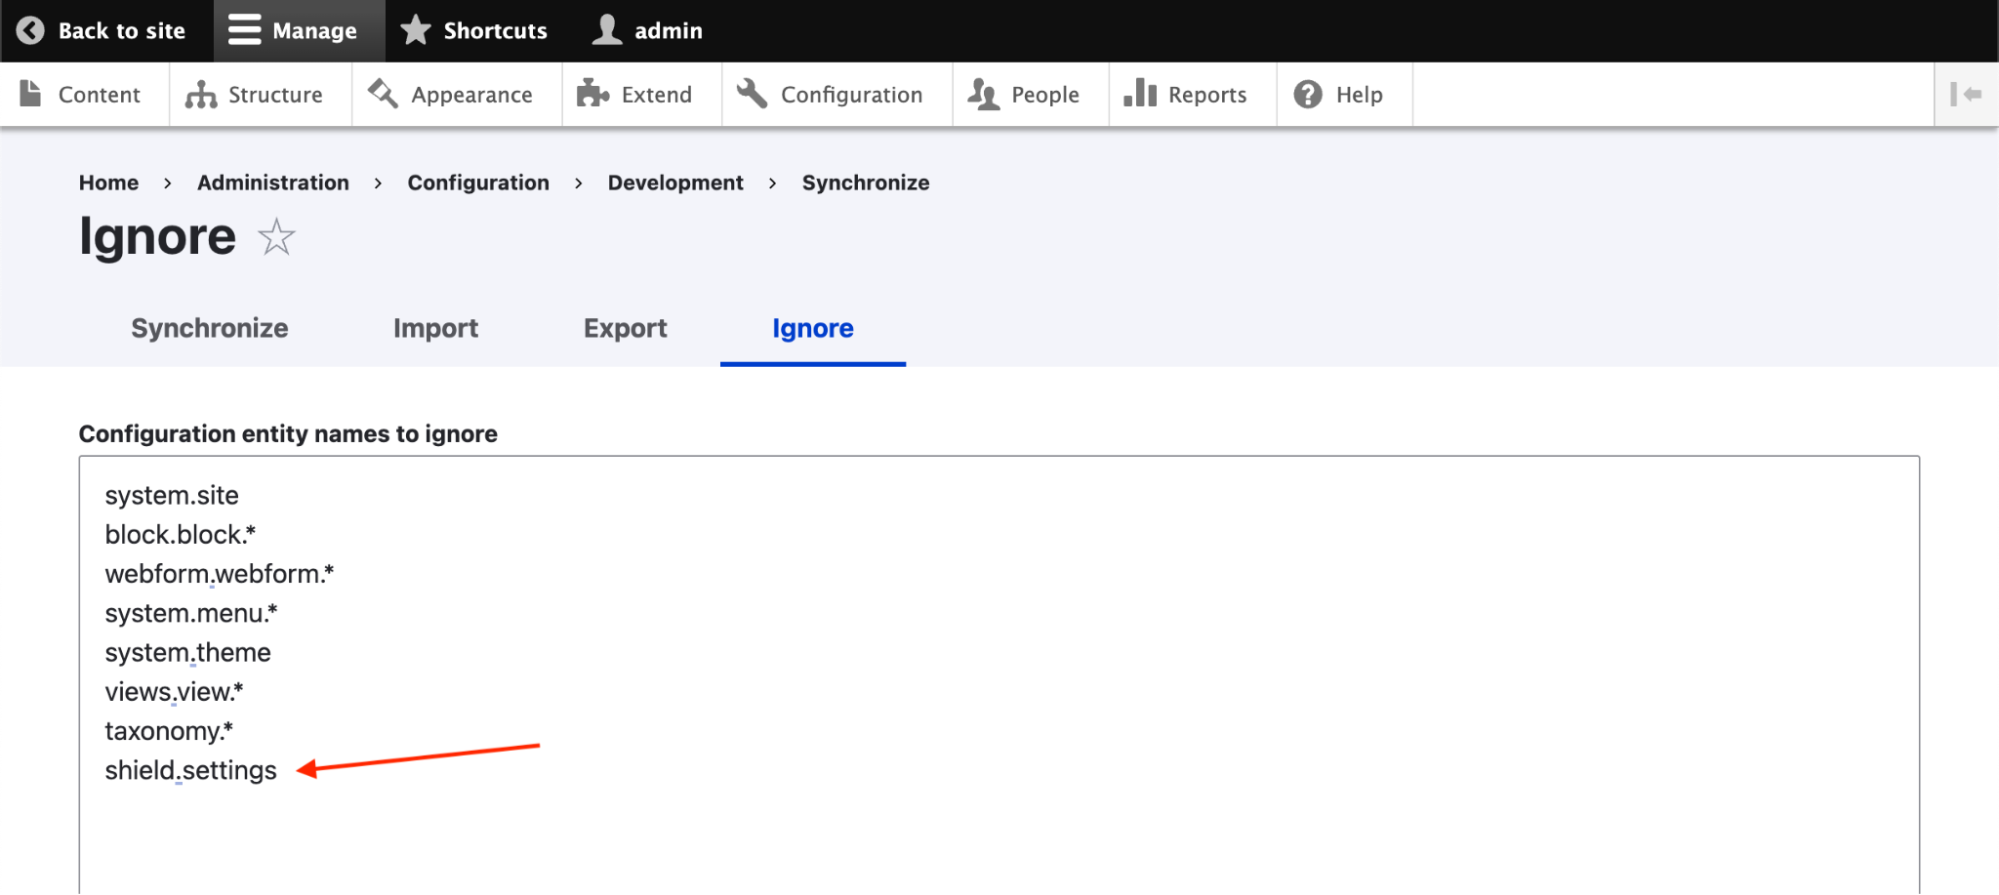
Export your new Drupal configuration
After installing a new module, it’s always recommended to see if there are pending database changes:
drush updbSignorelli IDE:~/project (main) $ drush updb [success] No pending updates. Signorelli IDE:~/project (main) $Run the following BLT command each time there is a core update or if a new module was installed:
blt recipes:acsf:init:drushExport the new Drupal configuration:
drush cexSignorelli IDE:~/project (main *) $ drush cex [notice] Differences of the active config to the export directory: +------------+-------------------------+-----------+ | Collection | Config | Operation | +------------+-------------------------+-----------+ | | core.extension | Update | | | config_ignore.settings | Update | +------------+-------------------------+-----------+ The .yml files in your export directory (/home/ide/project/config/default) will be deleted and replaced with the active config. (yes/no) [yes]: > yes [success] Configuration successfully exported to /home/ide/project/config/default. /home/ide/project/config/default Signorelli IDE:~/project (main *) $Add your new module to your profile’s .info.yml file
Every time you add a new module to your codebase, you will need to add it to your profile’s .info.yml file.
Open your profile’s .info.yml file (/home/ide/project/docroot/profiles/custom/tamprofile/acsfprofile.info.yml) and under the “install” section, add the new installed module (shield):name: acsfprofile type: profile base profile: minimal description: 'ACSF Profile' core: 9.x core_version_requirement: '^9 || ^10' install: - acsf - acsf_duplication - acsf_theme - acsf_variables - automated_cron - big_pipe - block - block_content - breakpoint - ckeditor5 - comment - config - config_filter - config_ignore - config_split - contact - contextual - datetime - dblog - dynamic_page_cache - editor - field - field_ui - file - filter - help - history - image - link - menu_link_content - menu_ui - mysql - node - options - page_cache - path - path_alias - search - shield <--- - shortcut - system - taxonomy - text - toolbar - tour - update - user - views_ui - views - acsfprofile theme: - olivero - claroSave your changes.
Deploy your new codebase changes to ACSF
First, you need to push your new codebase changes to your repository:
git add -A git commit -m "BLT-004: Added the Shield module." git pushDeploy your codebase to ACSF:
blt artifact:deployI named this new deployed code: 1.0.2-d10acsf
Signorelli IDE:~/project (main) $ blt artifact:deploy Would you like to create a tag? (y/n) y Enter a valid commit message [BLT-004: Added the Shield module.] Enter the tag name for the deployment artifact, e.g., 1.0.0-build 1.0.2-d10acsfGo to the ACSF Console UI of one of your lower environments and go to Administration -> Update code:
Image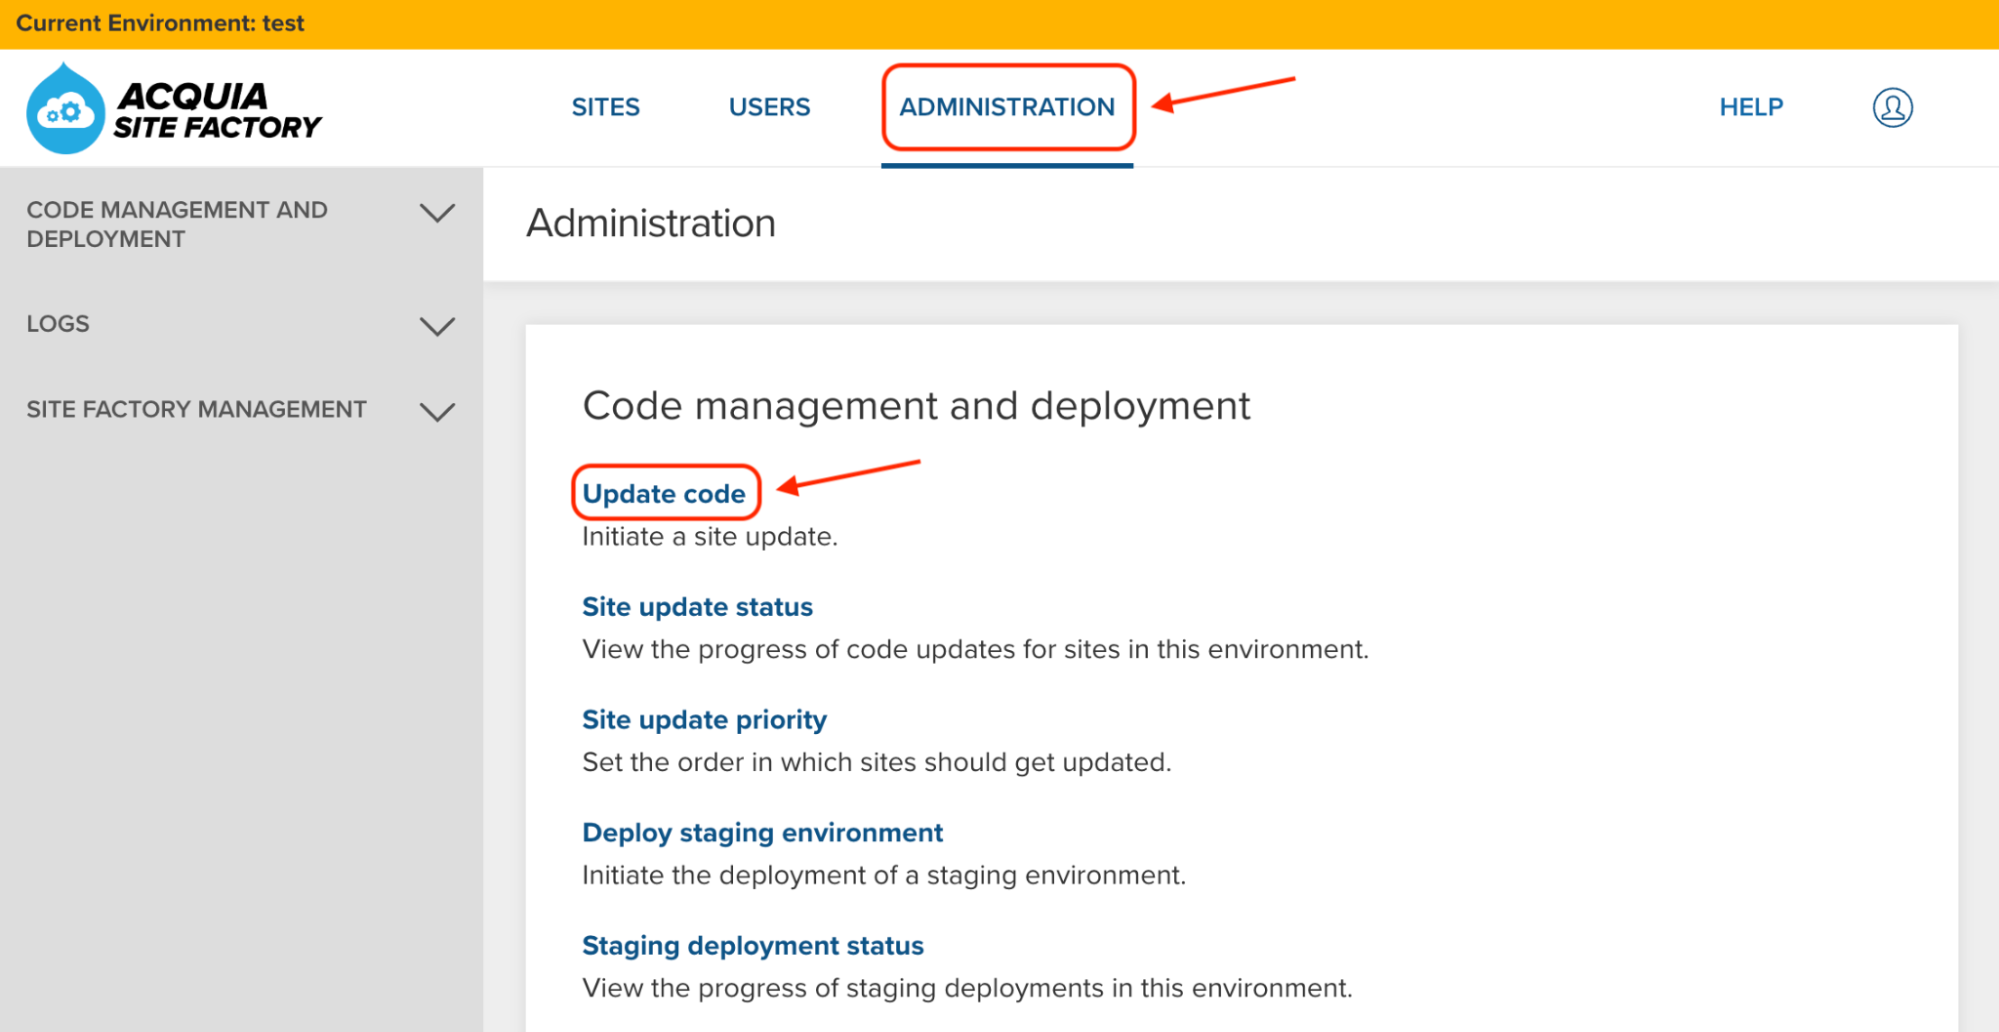
In the Site Update page, use the dropdown to select your new codebase (1.0.2-d10acsf):
Image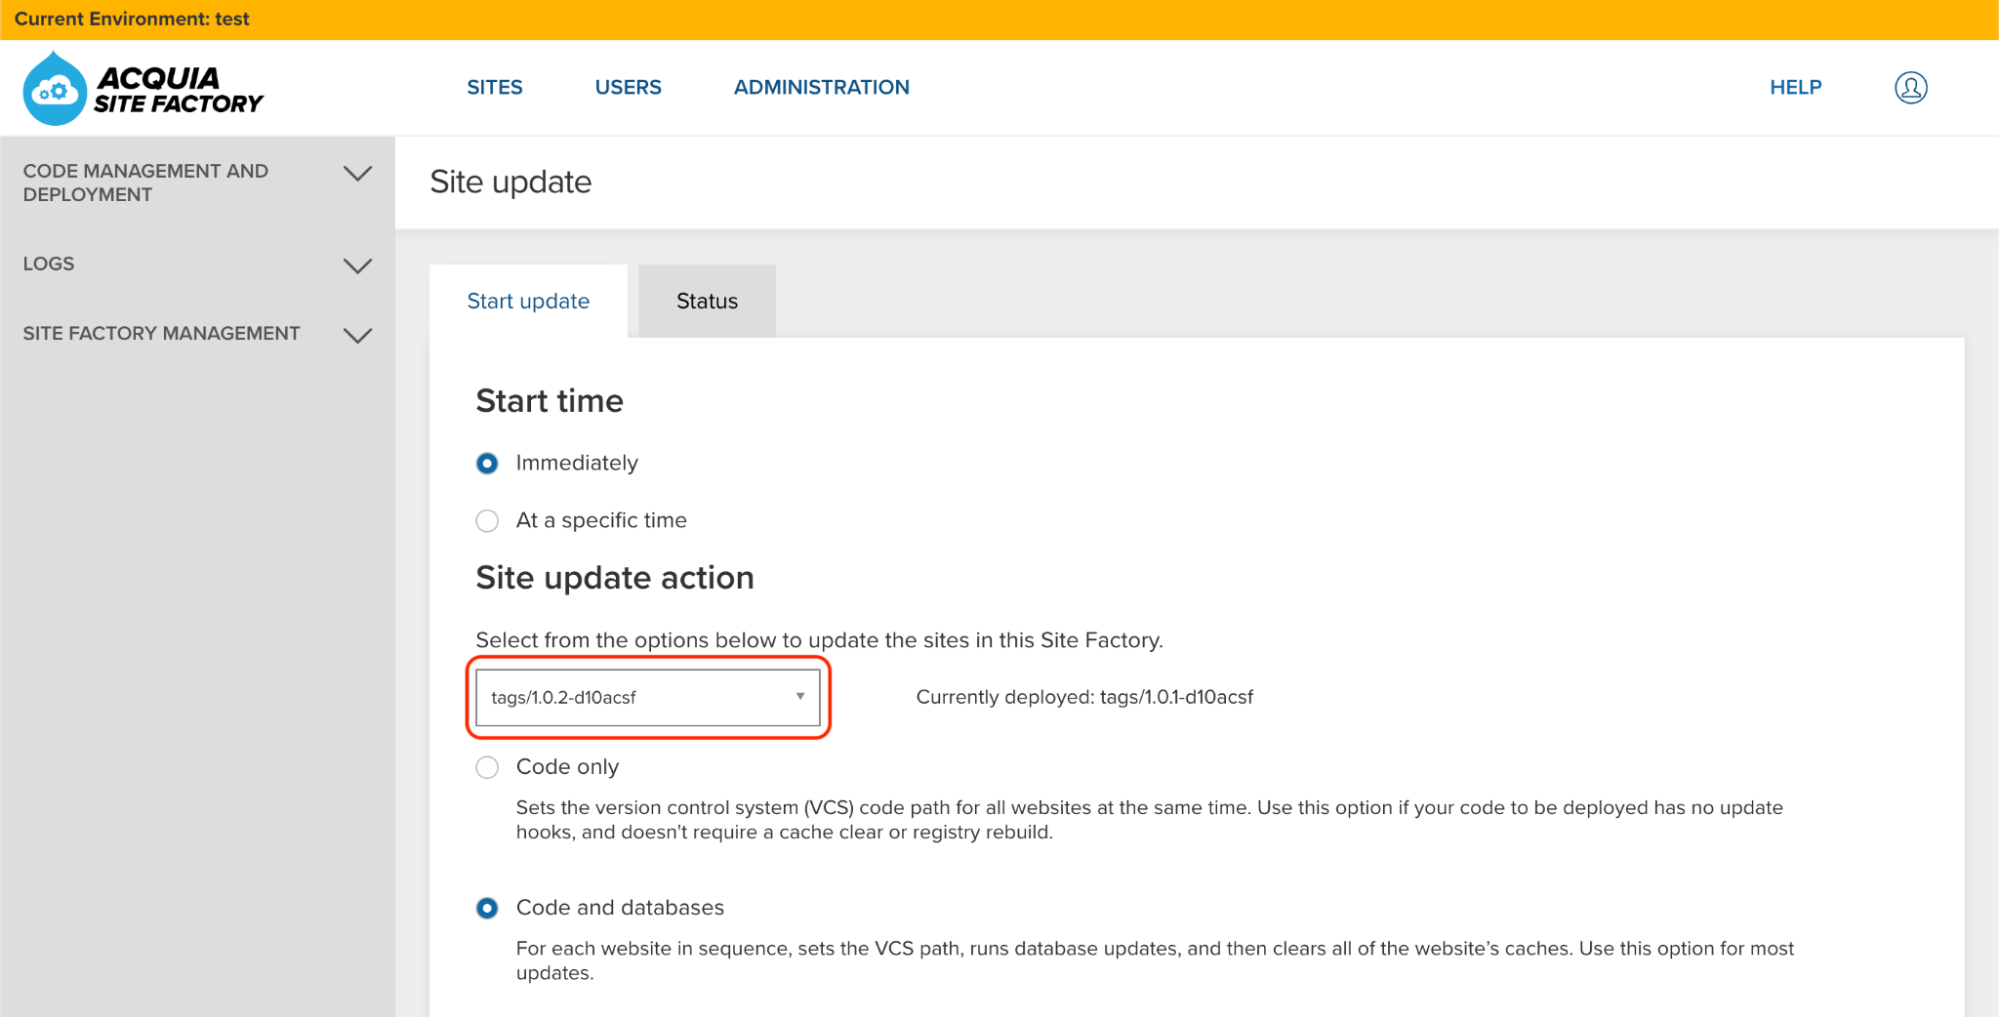
Click the Update button and wait until the update process finishes:
Image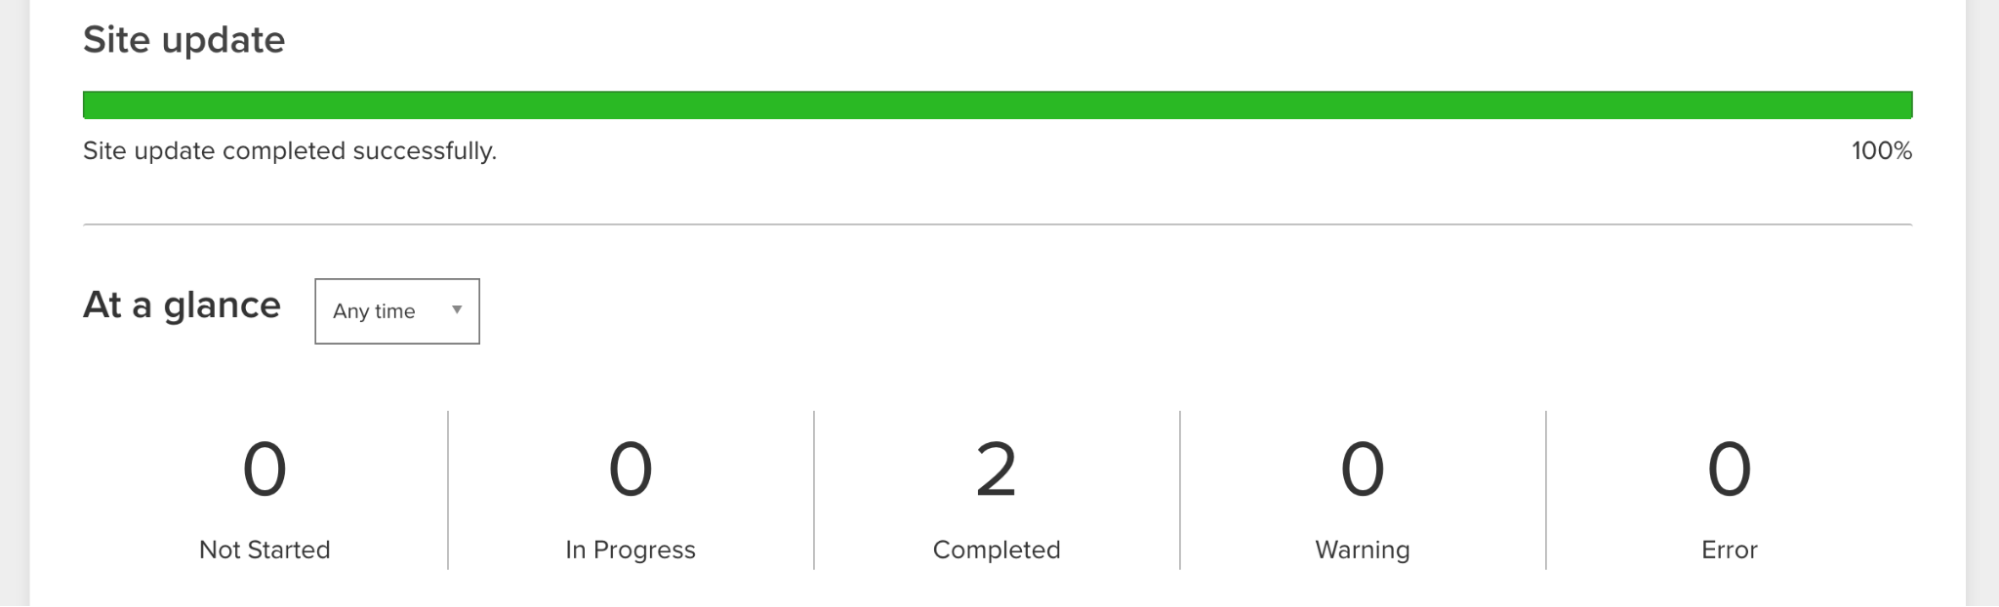
Check the changes in your existing ACSF sites
After you pushed your new codebase to the test environment and updated all the existing sites in there, you should always check that the changes were applied successfully to your sites.
Go to the Config Ignore module admin page of one of your ACSF sites to check if it has the new “shield.settings” on the list:
Image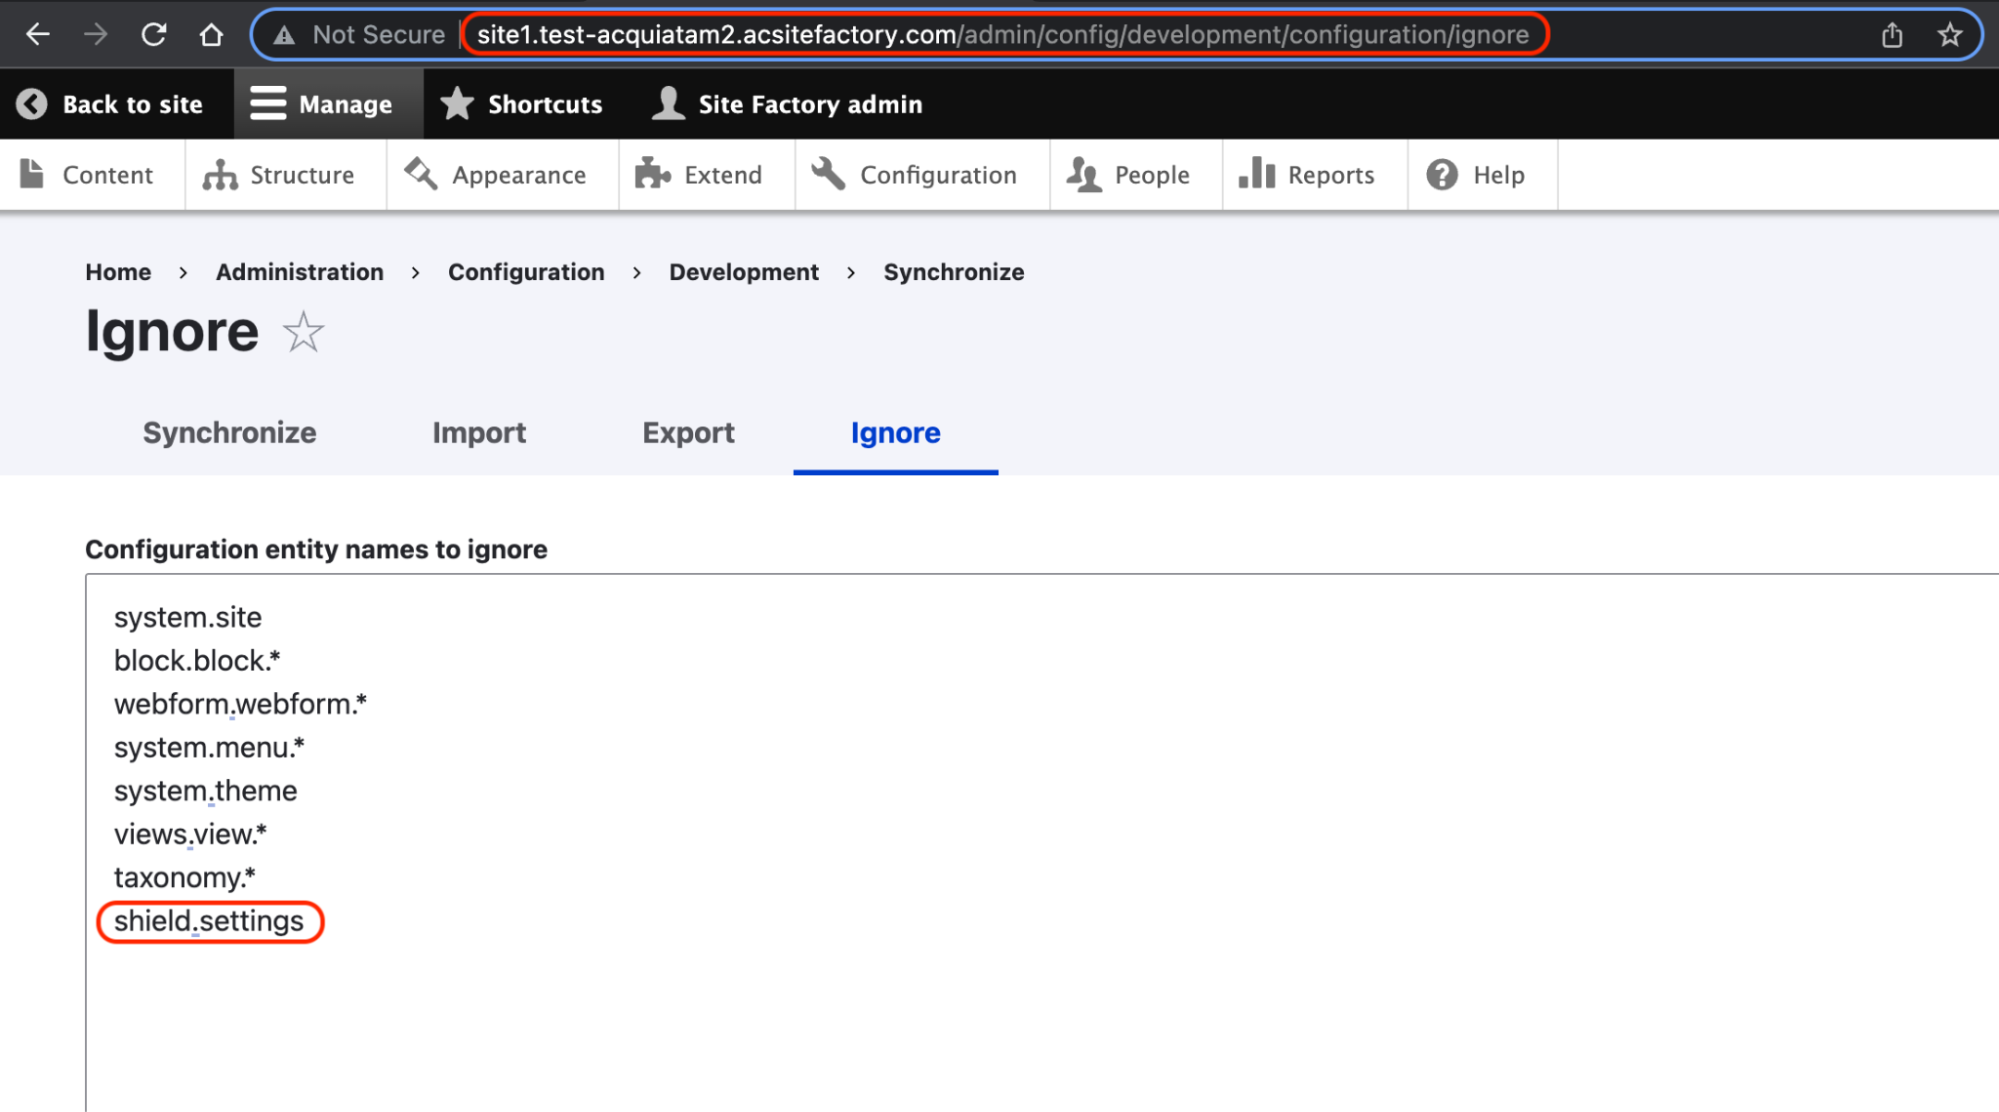
Enable the Shield module and check for Configuration Differences
Let’s activate and configure the Shield module on one of your ACSF sites. Go to the Shield module admin page ( /admin/config/system/shield), check the “Enable Shield” checkbox and assign a user and password under the Credentials section. Click the “Save configuration” button to save the changes:
Image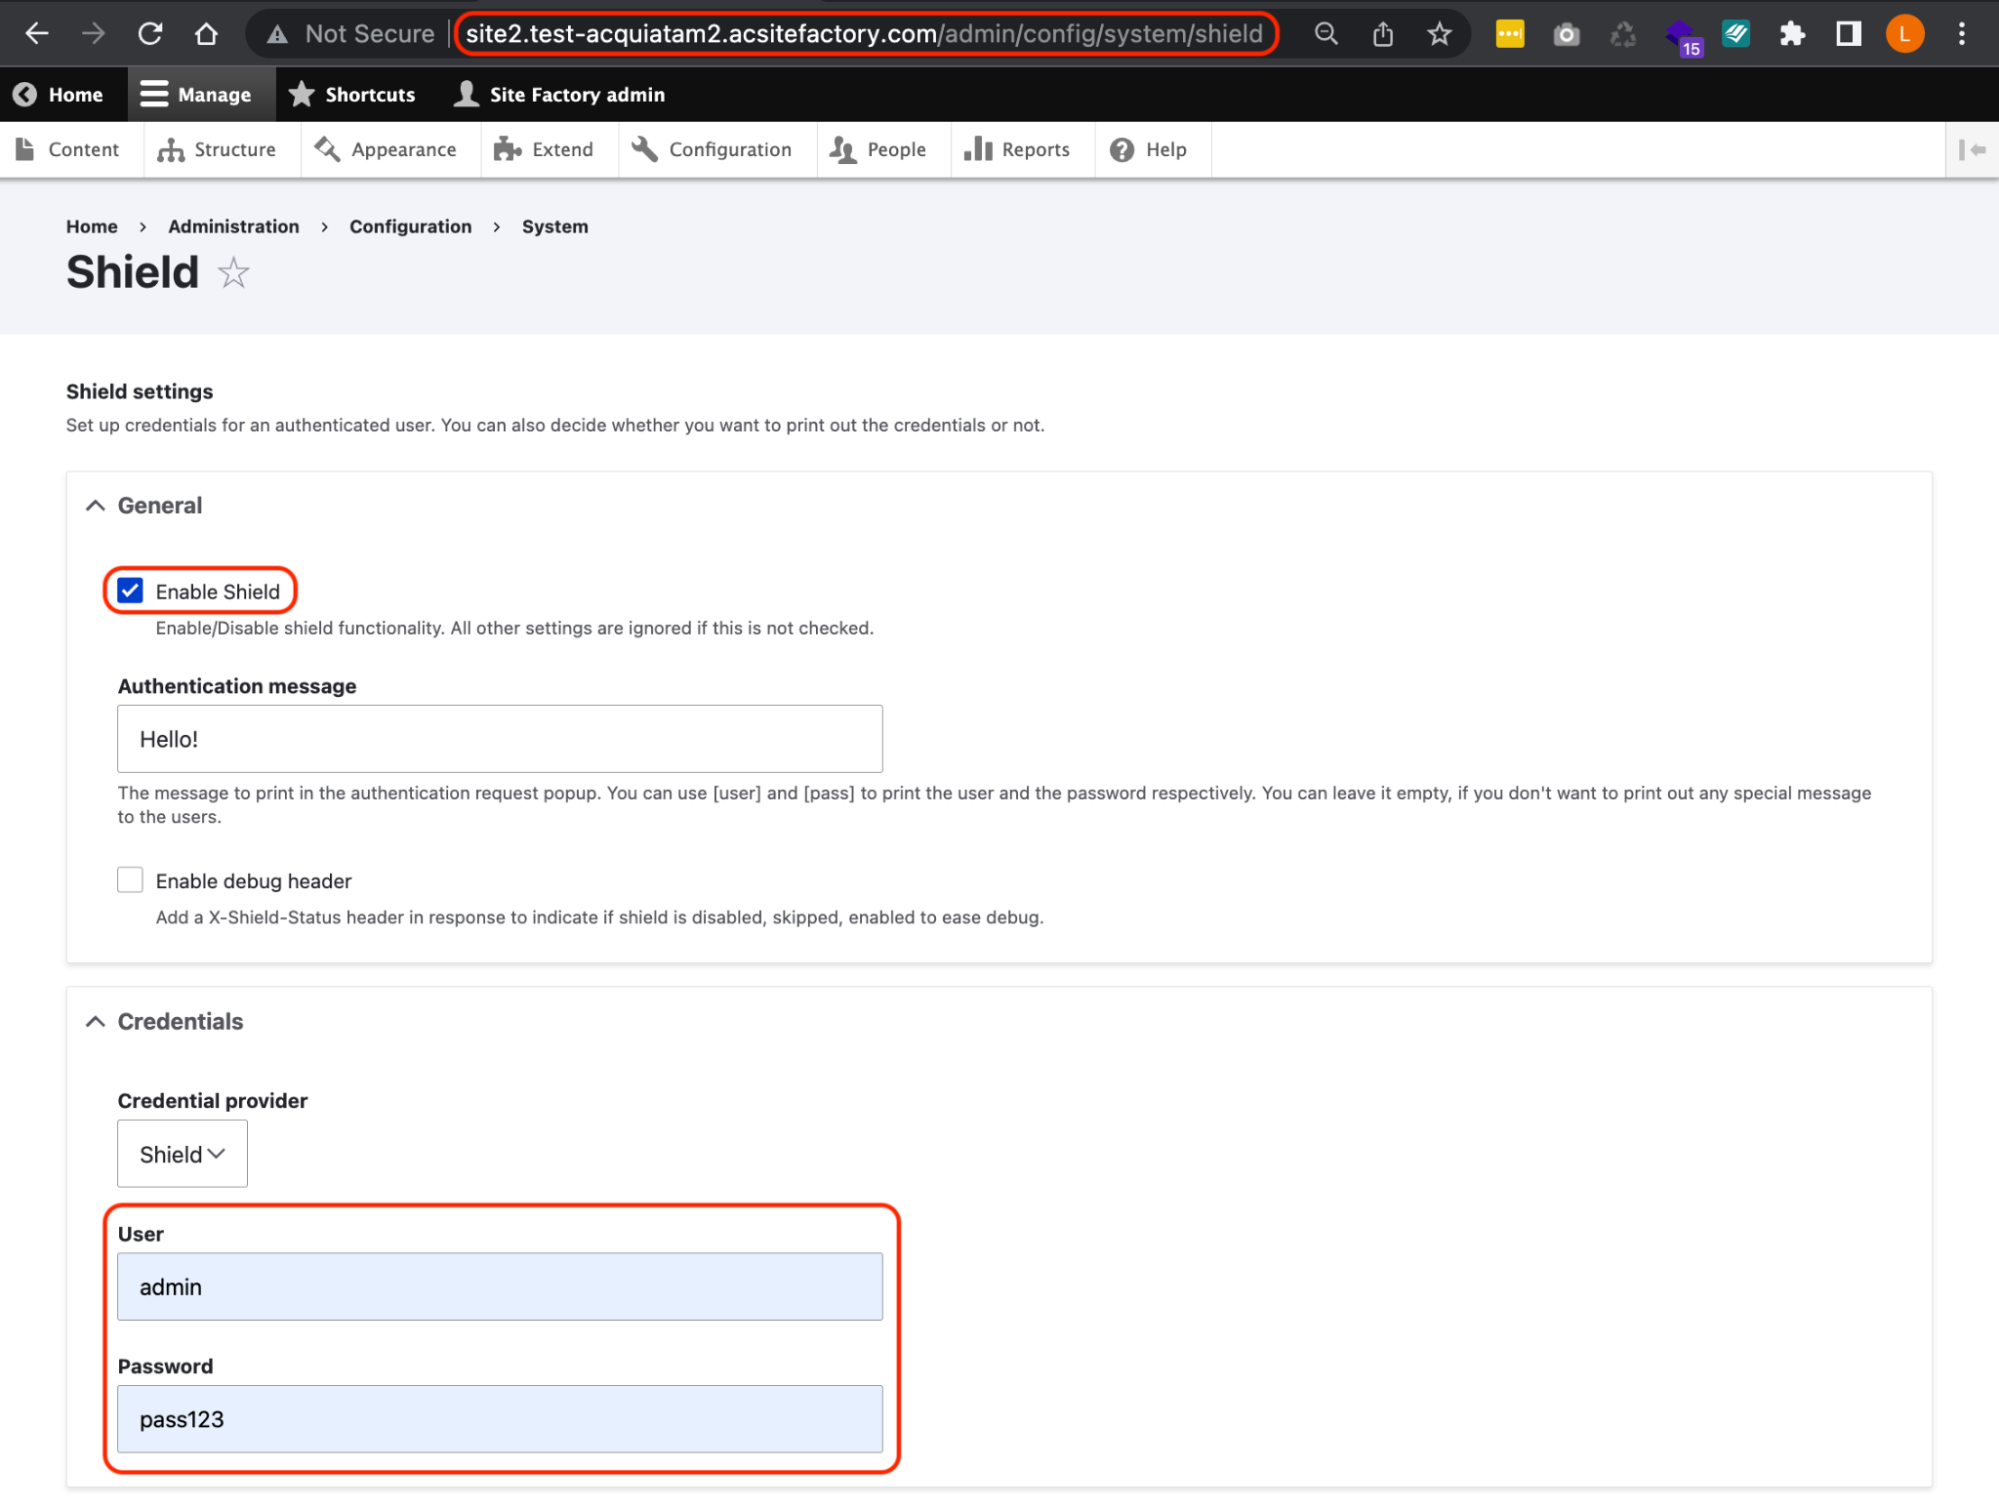
You should get the Shield “Sign In” prompt right after you hit the “Save configuration” button:
Image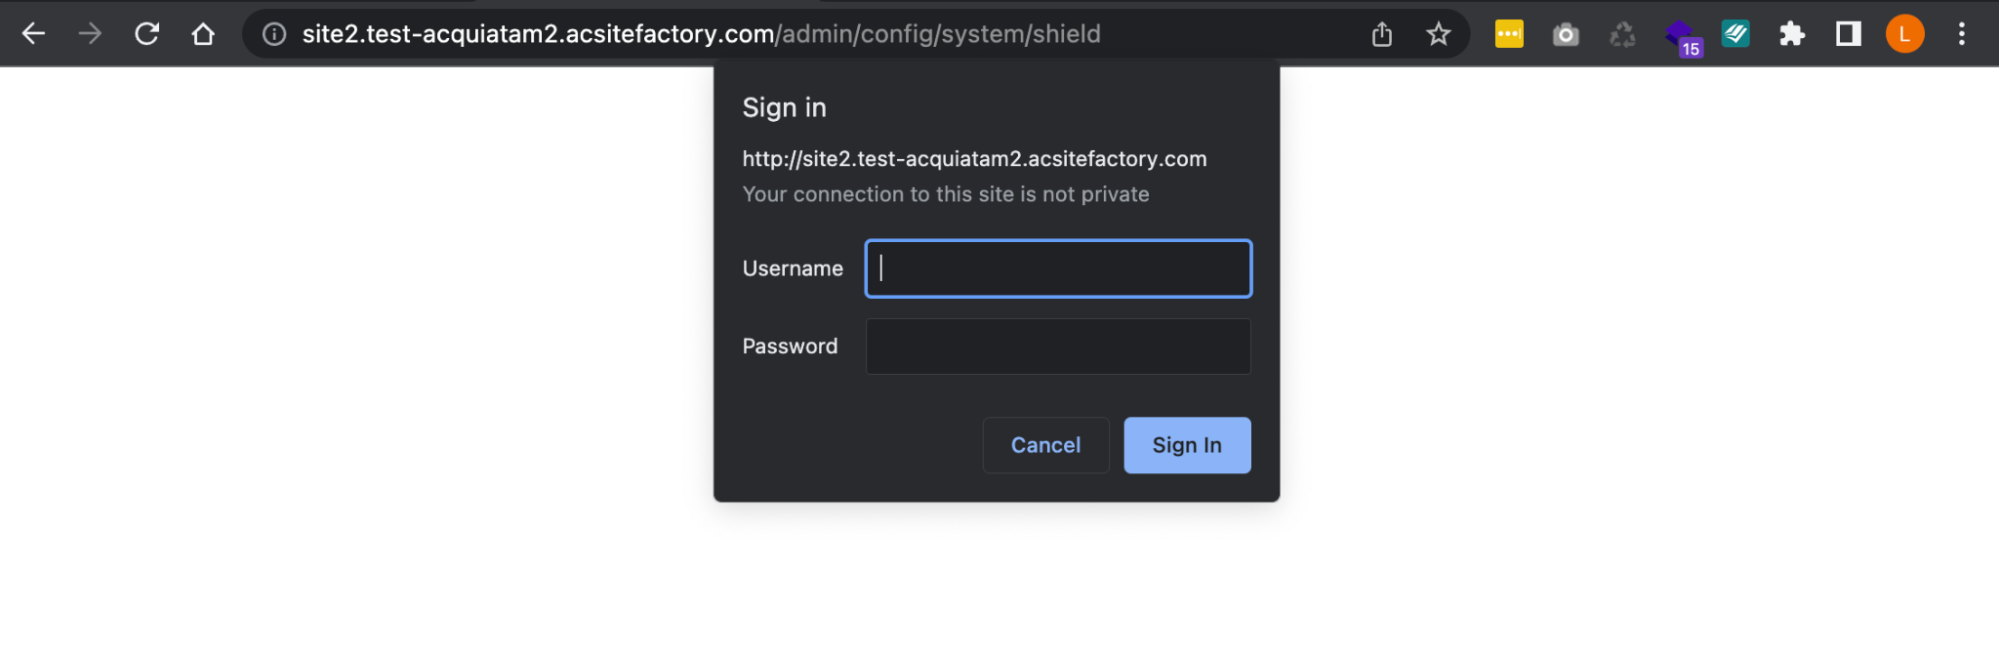
Enter your Shield credentials to test everything is working fine.
Check for configuration differences
Now that one of your sites has the Shield module activated, you should check if there are any configuration differences. Go to your Cloud IDE terminal and execute “drush cex” against your ACSF site that has the Shield module activated:
Signorelli IDE:~/project (main) $ drush @site2.01test cex [notice] The active configuration is identical to the configuration in the export directory (../config/default). ../config/default Connection to acquiatam201test.ssh.enterprise-g1.acquia-sites.com closed. Signorelli IDE:~/project (main) $We don’t have any configuration differences. That means we configured the Config Ignore module correctly to ignore any configuration changes of the Shield module across your ACSF sites.
Create a new ACSF site to test your new codebase
It’s recommended that you always create a new site to test that your codebase is working fine and that it doesn’t create configuration differences.
Create a new ACSF site using your new codebase. Go to Sites and select your group:
Image
Click the “Create a new Site” button. Give a name to your new site (Example: site3), and click the “Create Site” button:
Image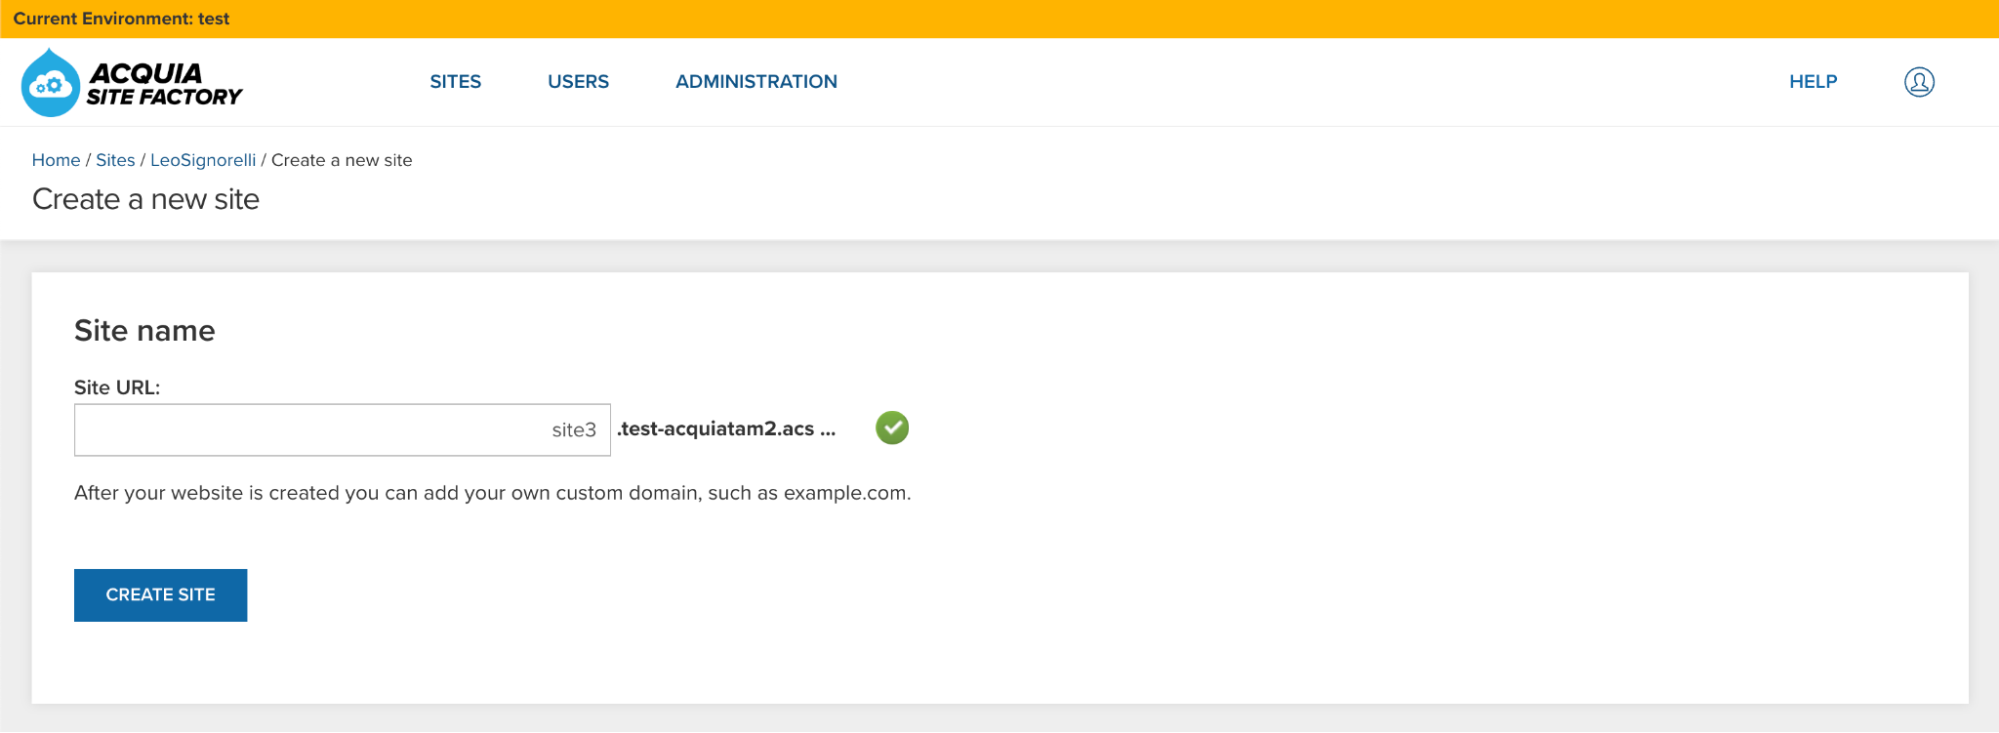 Image
Image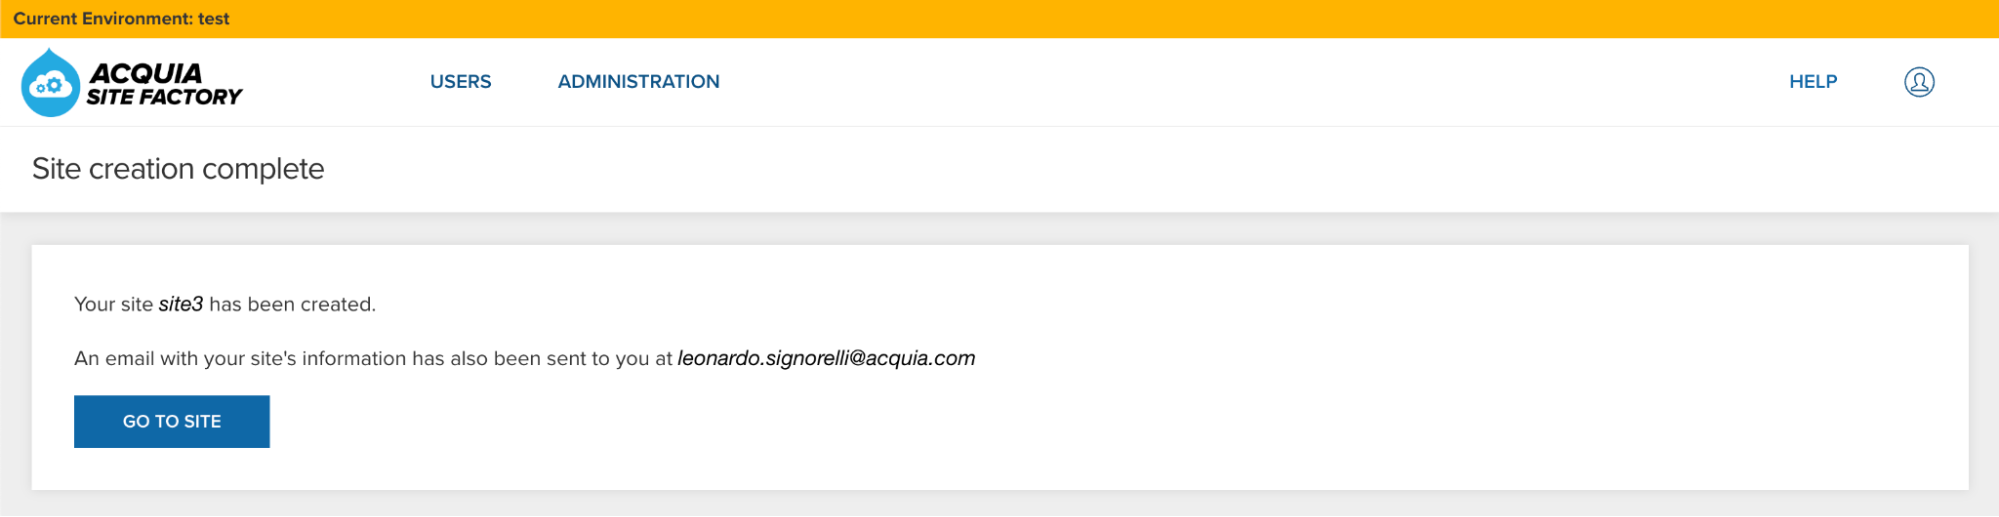
Create a new Drush alias for your new ACSF site
Go back to your Cloud IDE and create a new Drush alias for your new ACSF site using the aliasgenerator.sh bash script. Execute the aliasgenerator.sh bash script and follow the instructions:
./aliasgenerator.shSignorelli IDE:~/project (main) $ ./aliasgenerator.sh <-------> <---------------> <---------------------------------> | Drush Alias Generator | <---------------------------------> <---------------> <-------> |---------------------| | Main Menu | |---------------------| | 1 - New Drush Alias | | 2 - Exit | |---------------------| Select a number from the Main Menu: 1 Selected: New Drush Alias ------------------------- Make sure to enter the name of a site you already created in your ACSF account. Example: If the ACSF URL assigned to your new site is site1.acquiatam2.acsitefactory.com Enter site1 Provide the name of the site you want to create a Drush alias: site2 Is this site name correct?: "site3" (Yes/No/Cancel = y/n/c) y Generating the drush alias for site3.. Ready! Going back to the Main Menu... |---------------------| | Main Menu | |---------------------| | 1 - New Drush Alias | | 2 - Exit | |---------------------| Select a number from the Main Menu: 2 Selected: Exit -------------- Exiting this script...Check that your new site doesn’t have configuration differences:
drush @site3.01test cexSignorelli IDE:~/project (main) $ drush @site3.01test cex [notice] The active configuration is identical to the configuration in the export directory (../config/default). ../config/default Connection to acquiatam201test.ssh.enterprise-g1.acquia-sites.com closed. Signorelli IDE:~/project (main) $If you see the above message stating that there are no configuration changes in your newly installed ACSF site, that means you configured your codebase correctly.
-
Pushing your changes to prod
After you have tested your new codebase changes in your lower environments (test or dev) and created a new test site to make sure your codebase doesn’t generate any configuration differences, you should be ready to update the code in your prod environment.
The prod environment is where you have all your live sites, that’s why it’s so important to test your new codebase changes thoroughly before you push a new codebase to your prod environment.
Login to the ACSF Console UI of your prod environment and go to Administration -> Update code:
Image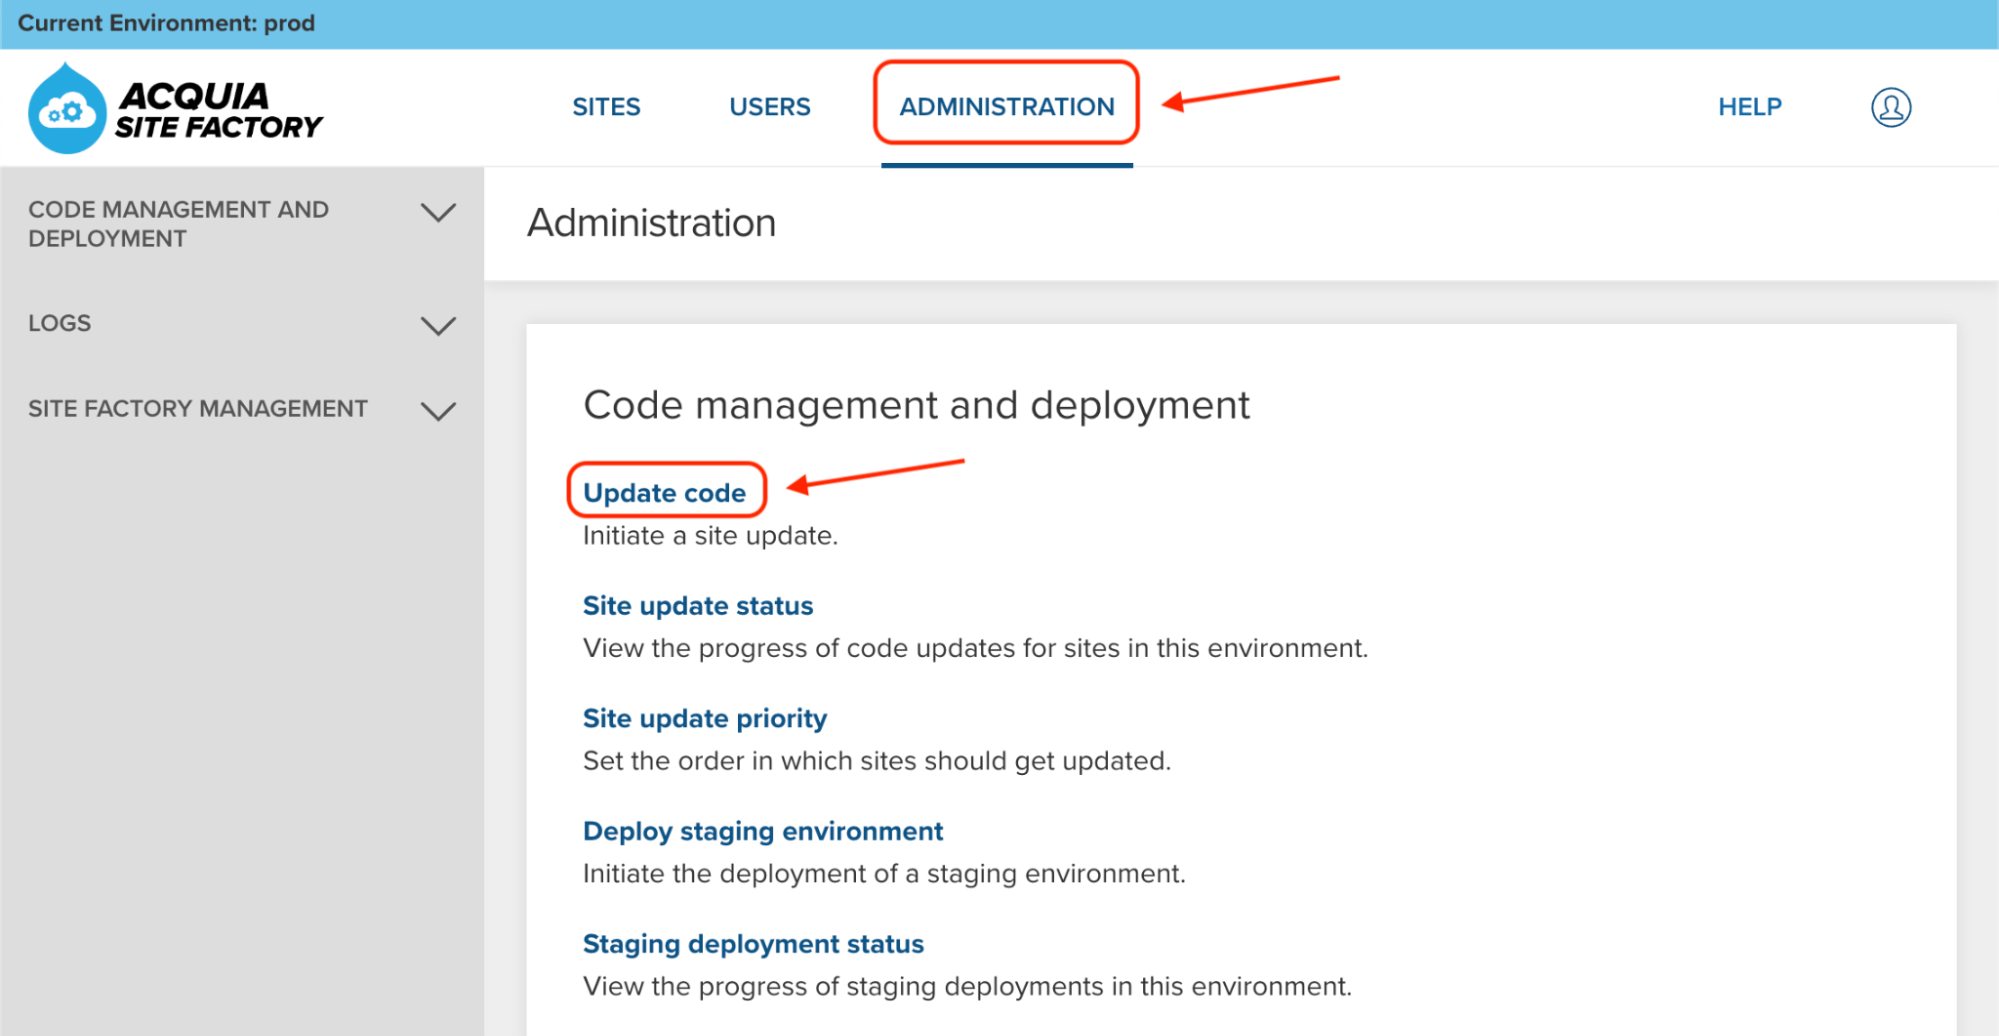
In the Site Update page, use the dropdown to select your new codebase (1.0.2-d10acsf):
Image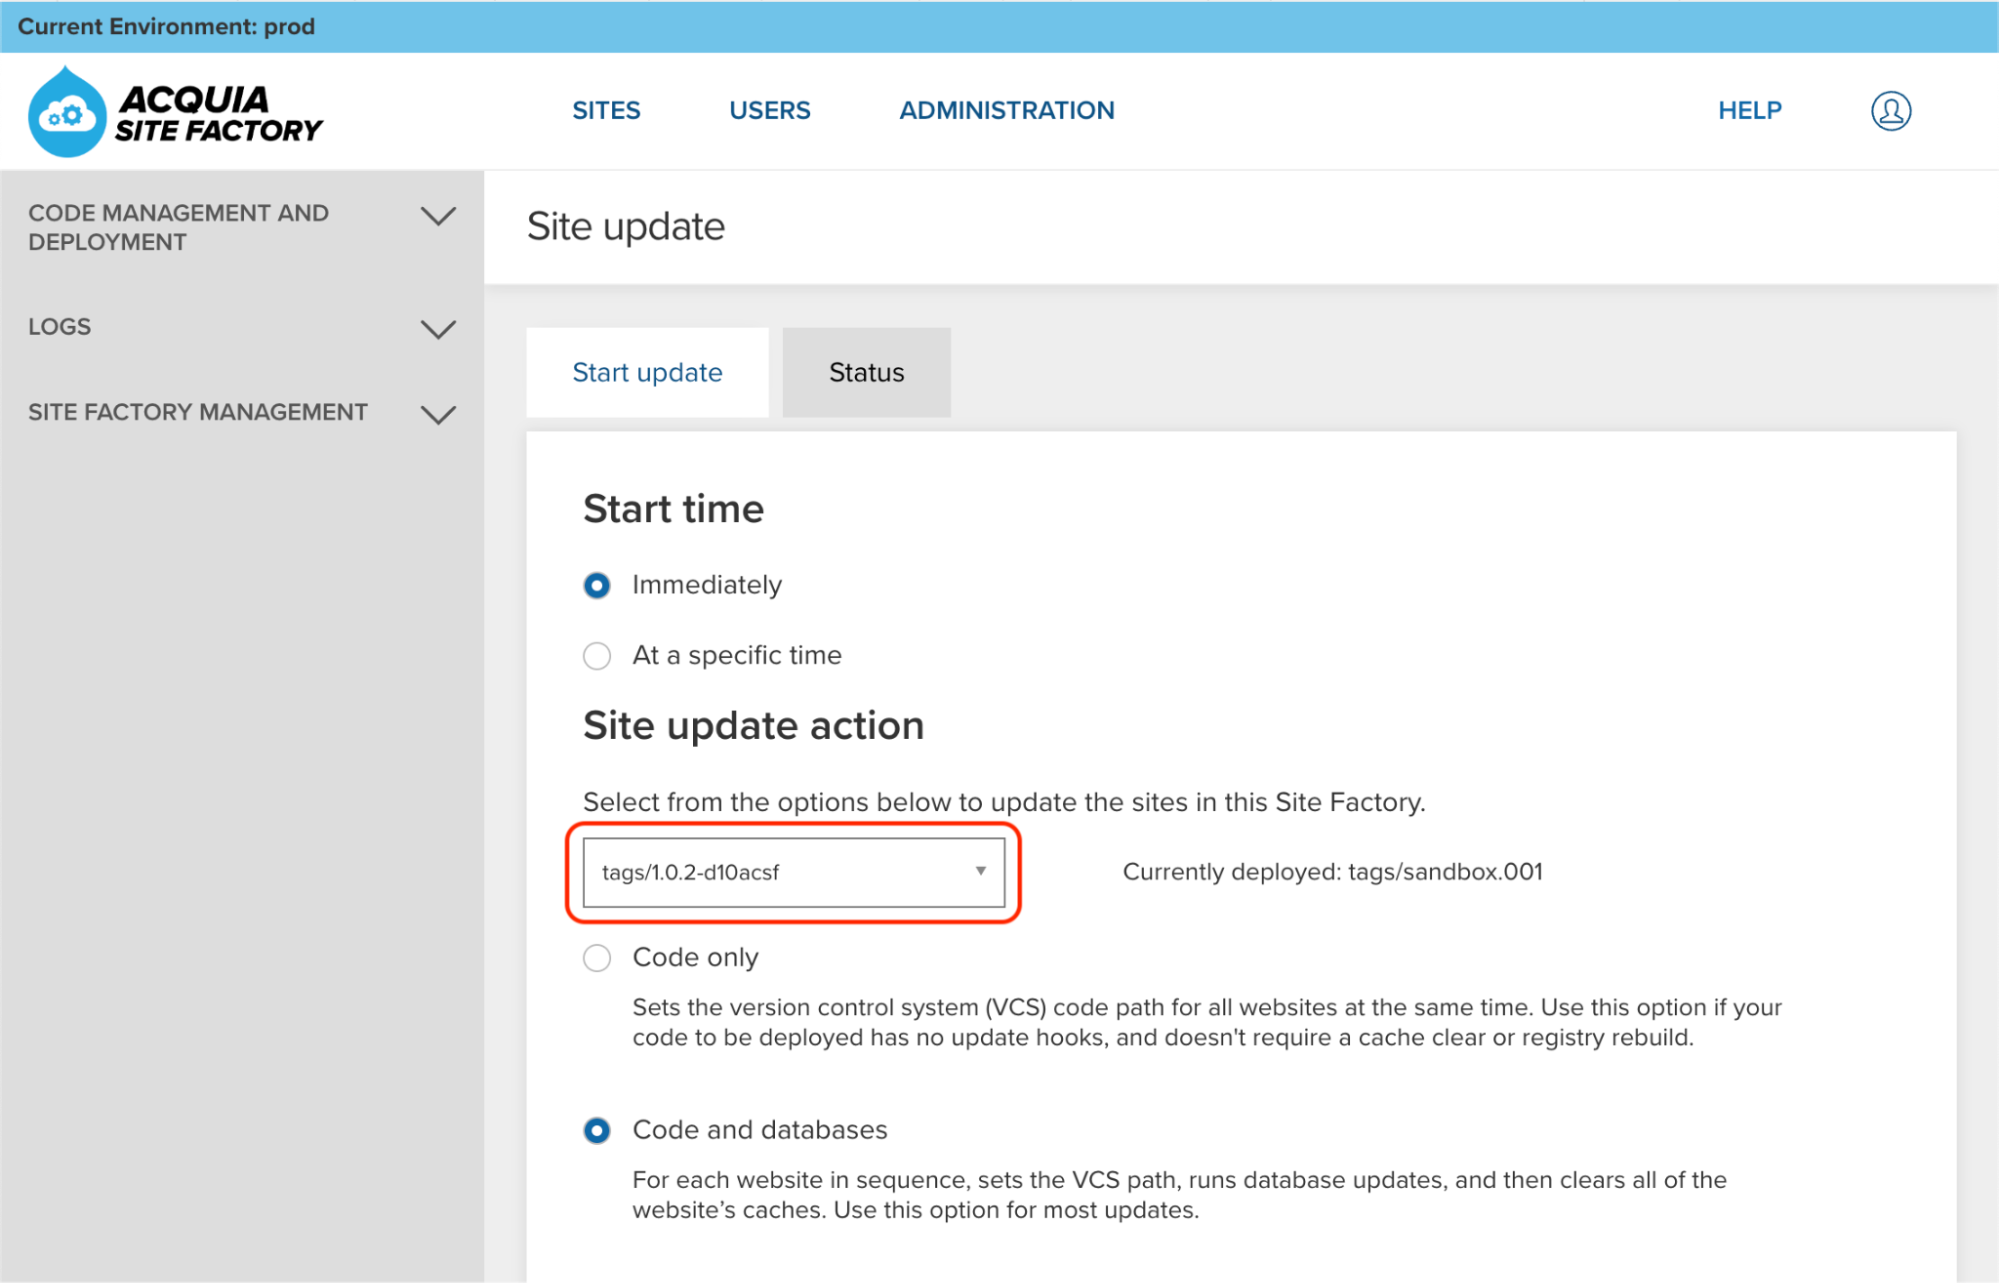
Click the Update button and wait until the update process finishes:
Image
Check the changes in your existing ACSF sites
After you pushed your new codebase to the test environment and updated all the existing sites in there, you should always check that the changes were applied successfully to your sites.
-
Restart your Cloud IDE workspace using your repository
In this last section, I will explain how to restart your Cloud IDE development workspace using your repository with all your latest codebase changes.
Reset your workspace
Go to your Cloud IDE instance, open the Get Started page (Help -> Get Started), and click the “Reset workspace” button:
Image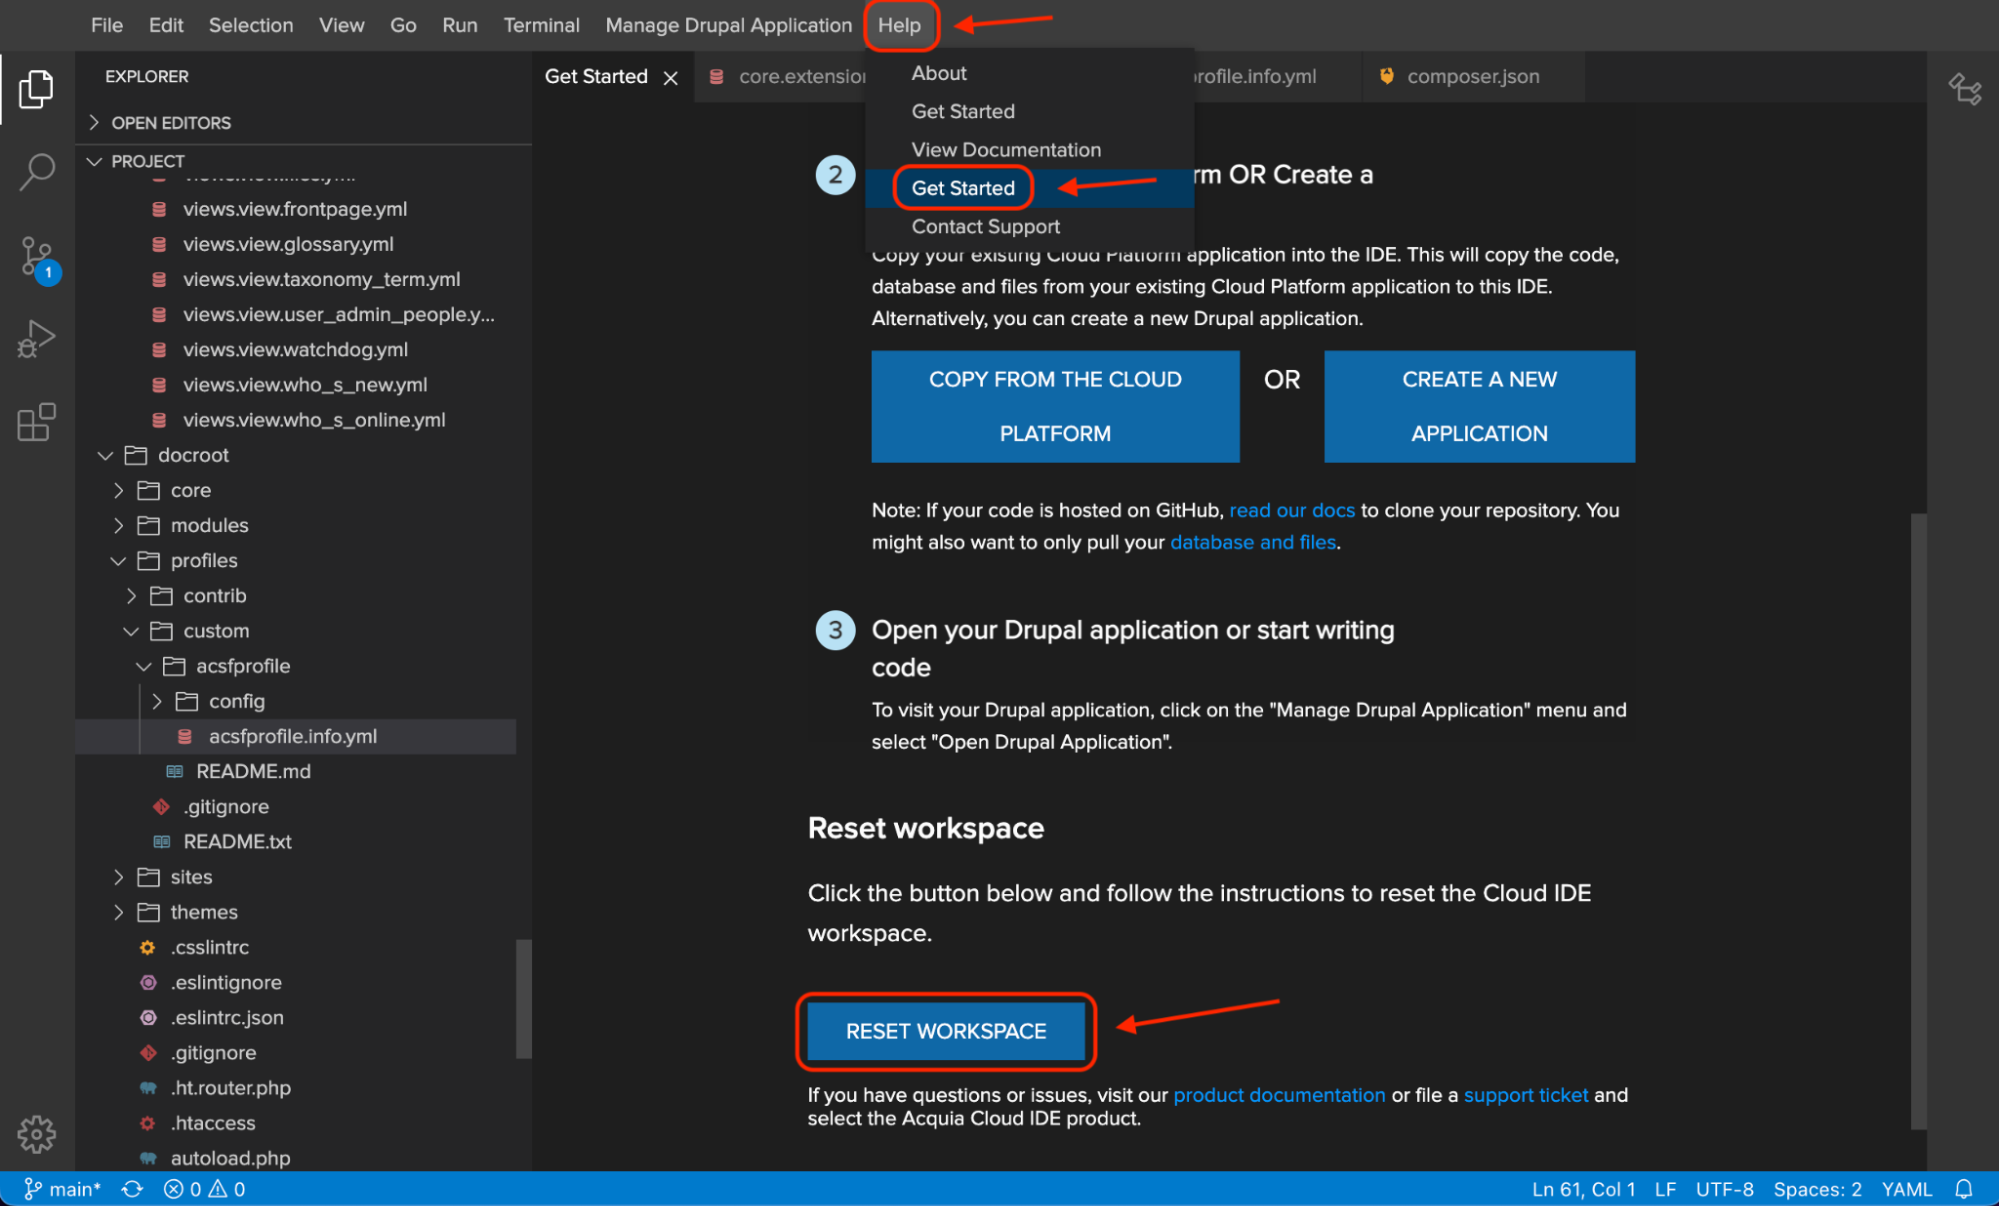
You can also execute the following command to restart your Cloud IDE workspace:
/ide/reset-workspace.pyRespond “y” to the prompt to execute the reset-workspace.py script:
Signorelli IDE:~/project (main) $ /ide/reset-workspace.py
This will reset the '/home/ide/project' workspace and 'drupal' database without an option to recover.
Do you want to continue? [y/n] y
✓ The 'drupal' database is reset.
✓ The '/home/ide/project' workspace is reset.
Signorelli IDE:~/project $
Image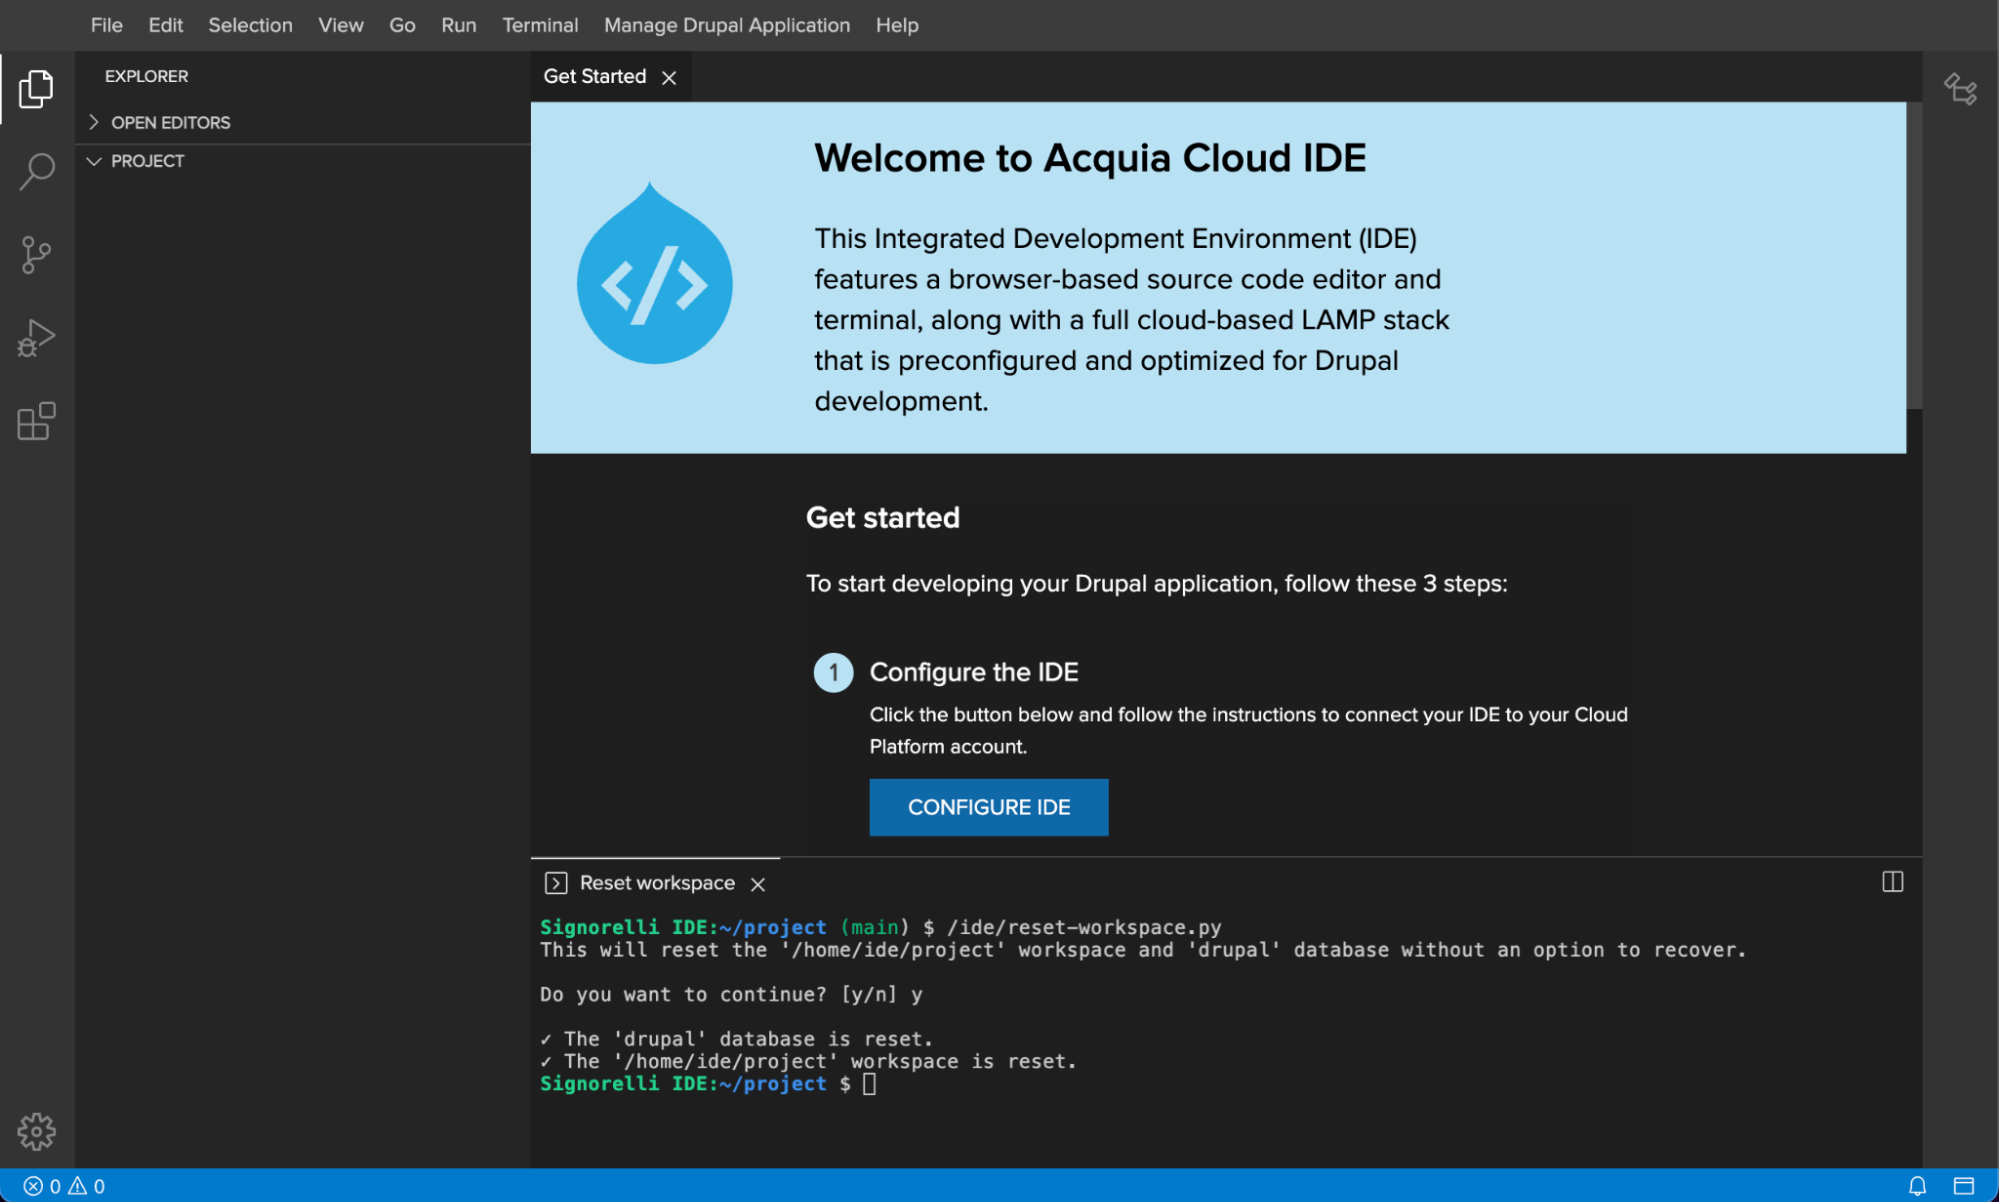
Clone your repository
In your Cloud IDE, open a new terminal window and make sure you are inside the project folder:
cd ~/projectClone your repository down using the following git command syntax:
git clone YourRemoteRepositoryURL .Make sure to add the final period “.” so you clone your repository inside the project folder. Example:
git clone https://github.com/astralmemories/d10acsf.git .Image
Execute "composer install" to generate the vendor folder with all the necessary dependencies:
composer installSignorelli IDE:~/project (main) $ composer install Installing dependencies from lock file (including require-dev) Verifying lock file contents can be installed on current platform. Package operations: 158 installs, 0 updates, 0 removals - Installing cweagans/composer-patches (1.7.3): Extracting archive Gathering patches for root package. No patches supplied. Gathering patches for dependencies. This might take a minute. - Installing drupal/core-composer-scaffold (10.0.7): Extracting archive - Installing composer/installers (v2.2.0): Extracting archive - Installing symfony/polyfill-ctype (v1.27.0): Extracting archive - Installing symfony/yaml (v6.2.7): Extracting archive - Installing symfony/process (v6.2.8): Extracting archive - Installing symfony/polyfill-mbstring (v1.27.0): Extracting archive - Installing symfony/deprecation-contracts (v3.2.1): Extracting archive - Installing symfony/http-foundation (v6.2.8): Extracting archive - Installing psr/event-dispatcher (1.0.0): Extracting archive - Installing symfony/event-dispatcher-contracts (v3.2.1): Extracting archive - Installing symfony/event-dispatcher (v6.2.8): Extracting archive - Installing symfony/var-dumper (v6.2.8): Extracting archive - Installing psr/log (3.0.0): Extracting archive - Installing symfony/error-handler (v6.2.7): Extracting archive - Installing symfony/http-kernel (v6.2.8): Extracting archive - Installing psr/container (2.0.2): Extracting archive - Installing symfony/service-contracts (v3.2.1): Extracting archive - Installing symfony/filesystem (v6.2.7): Extracting archive - Installing symfony/var-exporter (v6.2.8): Extracting archive - Installing symfony/dependency-injection (v6.2.8): Extracting archive - Installing symfony/polyfill-intl-normalizer (v1.27.0): Extracting archive - Installing symfony/polyfill-intl-grapheme (v1.27.0): Extracting archive - Installing symfony/string (v6.2.8): Extracting archive - Installing symfony/console (v6.2.8): Extracting archive - Installing symfony/config (v6.2.7): Extracting archive - Installing symfony/polyfill-php81 (v1.27.0): Extracting archive - Installing symfony/polyfill-php80 (v1.27.0): Extracting archive - Installing symfony/finder (v6.2.7): Extracting archive - Installing composer/semver (3.3.2): Extracting archive - Installing acquia/drupal-environment-detector (1.6.0): Extracting archive - Installing zumba/amplitude-php (1.0.7): Extracting archive - Installing webmozart/assert (1.11.0): Extracting archive - Installing webmozart/path-util (2.3.0): Extracting archive - Installing twig/twig (v3.5.1): Extracting archive - Installing symfony/translation-contracts (v3.2.1): Extracting archive - Installing symfony/twig-bridge (v6.2.8): Extracting archive - Installing loophp/phposinfo (1.8.0): Extracting archive - Installing dflydev/dot-access-data (v3.0.2): Extracting archive - Installing grasmash/expander (3.0.0): Extracting archive - Installing grasmash/yaml-expander (3.0.2): Extracting archive - Installing grasmash/yaml-cli (3.1.0): Extracting archive - Installing psr/http-message (1.0.1): Extracting archive - Installing psr/http-client (1.0.1): Extracting archive - Installing ralouphie/getallheaders (3.0.3): Extracting archive - Installing psr/http-factory (1.0.1): Extracting archive - Installing guzzlehttp/psr7 (2.4.4): Extracting archive - Installing guzzlehttp/promises (1.5.2): Extracting archive - Installing guzzlehttp/guzzle (7.5.0): Extracting archive - Installing enlightn/security-checker (v1.10.0): Extracting archive - Installing webflo/drupal-finder (1.2.2): Extracting archive - Installing nikic/php-parser (v4.15.4): Extracting archive - Installing psy/psysh (v0.11.12): Extracting archive - Installing league/container (4.2.0): Extracting archive - Installing consolidation/config (2.1.2): Extracting archive - Installing consolidation/site-alias (4.0.0): Extracting archive - Installing consolidation/site-process (5.2.0): Extracting archive - Installing phootwork/lang (v3.2.1): Extracting archive - Installing phootwork/collection (v3.2.1): Extracting archive - Installing phpowermove/docblock (v4.0): Extracting archive - Installing consolidation/self-update (2.0.5): Extracting archive - Installing consolidation/output-formatters (4.2.3): Extracting archive - Installing consolidation/log (3.0.0): Extracting archive - Installing consolidation/annotated-command (4.7.1): Extracting archive - Installing consolidation/robo (4.0.3): Extracting archive - Installing consolidation/filter-via-dot-access-data (2.0.2): Extracting archive - Installing chi-teck/drupal-code-generator (2.6.2): Extracting archive - Installing drush/drush (11.5.1): Extracting archive - Installing symfony/validator (v6.2.8): Extracting archive - Installing symfony/serializer (v6.2.8): Extracting archive - Installing symfony/routing (v6.2.8): Extracting archive - Installing symfony/psr-http-message-bridge (v2.1.4): Extracting archive - Installing symfony/polyfill-iconv (v1.27.0): Extracting archive - Installing symfony/polyfill-php72 (v1.27.0): Extracting archive - Installing symfony/polyfill-intl-idn (v1.27.0): Extracting archive - Installing symfony/mime (v6.2.7): Extracting archive - Installing pear/pear_exception (v1.0.2): Extracting archive - Installing pear/console_getopt (v1.4.3): Extracting archive - Installing pear/pear-core-minimal (v1.10.11): Extracting archive - Installing pear/archive_tar (1.4.14): Extracting archive - Installing masterminds/html5 (2.7.6): Extracting archive - Installing doctrine/lexer (1.2.3): Extracting archive - Installing egulias/email-validator (3.2.5): Extracting archive - Installing psr/cache (3.0.0): Extracting archive - Installing doctrine/annotations (1.13.3): Extracting archive - Installing asm89/stack-cors (v2.1.1): Extracting archive - Installing drupal/core (10.0.7): Extracting archive - Installing consolidation/comments (1.0.2): Extracting archive - Installing acquia/blt (13.7.0): Extracting archive - Installing squizlabs/php_codesniffer (3.7.2): Extracting archive - Installing dealerdirect/phpcodesniffer-composer-installer (v1.0.0): Extracting archive - Installing phpstan/phpstan (1.10.10): Extracting archive - Installing oomphinc/composer-installers-extender (2.0.1): Extracting archive - Installing phpstan/extension-installer (1.2.0): Extracting archive - Installing symfony/http-client-contracts (v3.2.1): Extracting archive - Installing symfony/http-client (v6.2.8): Extracting archive - Installing stecman/symfony-console-completion (v0.12.0): Extracting archive - Installing symfony/polyfill-php73 (v1.27.0): Extracting archive - Installing seld/signal-handler (2.0.1): Extracting archive - Installing seld/phar-utils (1.2.1): Extracting archive - Installing seld/jsonlint (1.9.0): Extracting archive - Installing react/promise (v2.9.0): Extracting archive - Installing justinrainbow/json-schema (5.2.12): Extracting archive - Installing composer/pcre (3.1.0): Extracting archive - Installing composer/xdebug-handler (3.0.3): Extracting archive - Installing composer/spdx-licenses (1.5.7): Extracting archive - Installing composer/metadata-minifier (1.0.0): Extracting archive - Installing composer/class-map-generator (1.0.0): Extracting archive - Installing composer/ca-bundle (1.3.5): Extracting archive - Installing composer/composer (2.5.4): Extracting archive - Installing acquia/acquia-cms-starterkit (1.0.9): Extracting archive - Installing drupal/acsf (2.73.0): Extracting archive - Installing drupal/acsf_variables (2.73.0) - Installing drupal/acsf_theme (2.73.0) - Installing drupal/acsf_duplication (2.73.0) - Installing acquia/blt-acsf (v1.1.0): Extracting archive - Installing phpstan/phpdoc-parser (1.15.3): Extracting archive - Installing slevomat/coding-standard (8.8.0): Extracting archive - Installing phpcompatibility/php-compatibility (9.3.5): Extracting archive - Installing sirbrillig/phpcs-variable-analysis (v2.11.10): Extracting archive - Installing drupal/coder (8.3.17): Extracting archive - Installing acquia/coding-standards (v2.0.0): Extracting archive - Installing drupal/memcache (2.5.0): Extracting archive - Installing acquia/memcache-settings (v1.2.0): Extracting archive - Installing drupal/config_filter (1.10.0): Extracting archive - Installing drupal/config_ignore (2.4.0): Extracting archive - Installing drupal/config_split (1.9.0): Extracting archive - Installing drupal/core-recommended (10.0.7) - Installing drupal/shield (1.7.0): Extracting archive - Installing mglaman/phpstan-drupal (1.1.29): Extracting archive - Installing phpstan/phpstan-deprecation-rules (1.1.3): Extracting archive - Installing sebastian/version (3.0.2): Extracting archive - Installing sebastian/type (3.2.1): Extracting archive - Installing sebastian/resource-operations (3.0.3): Extracting archive - Installing sebastian/recursion-context (4.0.5): Extracting archive - Installing sebastian/object-reflector (2.0.4): Extracting archive - Installing sebastian/object-enumerator (4.0.4): Extracting archive - Installing sebastian/global-state (5.0.5): Extracting archive - Installing sebastian/exporter (4.0.5): Extracting archive - Installing sebastian/environment (5.1.5): Extracting archive - Installing sebastian/diff (4.0.4): Extracting archive - Installing sebastian/comparator (4.0.8): Extracting archive - Installing sebastian/code-unit (1.0.8): Extracting archive - Installing sebastian/cli-parser (1.0.1): Extracting archive - Installing phpunit/php-timer (5.0.3): Extracting archive - Installing phpunit/php-text-template (2.0.4): Extracting archive - Installing phpunit/php-invoker (3.1.1): Extracting archive - Installing phpunit/php-file-iterator (3.0.6): Extracting archive - Installing theseer/tokenizer (1.2.1): Extracting archive - Installing sebastian/lines-of-code (1.0.3): Extracting archive - Installing sebastian/complexity (2.0.2): Extracting archive - Installing sebastian/code-unit-reverse-lookup (2.0.3): Extracting archive - Installing phpunit/php-code-coverage (9.2.26): Extracting archive - Installing phar-io/version (3.2.1): Extracting archive - Installing phar-io/manifest (2.0.3): Extracting archive - Installing myclabs/deep-copy (1.11.1): Extracting archive - Installing doctrine/instantiator (2.0.0): Extracting archive - Installing phpunit/phpunit (9.6.6): Extracting archive Package webmozart/path-util is abandoned, you should avoid using it. Use symfony/filesystem instead. Generating autoload files 85 packages you are using are looking for funding. Use the `composer fund` command to find out more! PHP CodeSniffer Config installed_paths set to ../../acquia/coding-standards/src/Standards,../../drupal/coder/coder_sniffer,../../phpcompatibility/php-compatibility,../../sirbrillig/phpcs-variable-analysis,../../slevomat/coding-standard Scaffolding files for drupal/core: - Copy [project-root]/.editorconfig from assets/scaffold/files/editorconfig - Copy [project-root]/.gitattributes from assets/scaffold/files/gitattributes - Copy [web-root]/.csslintrc from assets/scaffold/files/csslintrc - Copy [web-root]/.eslintignore from assets/scaffold/files/eslintignore - Copy [web-root]/.eslintrc.json from assets/scaffold/files/eslintrc.json - Copy [web-root]/.ht.router.php from assets/scaffold/files/ht.router.php - Skip [web-root]/.htaccess: overridden in acquia/drupal-recommended-project - Copy [web-root]/example.gitignore from assets/scaffold/files/example.gitignore - Copy [web-root]/index.php from assets/scaffold/files/index.php - Copy [web-root]/INSTALL.txt from assets/scaffold/files/drupal.INSTALL.txt - Copy [web-root]/README.md from assets/scaffold/files/drupal.README.md - Copy [web-root]/robots.txt from assets/scaffold/files/robots.txt - Copy [web-root]/update.php from assets/scaffold/files/update.php - Copy [web-root]/web.config from assets/scaffold/files/web.config - Copy [web-root]/sites/README.txt from assets/scaffold/files/sites.README.txt - Copy [web-root]/sites/development.services.yml from assets/scaffold/files/development.services.yml - Copy [web-root]/sites/example.settings.local.php from assets/scaffold/files/example.settings.local.php - Copy [web-root]/sites/example.sites.php from assets/scaffold/files/example.sites.php - Copy [web-root]/modules/README.txt from assets/scaffold/files/modules.README.txt - Copy [web-root]/profiles/README.txt from assets/scaffold/files/profiles.README.txt - Copy [web-root]/themes/README.txt from assets/scaffold/files/themes.README.txt Updating BLT template files... > blt blt:update --ansi --no-interaction phpstan/extension-installer: Extensions installed > composer/composer: installed > mglaman/phpstan-drupal: installed > phpstan/phpstan-deprecation-rules: installed Signorelli IDE:~/project (main) $Install a new site with BLT
Now you should be able to install a new site using the existing configuration on disk:
blt setup --no-interactionImage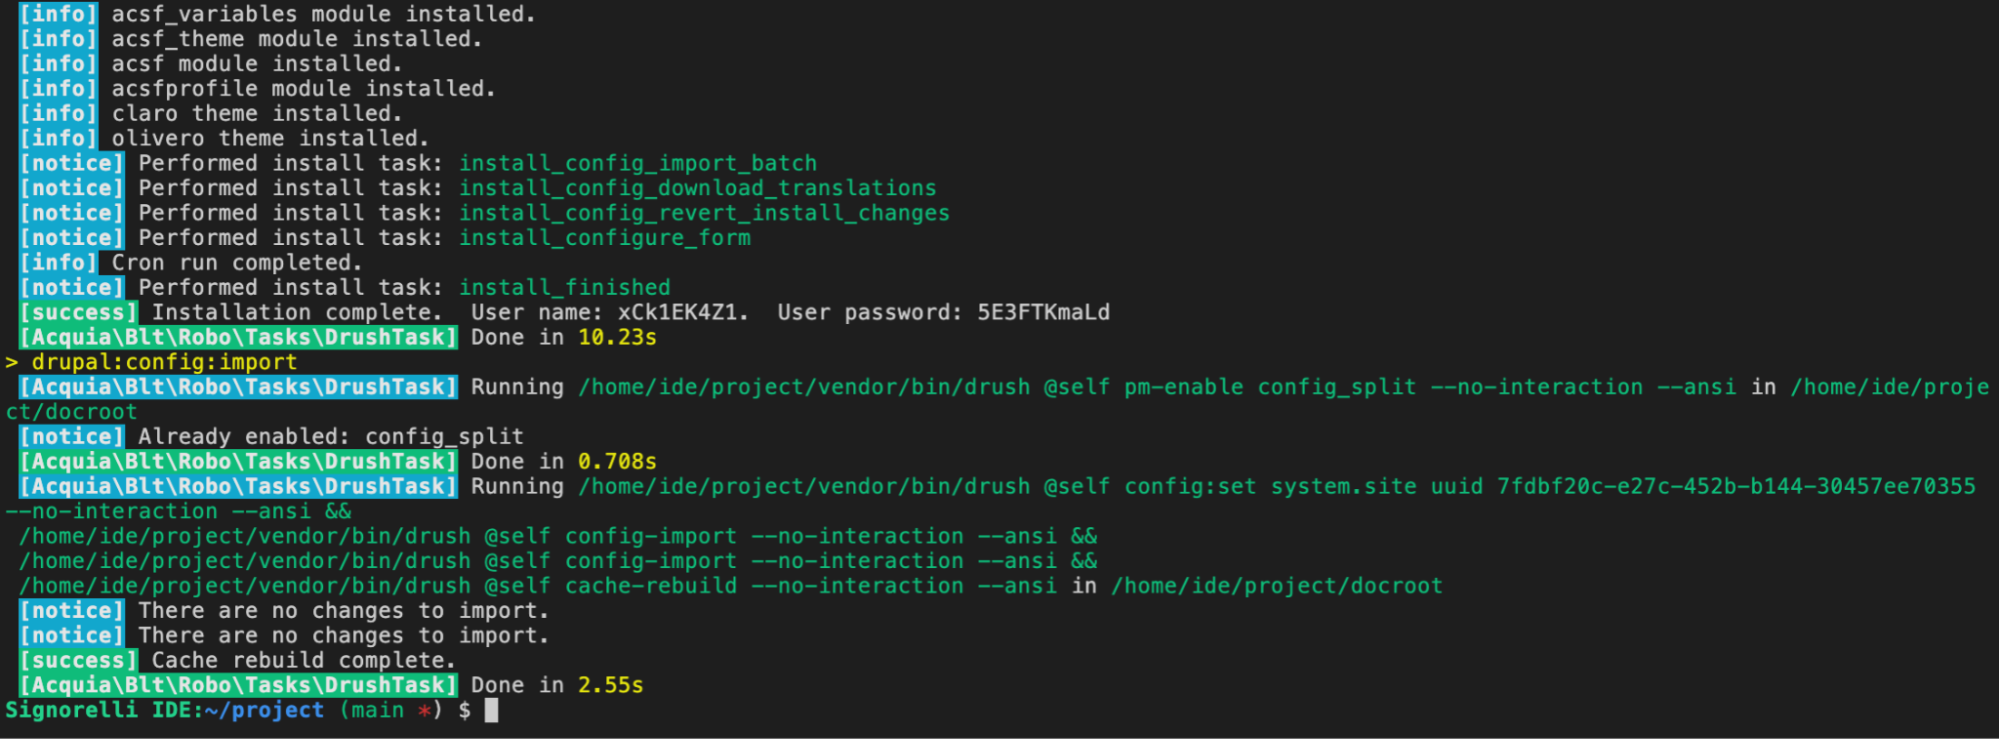
You should have no configuration differences between the new site’s database and the existing configuration on disk:
drush config:statusSignorelli IDE:~/project (main *) $ drush config:status [notice] No differences between DB and sync directory.Try to access your new Cloud IDE with “drush uli”:
drush uliIf you get the following error message, it’s probably because you are missing the .htaccess file from the docroot folder:
Image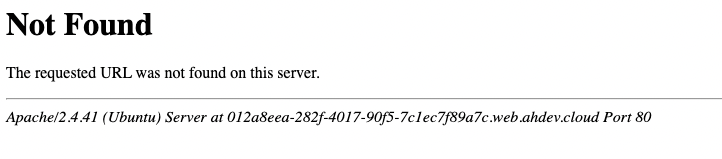
Look inside your docroot folder:
Signorelli IDE:~/project/docroot (main) $ ls -lA
total 72
-rw-r--r--  1 ide ide  315 Apr  6 13:21 autoload.php
drwxr-xr-x 12 ide ide 4096 Mar 24 16:45 core
-rw-r--r--  1 ide ide 1025 Apr  6 09:44 .csslintrc
-rw-r--r--  1 ide ide  151 Apr  6 09:44 .eslintignore
-rw-r--r--  1 ide ide   41 Apr  6 09:44 .eslintrc.json
-rw-r--r--  1 ide ide 1495 Apr  6 09:44 example.gitignore
-rw-r--r--  1 ide ide  173 Apr  6 09:32 .gitignore
-rw-r--r--  1 ide ide 2471 Apr  6 09:44 .ht.router.php
-rw-r--r--  1 ide ide  549 Apr  6 09:44 index.php
-rw-r--r--  1 ide ide   94 Apr  6 09:44 INSTALL.txt
drwxr-xr-x  4 ide ide 4096 Apr  6 09:44 modules
drwxr-xr-x  4 ide ide 4096 Apr  6 09:44 profiles
-rw-r--r--  1 ide ide 3205 Apr  6 09:44 README.md
-rw-r--r--  1 ide ide 1706 Apr  6 09:44 robots.txt
drwxr-xr-x  5 ide ide 4096 Apr  6 09:44 sites
drwxr-xr-x  3 ide ide 4096 Apr  6 09:44 themes
-rw-r--r--  1 ide ide  804 Apr  6 09:44 update.php
-rw-r--r--  1 ide ide 4039 Apr  6 09:44 web.config
Signorelli IDE:~/project/docroot (main) $
Open the .gitignore file located inside the docroot folder, you should see that the .htaccess file is listed to be ignored:
Image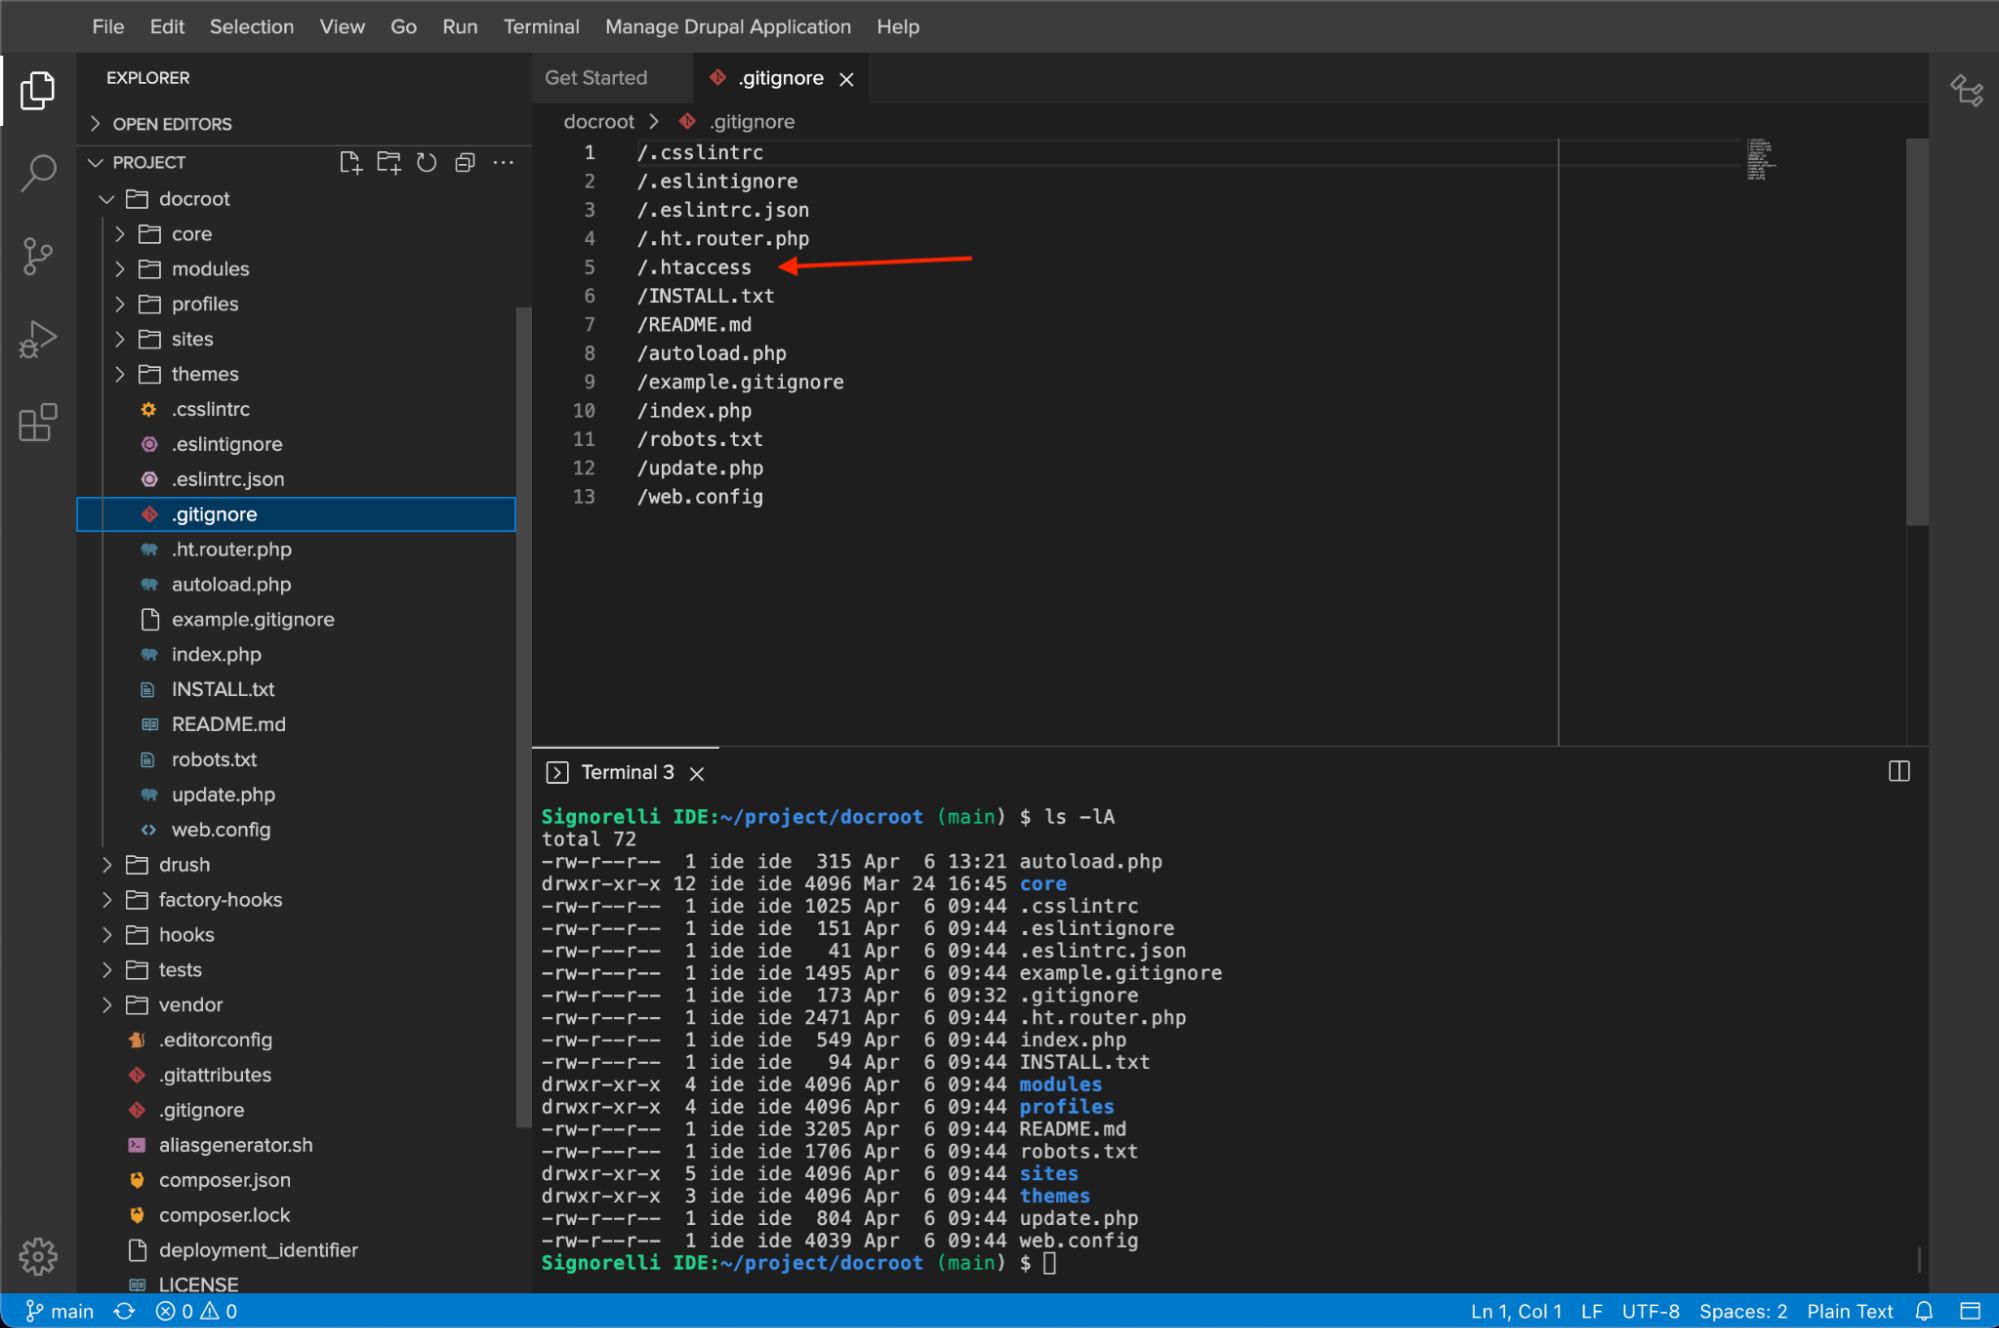
Remove the docroot/.gitignore file:
rm /home/ide/project/docroot/.gitignoreCopy the htaccess file that’s located inside the project/docroot/core/assets/scaffold/files/ folder to the docroot folder as .htaccess:
cp /home/ide/project/docroot/core/assets/scaffold/files/htaccess /home/ide/project/docroot/.htaccessGo back to the project folder and clear Drupal’s cache:
cd ~/project
drush cr
Try to access your new Cloud IDE with “drush uli”:
drush uliWith the new .htaccess file you should be able to access the site without errors:
Image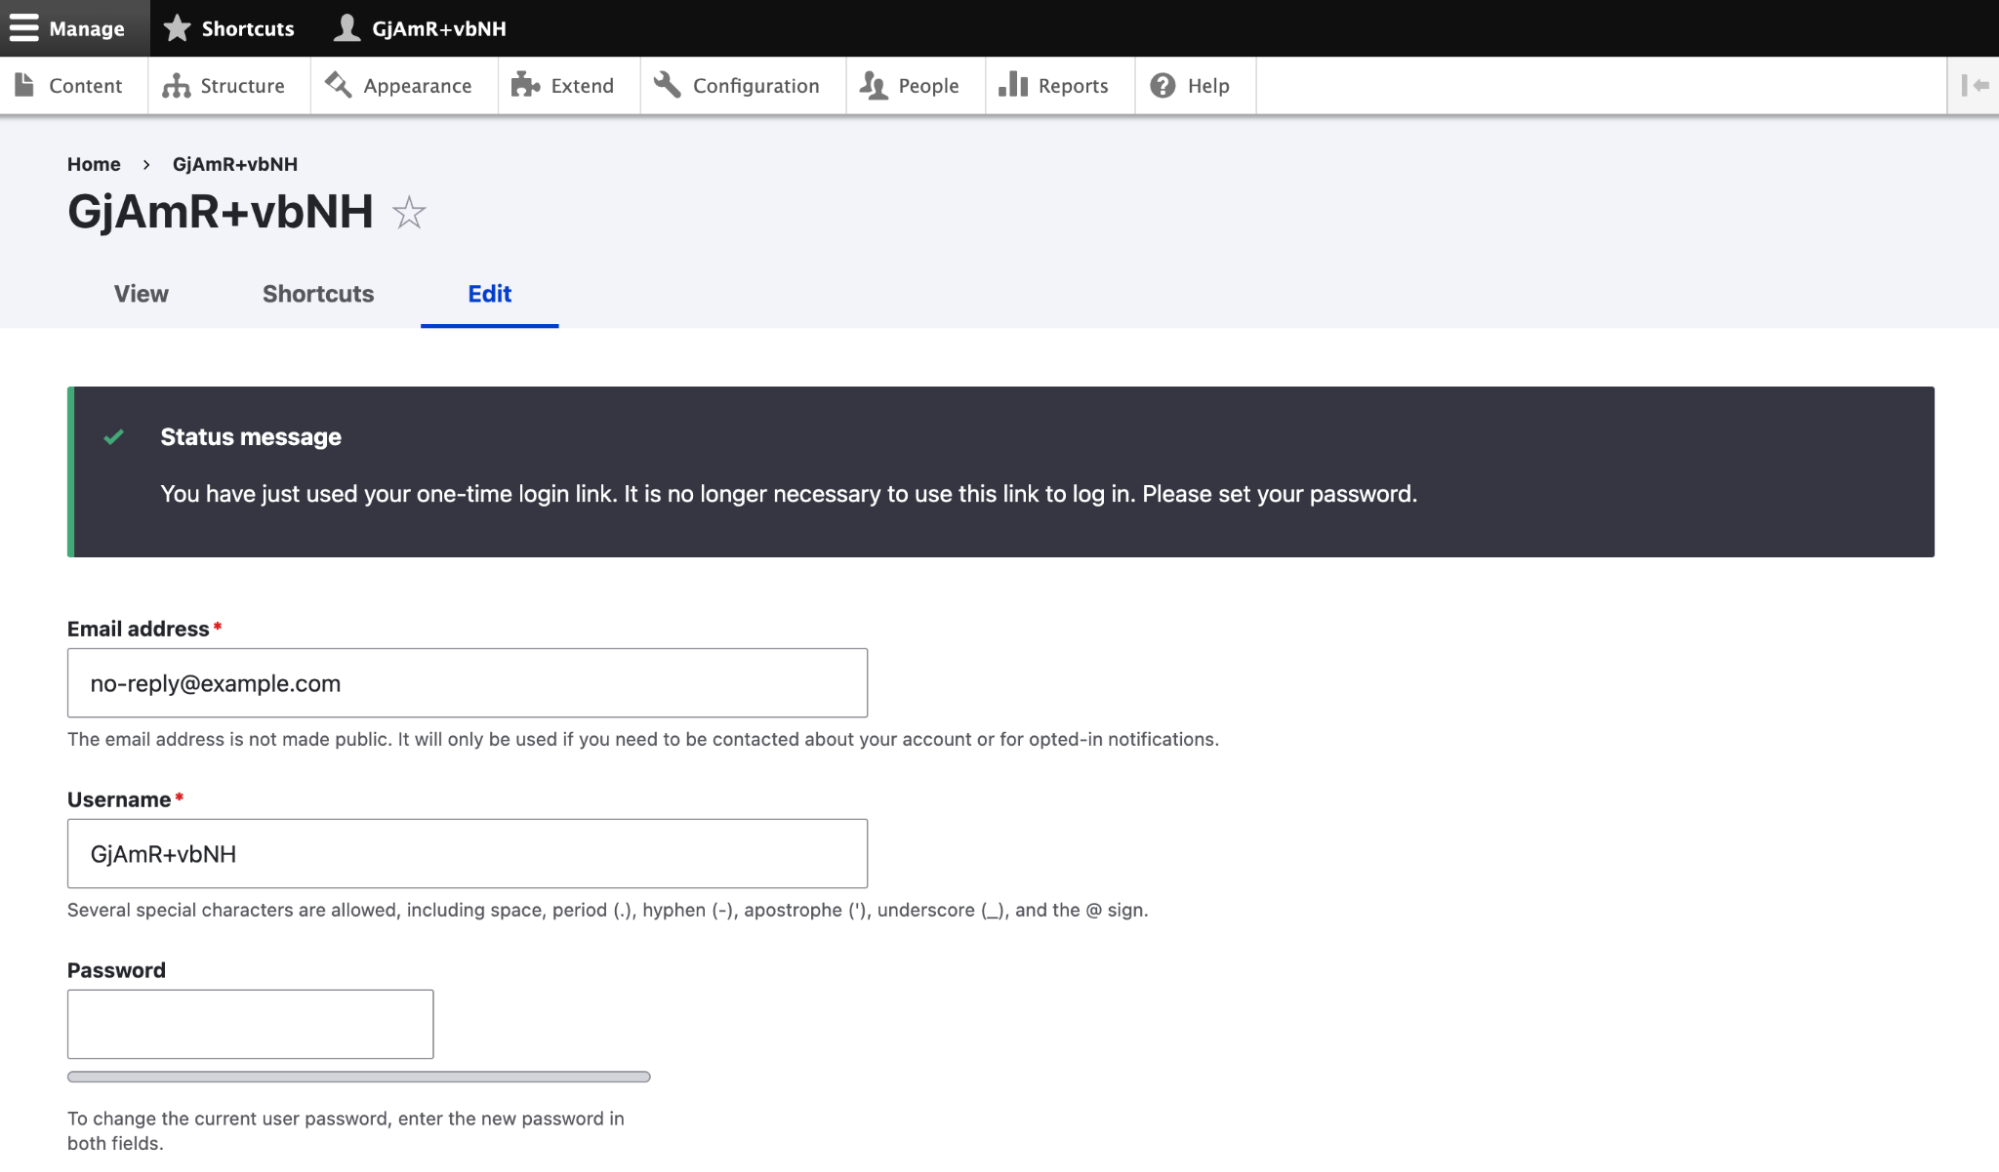
Copy a site from ACSF to Cloud IDE with BLT
Edit your blt/blt.yml file and modify the value of the drush -> aliases -> remote key with the ACSF website that you wish to copy down to your Cloud IDE, for this tutorial, I will use the site2.01test site:
project:
 machine_name: d10acsf
 profile:
   name: acsfprofile
 prefix: BLT
cloud:
 appId: 48efba74-75af-43ef-8455-32e6f043c375
git:
 default_branch: master
 remotes:
   cloud: '[email protected]:acquiatam2.git'
deploy:
 tag_source: true
drush:
 aliases:
   remote: site2.01test  <---
   local: self
   ci: self
 default_alias: '${drush.aliases.local}'
Save your changes.
Copy the database from the remote site stipulated in your blt/blt.yml file with the following BLT command:
blt drupal:sync:dbIf you want to pull down the assets, execute the following drush command:
https://docs.acquia.com/cloud-platform/manage/files/transfer-files/rsync/
drush rsync @site2.01test:%files docroot/sites/default/files“site2” is the alias of an existing site and “.01test” is the environment where that site lives.
Signorelli IDE:~/project (main *) $ drush rsync @site2.01test:%files docroot/sites/default/files
Copy new and override existing files at docroot/sites/default/files. The source is acquiatam2.01test@acquiatam201test.ssh.enterprise-g1.acquia-sites.com:/var/www/html/acquiatam2.01test/docroot/sites/g/files/utfjsx5000431test/files/? (yes/no) [yes]:
> yes
Signorelli IDE:~/project (main *) $
Clear the cache of your new cloned site:
drush crOpen your local Cloud IDE website to see your new cloned site. On the Menu, navigate to “Manage Drupal Application” -> “Open Drupal Application”:
Image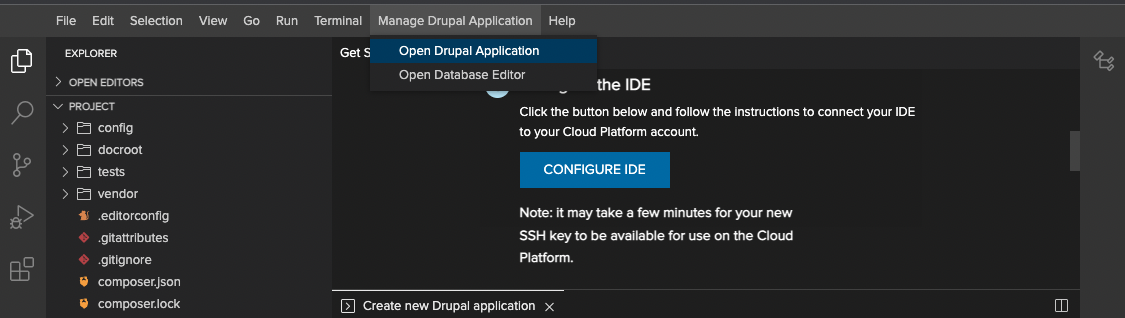
Because we cloned the “site2” site, we should see the Shield module username and password prompt as we previously activated and configured the Shield module on the “site2” ACSF site:
Image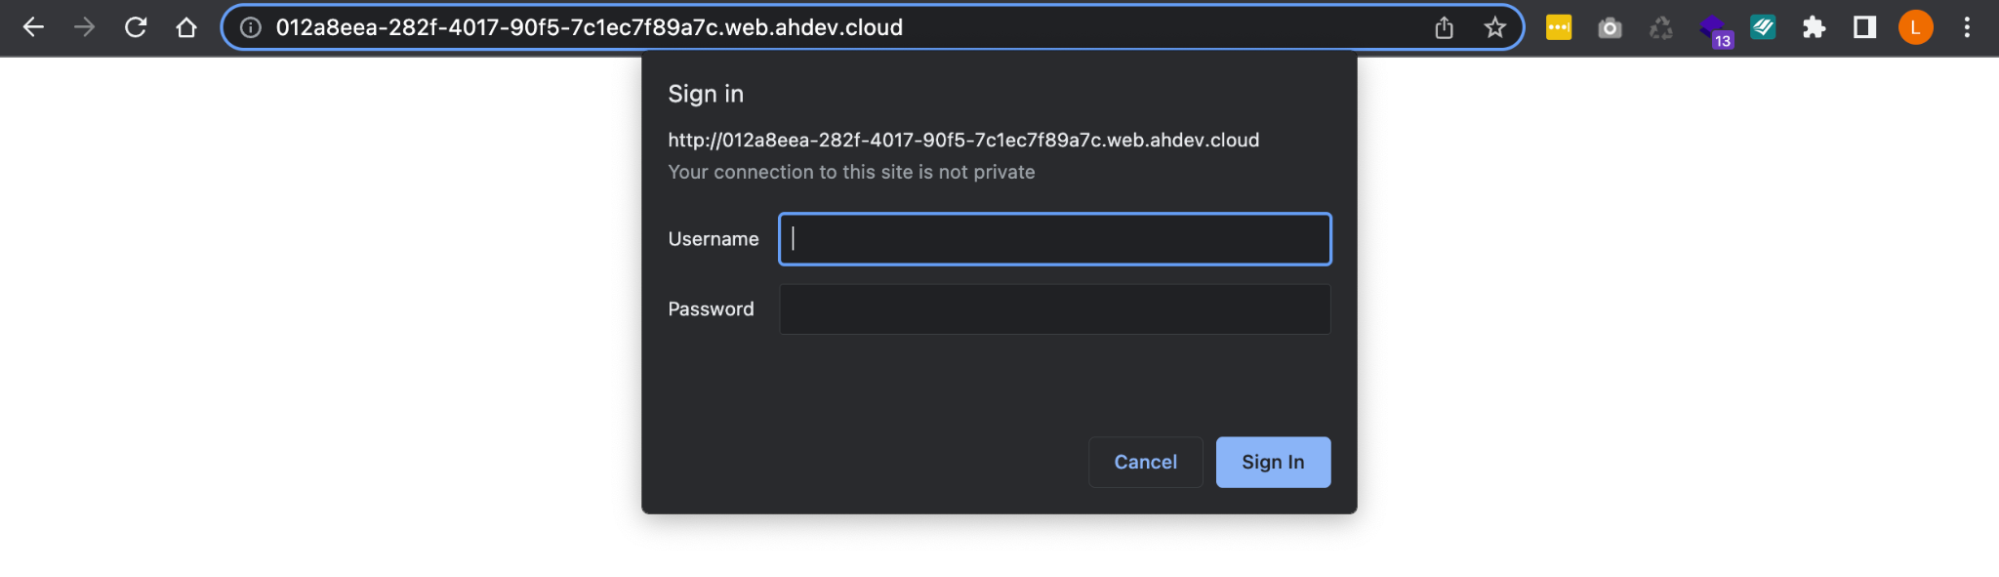
In my case, my shield credentials for site2 is admin and pass123:
Image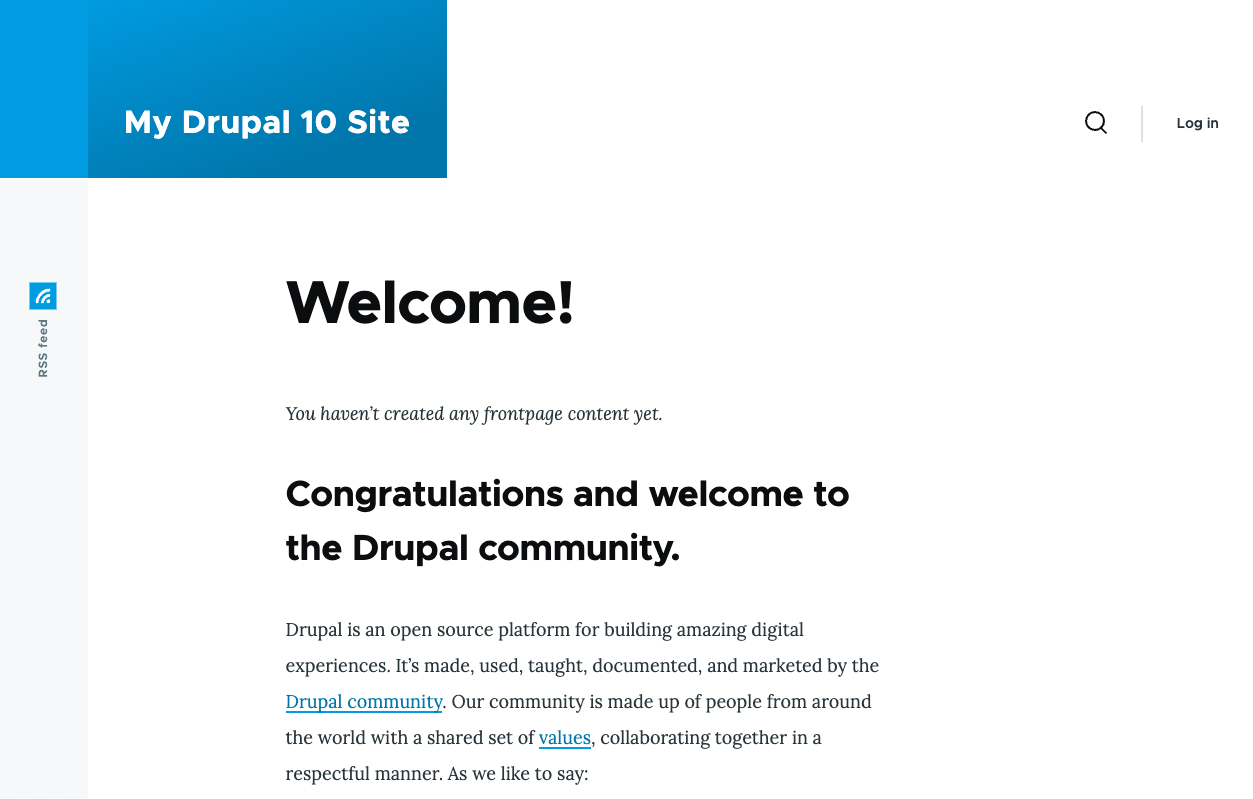
Access your new cloned site with “drush uli”:
drush uliMake sure everything looks fine. It’s always a good idea to check for configuration differences:
Signorelli IDE:~/project (main *) $ drush cex
[notice] The active configuration is identical to the configuration in the export directory (/home/ide/project/config/default).
/home/ide/project/config/default
Signorelli IDE:~/project (main *) $ drush config:status
[notice] No differences between DB and sync directory.
Signorelli IDE:~/project (main *) $
Push your new codebase changes to your repository which includes the new .htaccess file in your docroot folder. The next time you restart your Cloud IDE workspace using your repository it shouldn't fail due to the missing .htaccess file.
First, execute the following BLT command to download and extract the updated Acquia Cloud Site Factory Connector:
blt recipes:acsf:init:drushCommit and push your codebase changes to your repository:
git add -A
git commit -m "BLT-005: Removed .gitignore and added a new .htaccess."
git push
Congratulations on successfully completing this three-step guide! First, we navigated through the process of creating a new Drupal 10 codebase that is configured for ACSF. Then, we created a custom Drupal installation profile. And in this last phase, we went through a detailed explanation of configuration management and deployment workflow on Site Factory. I sincerely hope you found this guide helpful.


