
Next.js on Acquia: Setting up Drupal CMS
- Last updated
- 1 minute read
Goal
Setup Drupal CMS for working with the Next.js
Prerequisites
-
You should have a local Drupal development environment (e.g. brew or lando/ddev/docksal)
-
Composer should be installed
Overview
This is the first in a 3 part tutorial series in how to get started with Next.js and Acquia CMS. Next.js is an adaptable JavaScript framework, built on top of React.js, with great support, stability, performance and security features. We partnered with Chapter 3, maintainers of Next.js for Drupal, to build Next.js for Acquia CMS: a Next.js starter kit for Acquia CMS.
This tutorial will show you how to set Acquia CMS to work with our starter kit
-
Create Acquia CMS project
Start by creating a new Acquia CMS project:
(If you have an existing Acquia CMS project, you can skip this step)
composer create-project --no-interaction acquia/drupal-recommended-project acms-headless
cd acms-headless && ./vendor/bin/acms acms:install
The acms:install command is apart of the Acquia CMS 2.0 starter kit installation method. It replaces traditional Drupal installation profiles with a wizard that integrates with composer to install only the project dependencies you need.
In the starter kit wizard, select
acquia_cms_headlessas the starter kit.We also recommend you install the demo content. This way it will be easier to see content coming through the Next.js site later.
-
Login to Acquia CMS
During the acms:install process, the starter kit will use a drush command called site:install. This will output to the console your admin username (admin) and password (which is randomly generated).
Find these in the console output and use them to visit your site in a browser and login. If you can't find the credentials, you can reset your password using drush also:
drush -l <http://your-site.com> uli -
Enable the Next.js starter kit
From the drop down admin menu, hover over the Tour link and select "Get started". This will take you to the CMS Dashboard. This is a dashboard for quickly being able to configure your site on Acquia CMS.
Image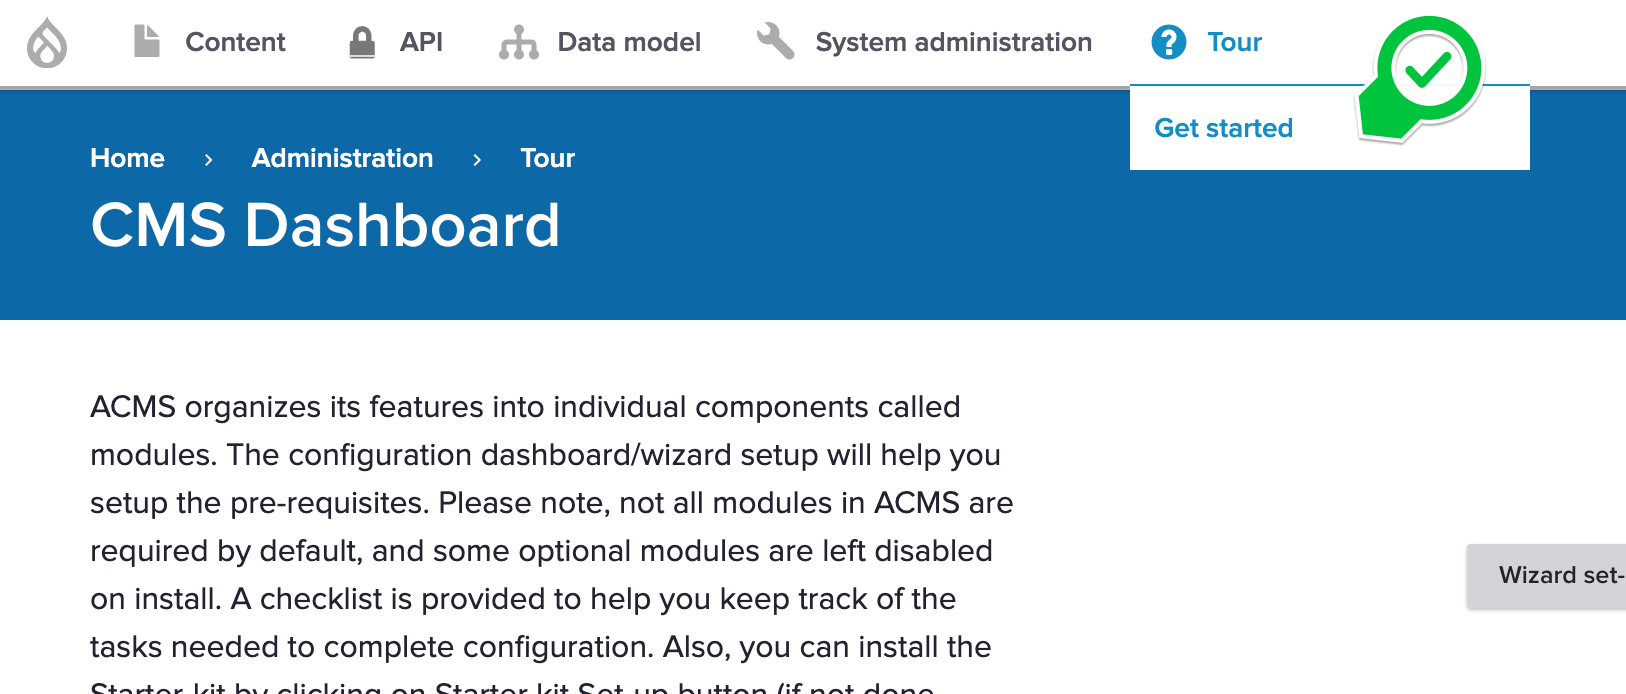
In the CMS Dashboard, expand the Headless accordion section and select the Next.js starter kit option and hit Save.
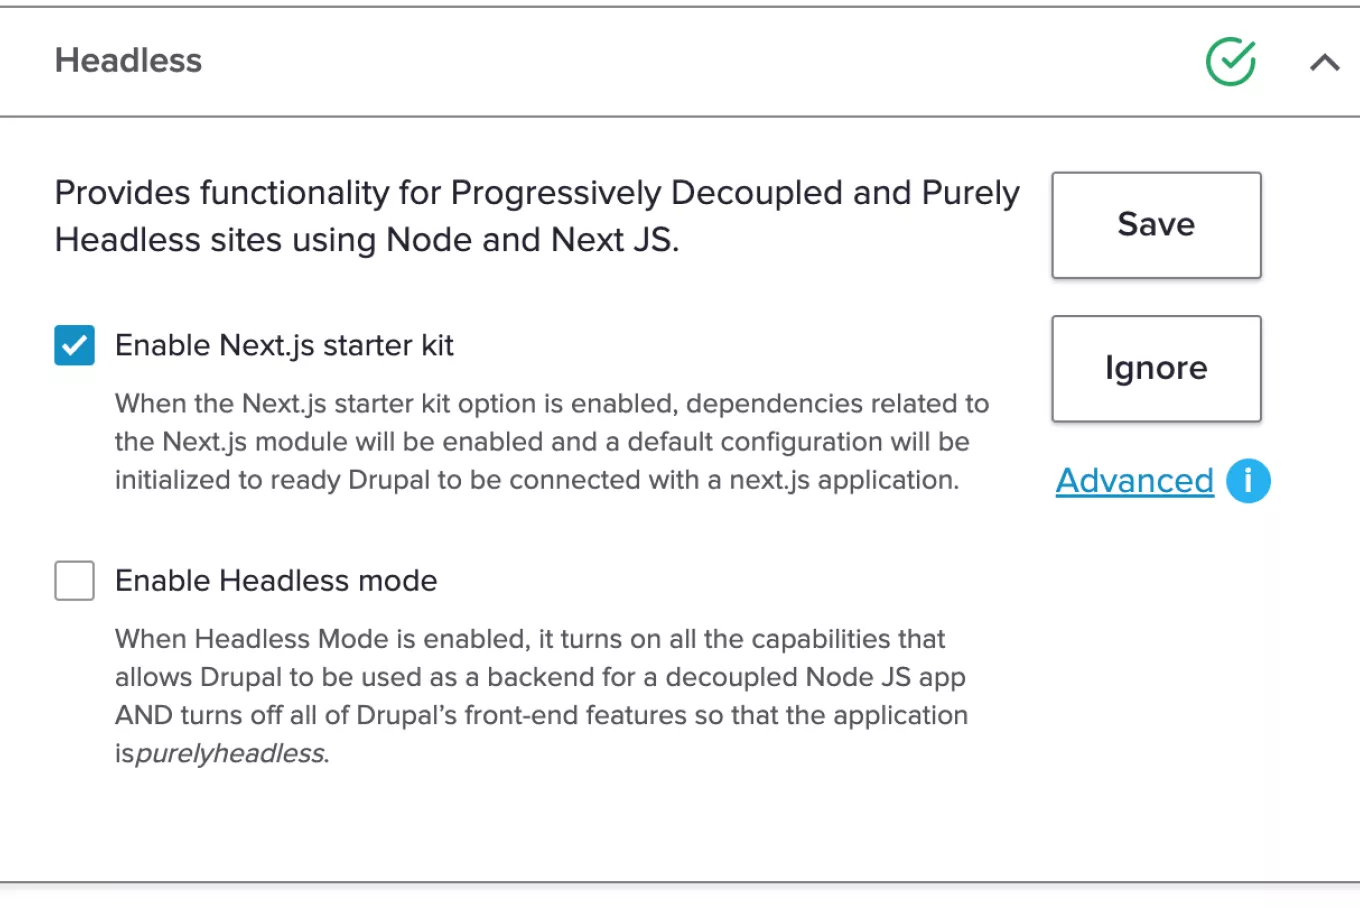
When you hit save, Acquia CMS takes the following steps for you:
- Create a role and user
- Ensure Simple OAuth SSL keys are generated and setup
- Ensure an OAuth client (consumer) is setup for Next.js with generated secret
- Create a Next.js site that will resolve to
http://localhost:3000with a generated preview secret. - Configure Next.js preview to use the content types shipped with Acquia CMS.
You will see a status message in the UI that will show you your environmental variables for your Node application when you build on the Acquia CMS starter kit for Next.js.
Image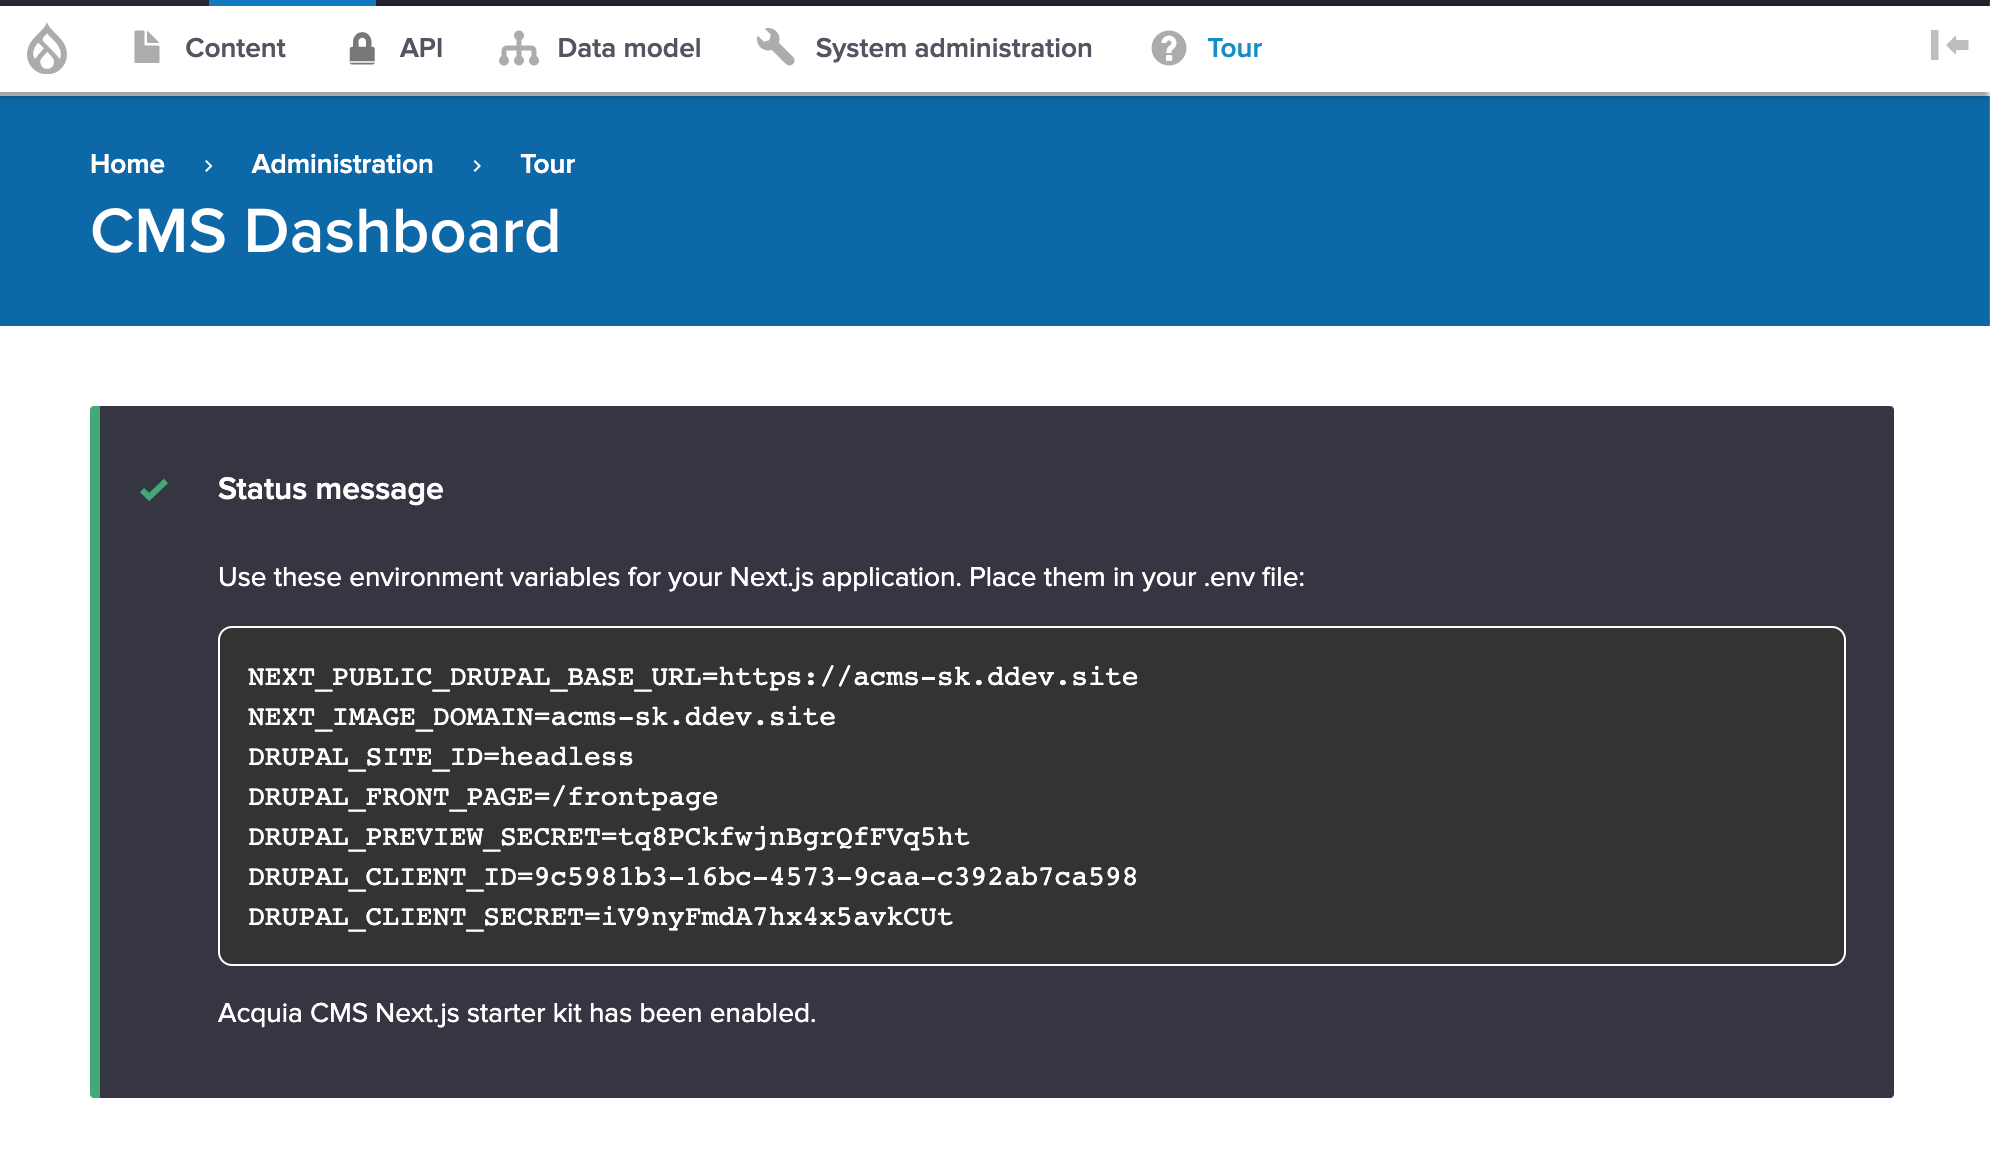
-
Copy environment variables
Lastly, copy the credentials from the status message. Perhaps save them somewhere ready for your Next.js application setup.
Warning - The secret generated in this message cannot be retrieved again as it is stored as an encrypted value. If you lose this secret, you'll need to regenerate it again from the Consumer edit page.
Congratulations 🎉
You now have an Acquia CMS instance ready for integration with Next.js. So what's next?
Continue the tutorial series and checkout how to setup the Next.js starter kit.


